Case study
Metahumanizing Twinblast

Metahumanizing
Twinblast
In August 2023, I was given the opportunity to audit the content from the Epic Fellowship for animation. The project entailed producing a 10 - 15 second animation with a focus on performance.
I wanted to incorporate a modified Metahuman in my project. The Metahumans are amazing - with expressive faces, a capable animation rig, and they look beautiful when lit well. I’ve been playing and experimenting with them for a while so I thought I’d be able to pull it off.
The issue with the default Metahumans is that they have very limited body types and clothing options. I wanted to mix the face of a Metahuman with the body of a Paragon character for more of a super-heroic figure.
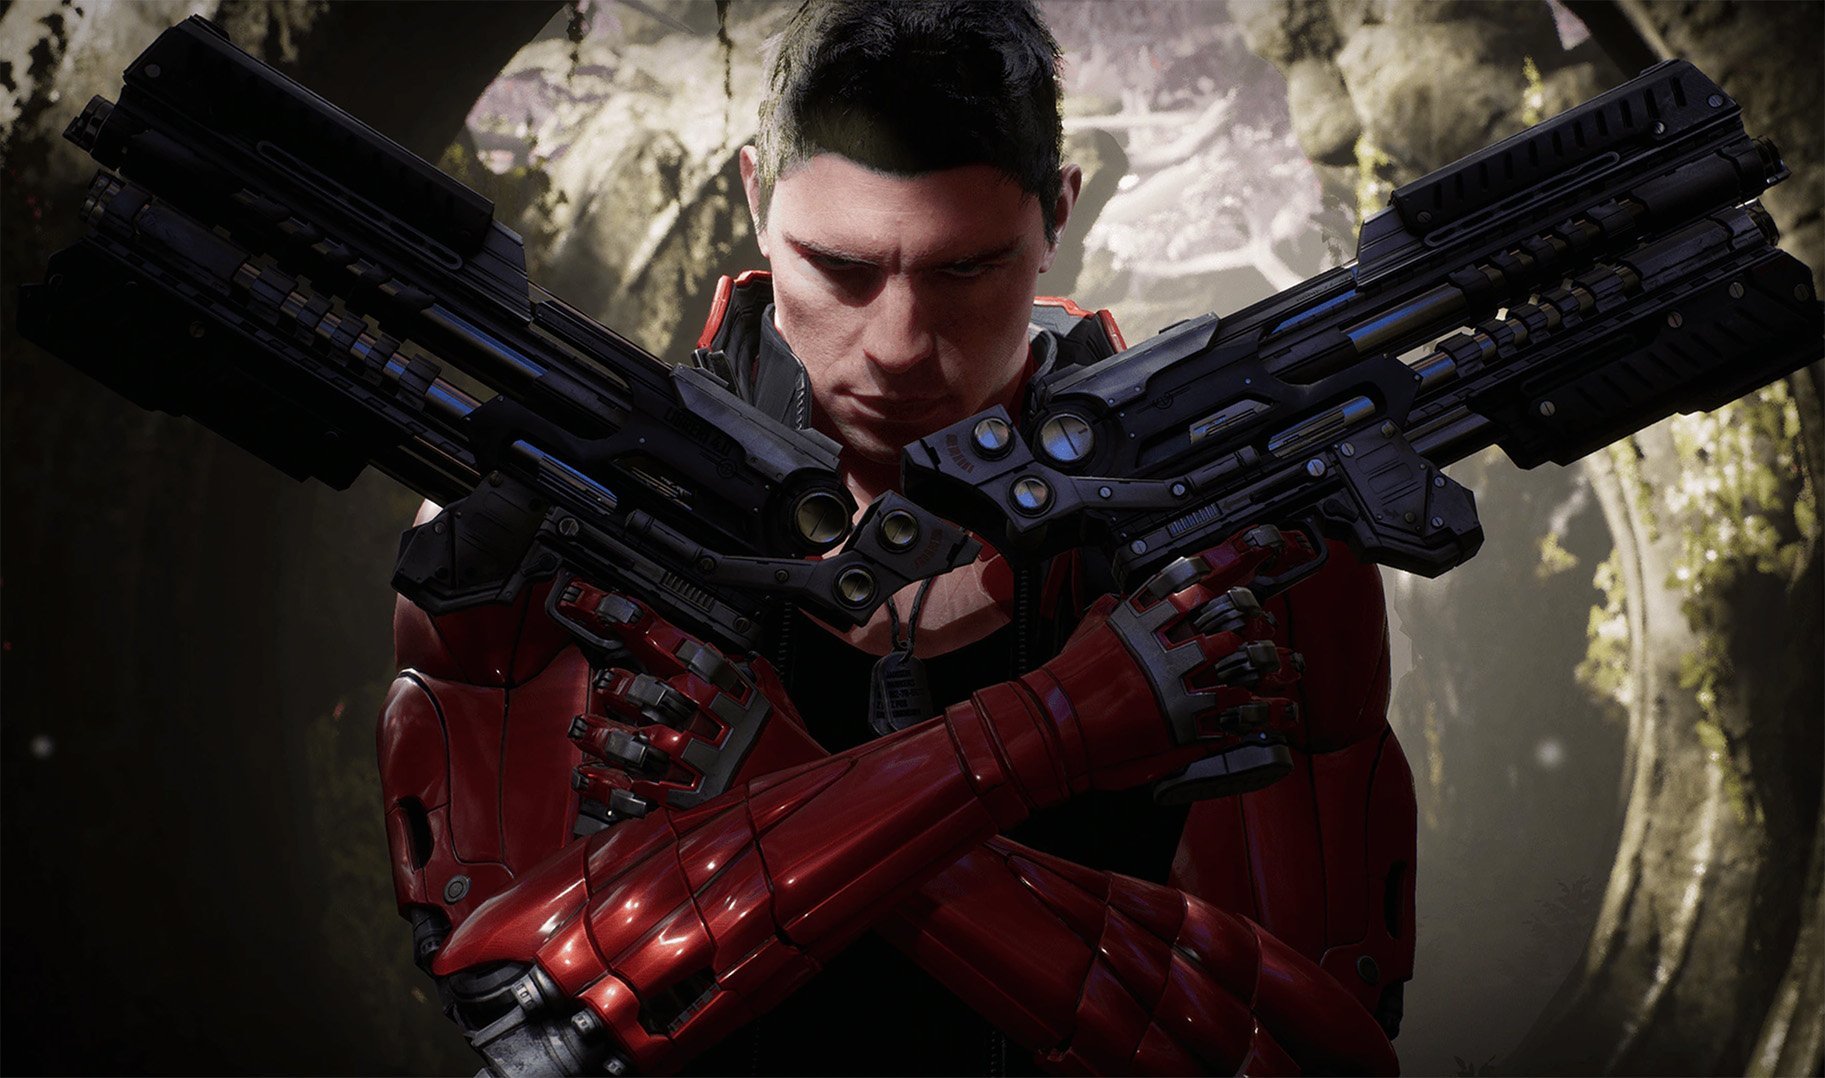
Paragon was a game that Epic created several years ago. They released all the character assets for free (as long as they’re used inside of Unreal). Paragon characters look awesome and combining them with Metahumans really make them look great. The character I wanted to use was Twinblast.

Challenges
Modifying a Metahuman, and in particular, Twinblast, comes with some challenges. A Metahuman face comes with hundreds of bones and blend shapes that all work together to produce very realistic facial animation.
Since most of the animation is driven by its bones, it’s important that if we change the shape of the face, that the bones are moved as well. To do this, we need to create a .dna file that has information about our new shape. In my case, I wanted to change the shape of the neck and chest to make it more ‘super-hero sized’.
When I first started modifying Metahumans, I only applied blend shapes to adjust the form of the face. This video explains why that’s not a good idea.
So modifying the shape of a Metahuman face needs to be done very carefully.
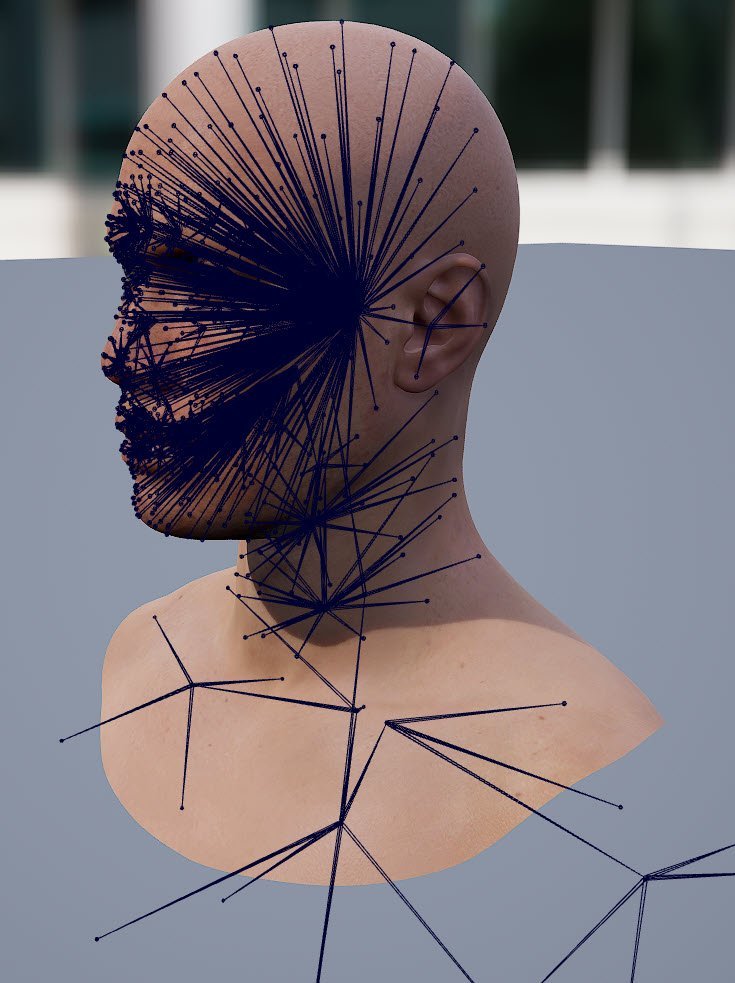
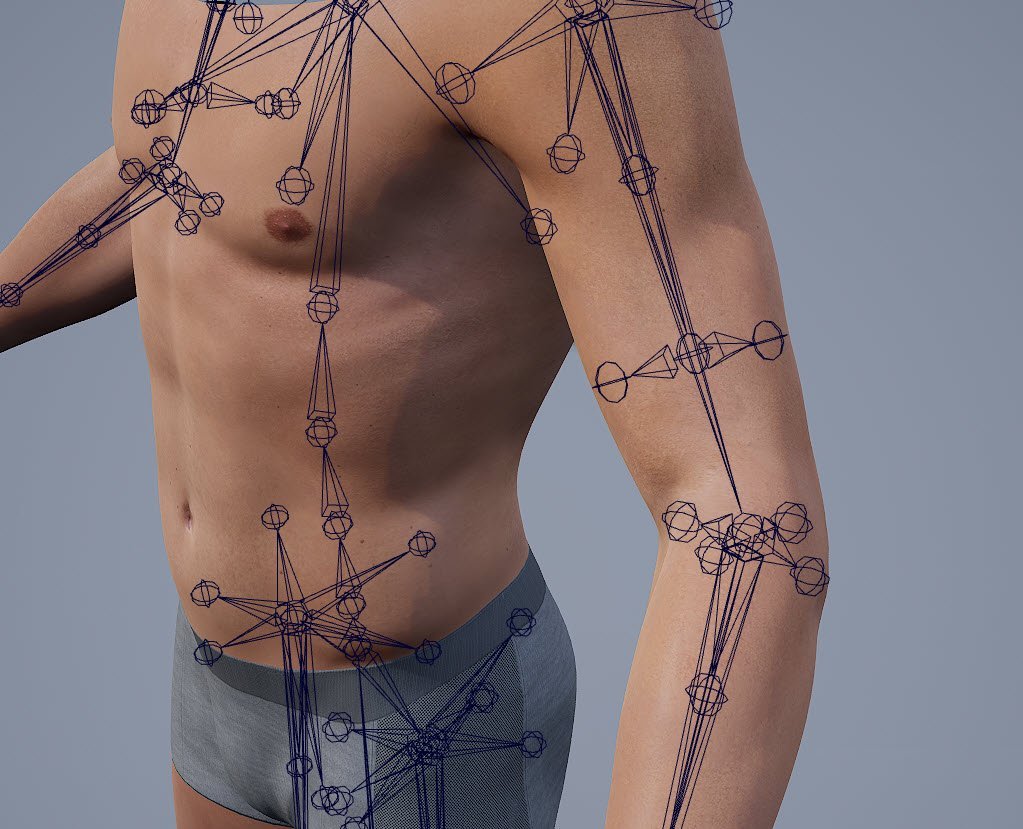
Changing the body is generally easier, but keeping the Metahuman rig and using its skeleton can also be tricky. The reason why you’d want to keep the rig is that the rig comes with very nice controls, along with ‘helper bones’ to maintain volume when the limbs bend. I wanted to keep these helper bones as much as I could.
Twinblast has robotic arms that are used to reveal his guns and add a flourish to his animations. This is not part of the Metahuman rig, but I wanted to keep this as well.

When Twinblast is exported from Unreal, this is what you get in Houdini.
I use Houdini because it’s what I’m used to (and it’s awesome), but I think most of these steps could be done in other 3D software.
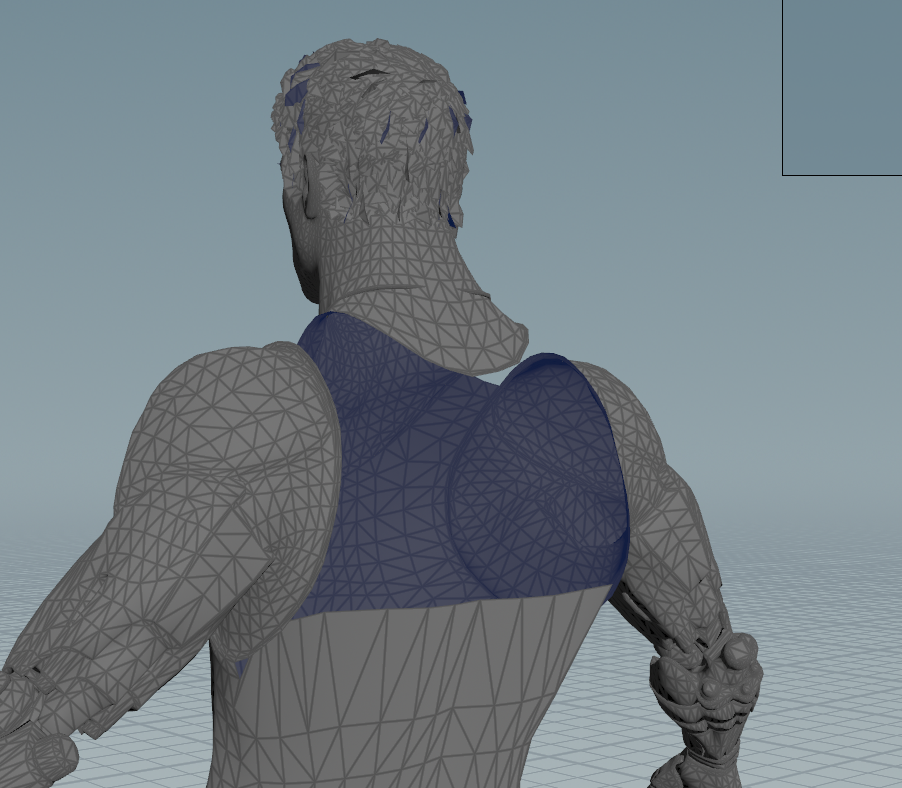
Note that his vest isn’t there; since that’s a cloth object in Unreal, it doesn’t export.
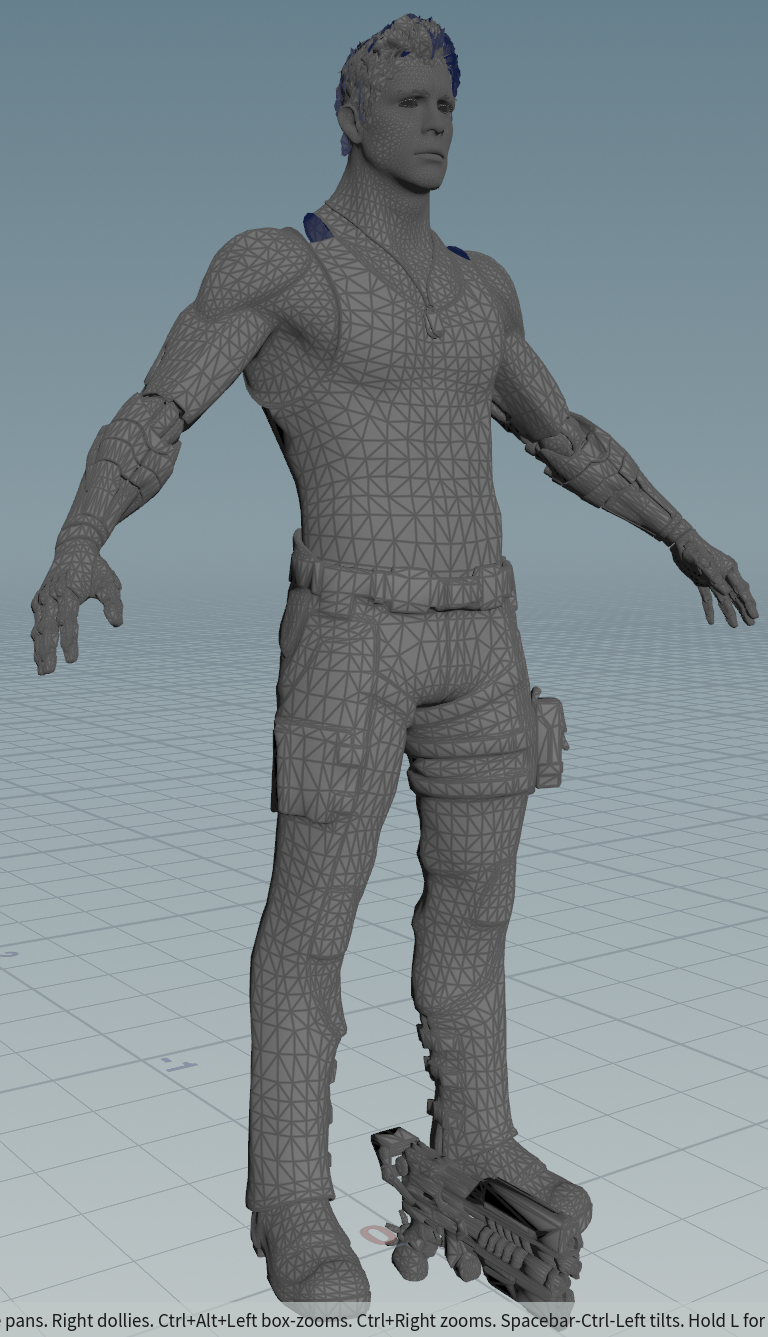
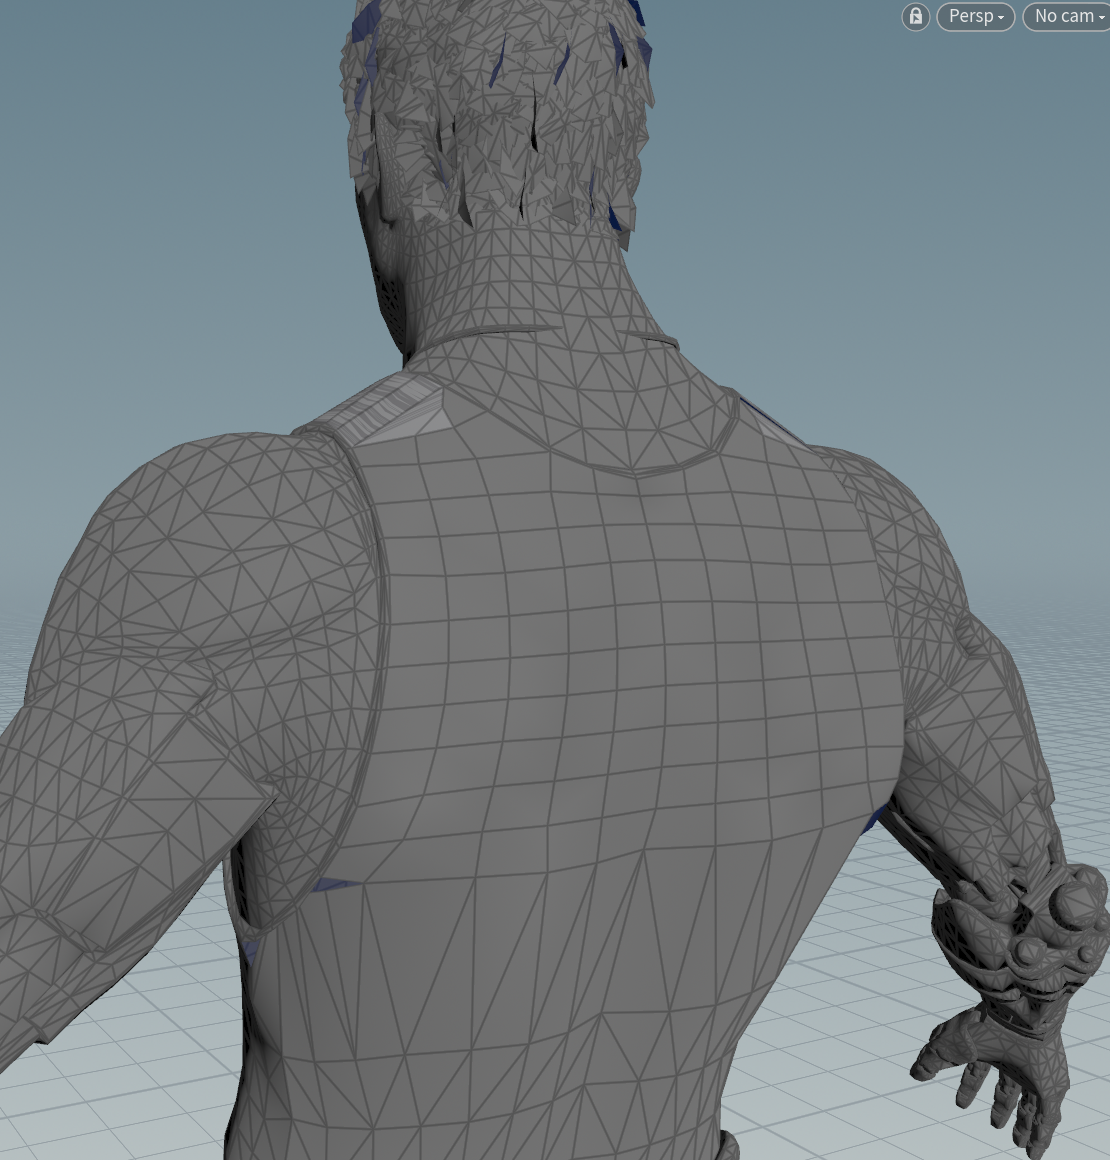
A large section of the back is not modelled. In the Paragon game this is covered by the missing vest.
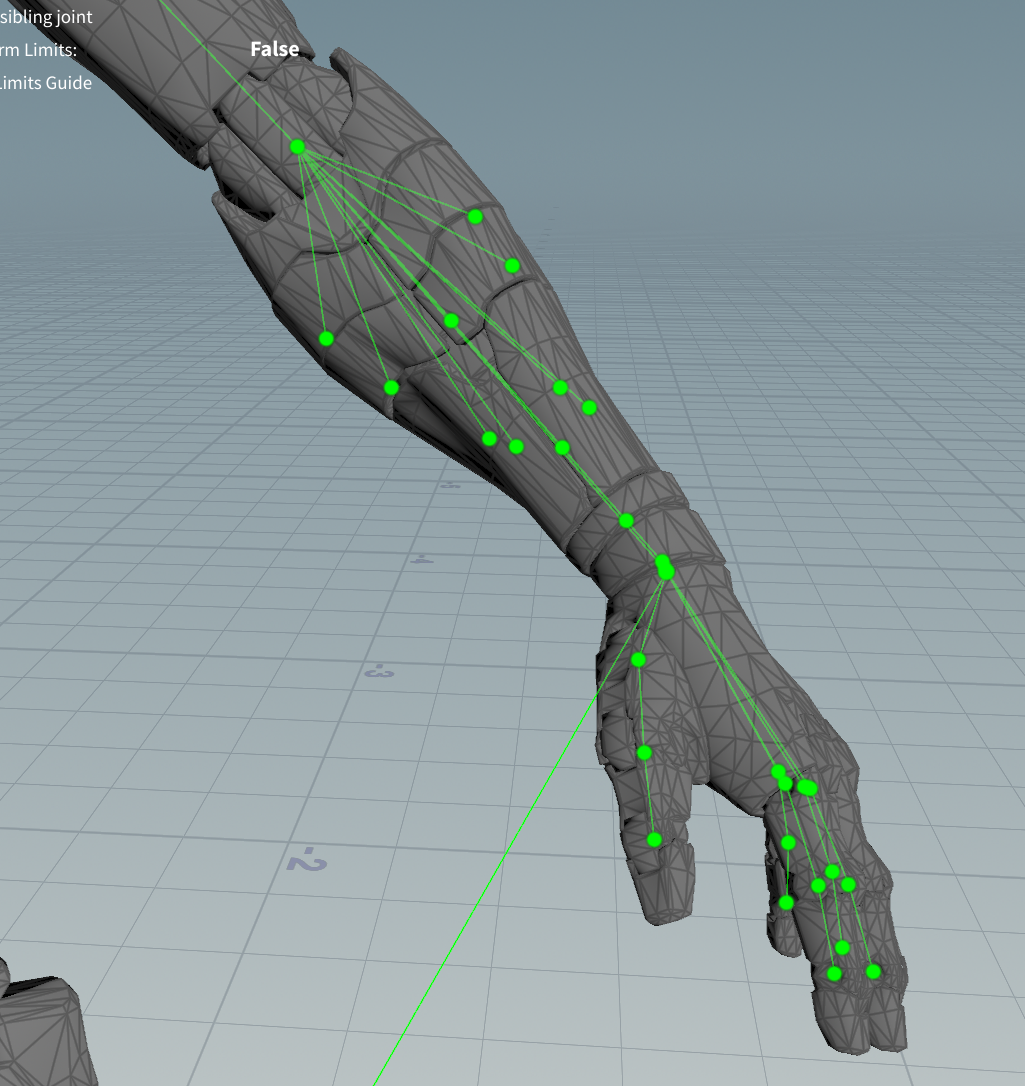
The skin weights are all set up so that the forearm plates can animate and move. It’s often used to add some cool FX when he uses his guns.
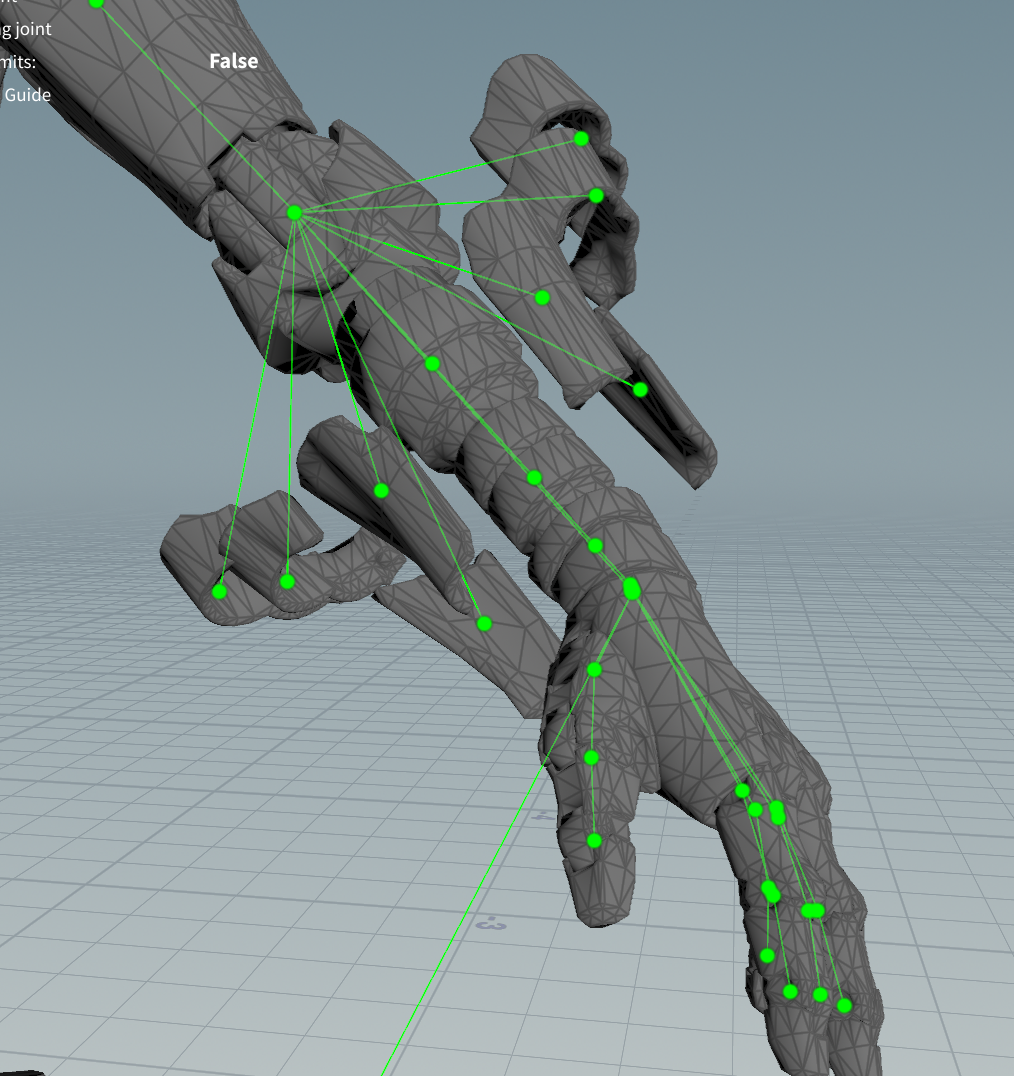
Here’s an example of a forearm animation when he pulls out his guns. I wanted to keep this animation, but at the same time still keep the Metahuman rig.

The face, while awesome in the time when it was made, doesn’t compare to the detail you can have with a Metahuman.
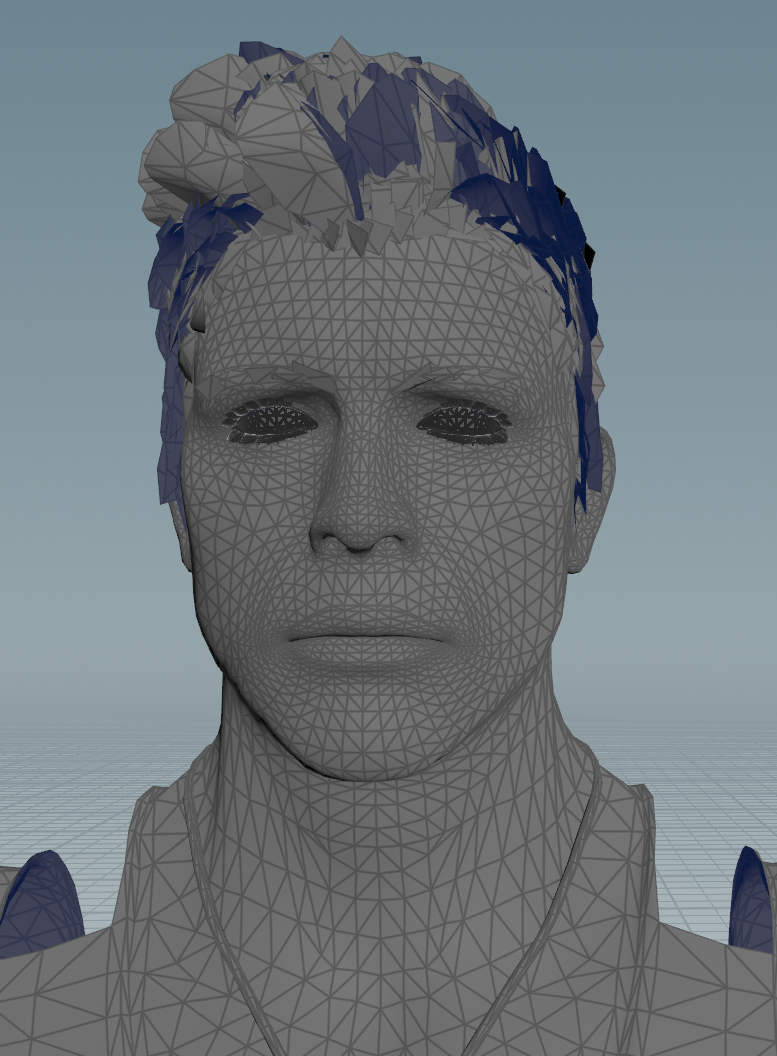
I really wanted to keep the Metahuman deformations to reserve volume when the mesh deforms. While not as realistic as a muscle simulation, it’s much better than nothing.

There are two pieces of software that we can use to create Metahumans out of other meshes: one choice is Mesh Morpher, which keeps the majority of the process inside of Unreal.
The other option is Metapipe, a suite of Python scripts that run inside of Maya. The nice thing about Metapipe is that it uses Epic’s own DNA tools in creating the Metahuman. For this project, I used Metapipe.
To use Twinblast’s body mesh, we will have to replace the skeleton that comes with Twinblast.
While the Paragon characters have skeletons that are very close to being compatible with Metahumans, they lack the helper bones that maintain mesh volume when the mesh deforms.
Notably, most Paragon characters have three spine bones, while a Metahuman contains five spine bones.
Metapipe will generate a new Metahuman skeleton for the Twinblast body mesh. It will also move all the face bones to our updated face mesh and create a .dna file which will ensure that the face rig will work correctly in Unreal.
The core part of the workflow involves wrapping a Metahuman mesh around the geometry you want to use. Popular software for this operation is Faceform’s Wrap, but Houdini also has tools that let you do this (Houdini’s node is called TopoTransfer).
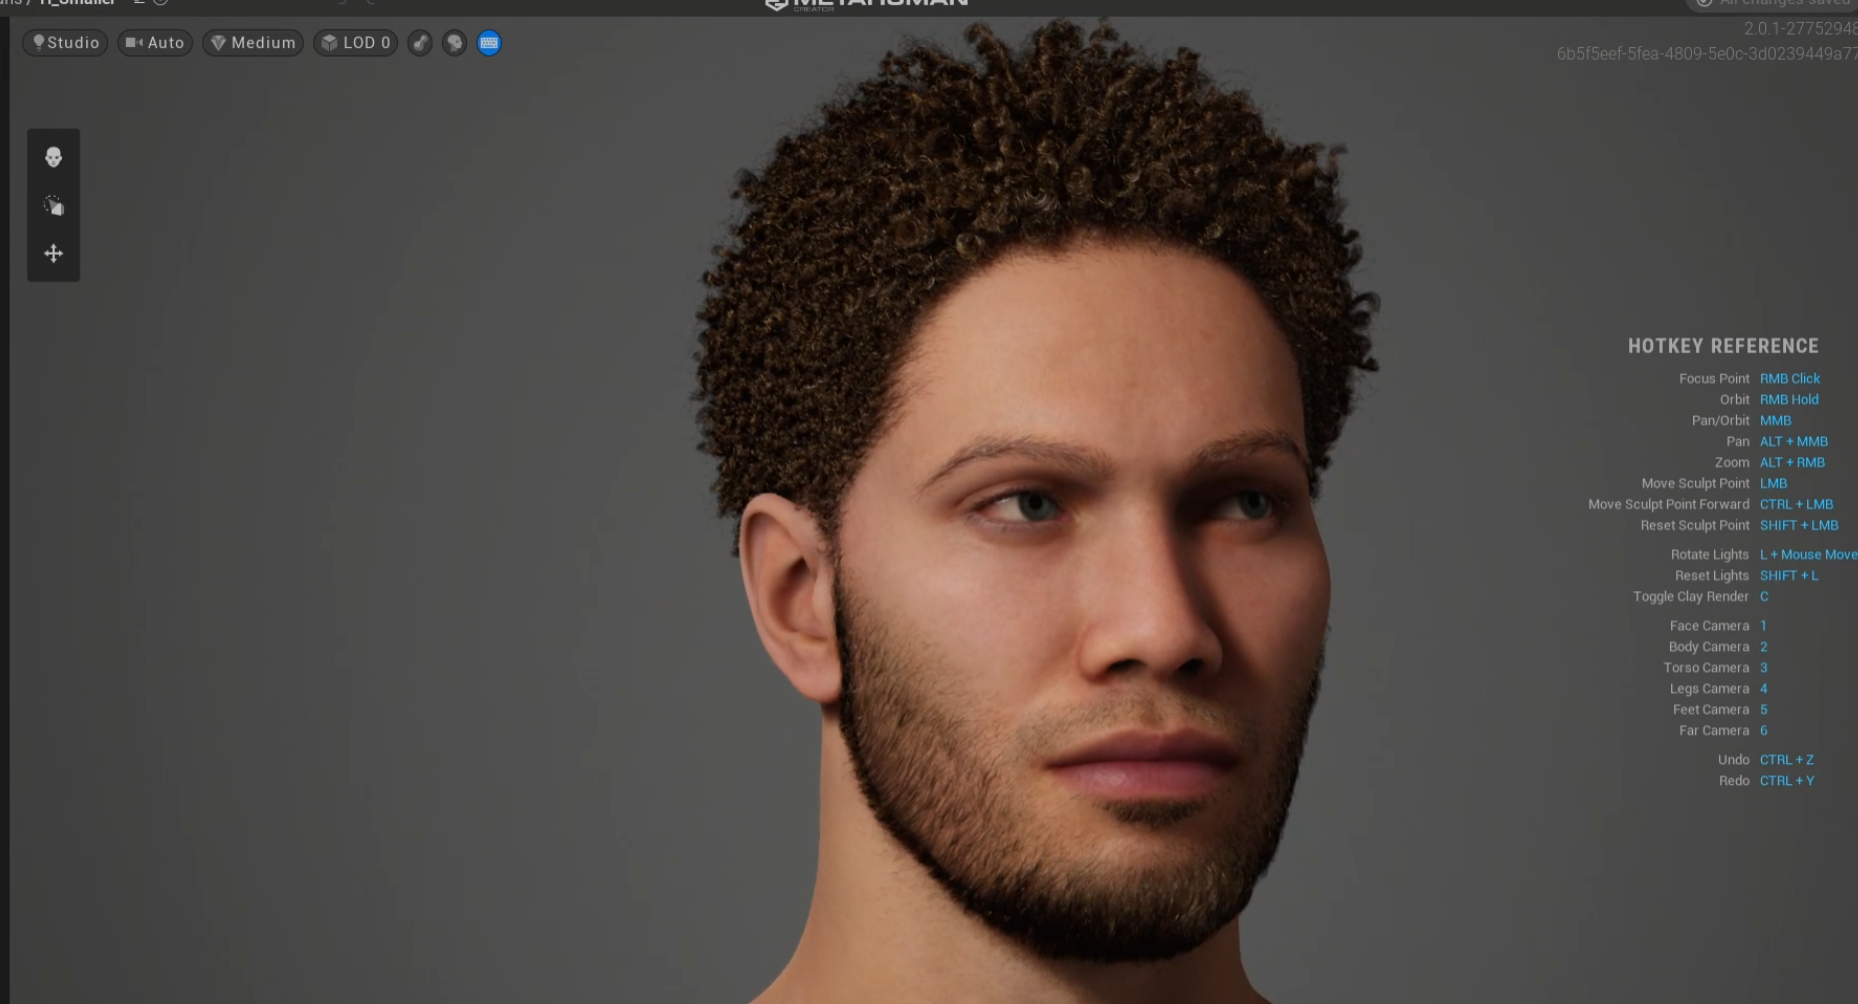
To get started I downloaded a Metahuman with the face and groom I wanted to use.
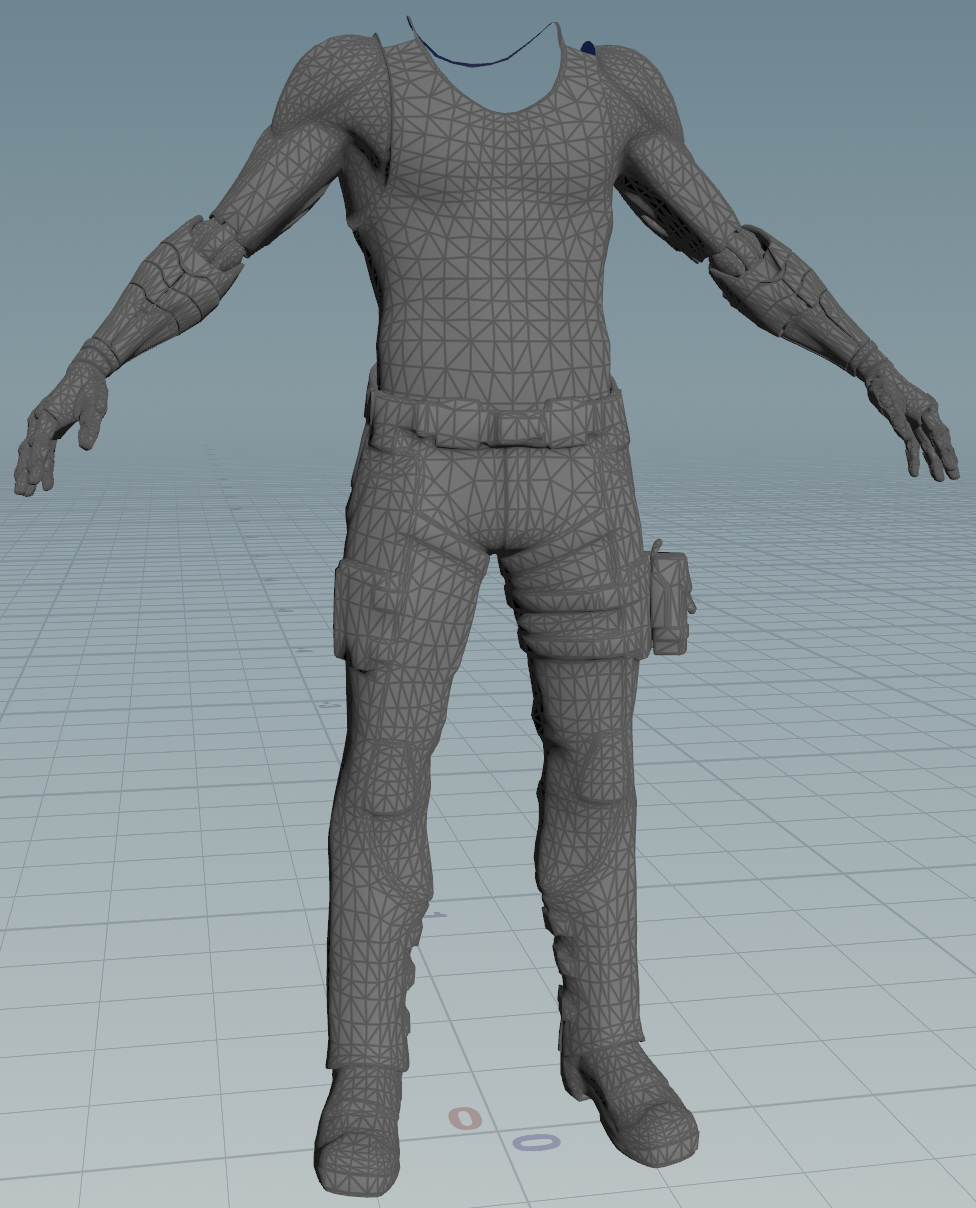
I needed to add geometry to Twinblast’s back. I’m not a great modeler, but I added a few polygons to the model. The main purpose of this new upper back is just to collide with the vest cloth simulation later, so no one should end up seeing it anyway.
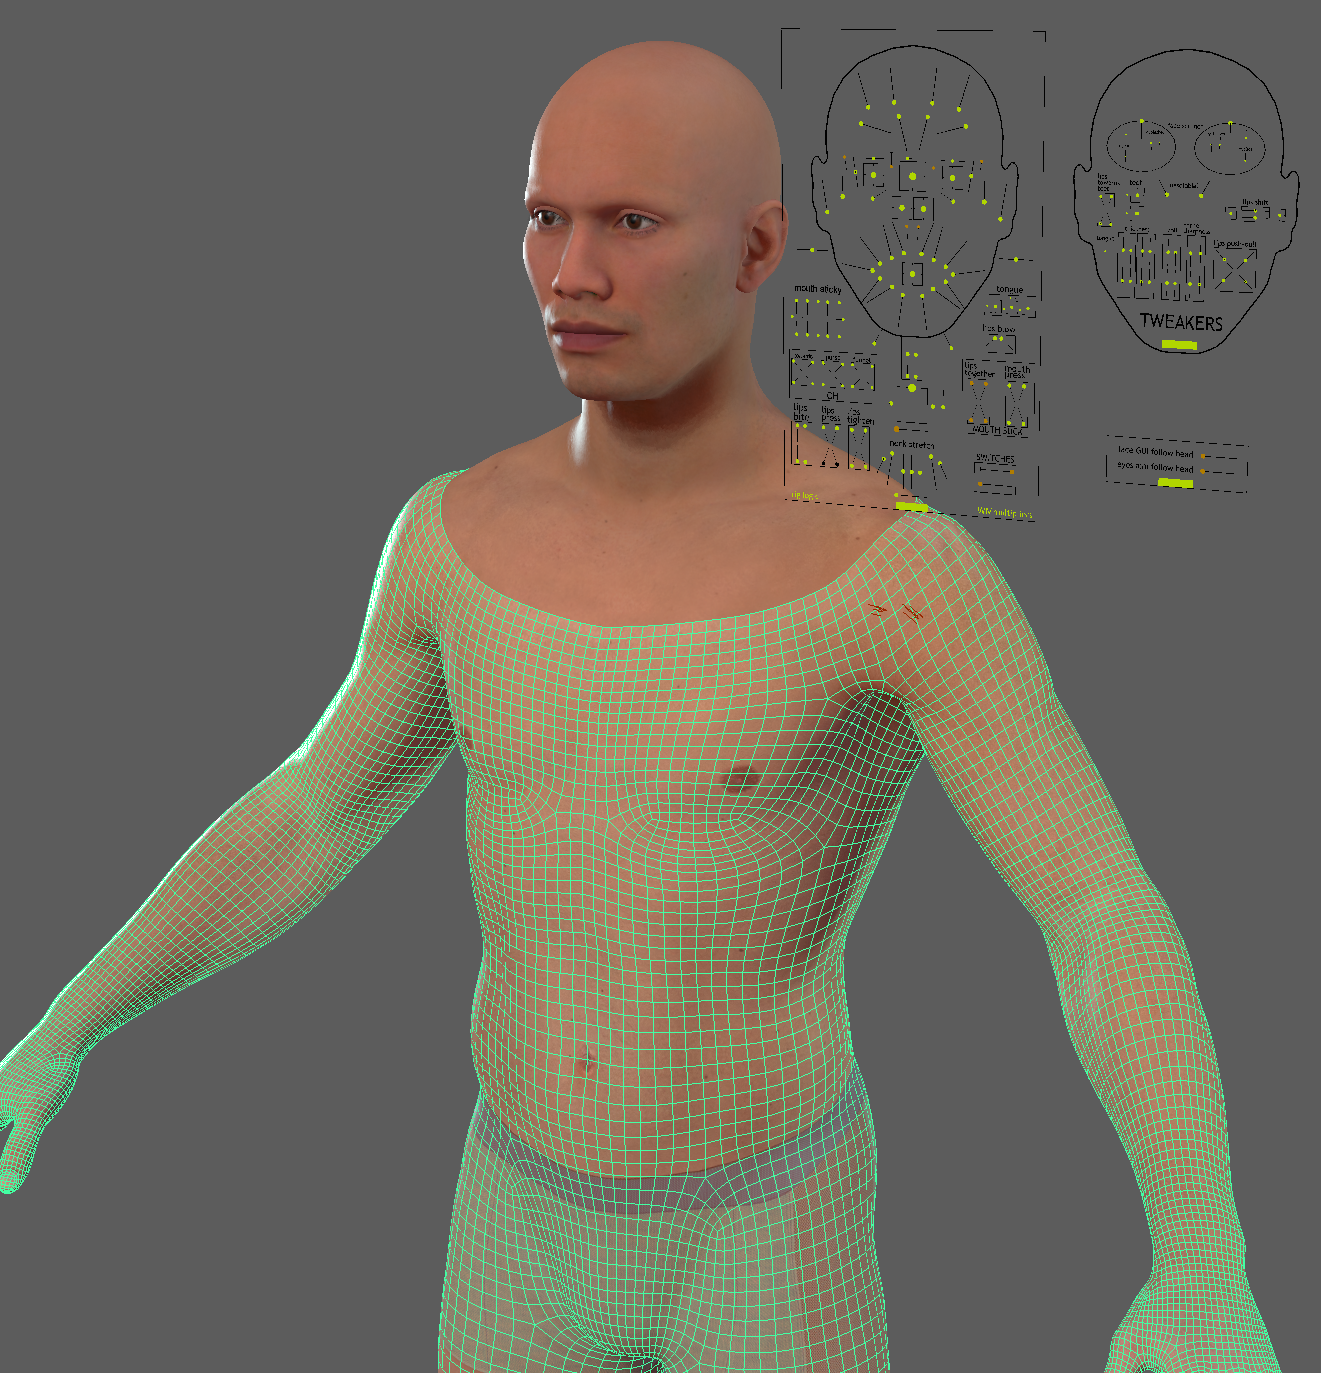
I downloaded my Metahuman and imported it into Maya using Quixel Bridge. That’s the version we want to manipulate, not the one that we can export from Unreal. If we export the Metahuman body out of Unreal, it will be triangulated. Metahumans imported directly into Maya will be all quads. For Metapipe to work properly, the vertex count is very important.
Here, I’m about to export the body. Note that the Metahuman face and body are separate meshes. This separation provides flexibility in Unreal, allowing for different animations on the face and body, as well as different Blueprints for the different meshes.
These are exported as FBX files to be used in Houdini.
There’s a hidden complete mesh (face and body) that I’m exporting as well. This will be very helpful later when I want to transfer the skin weights from the Metahuman body to Twinblast’s body.
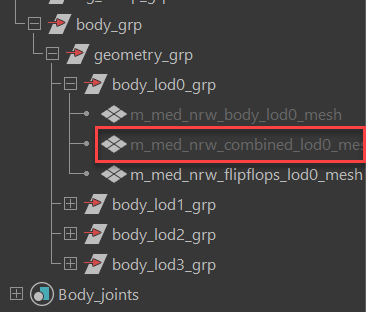
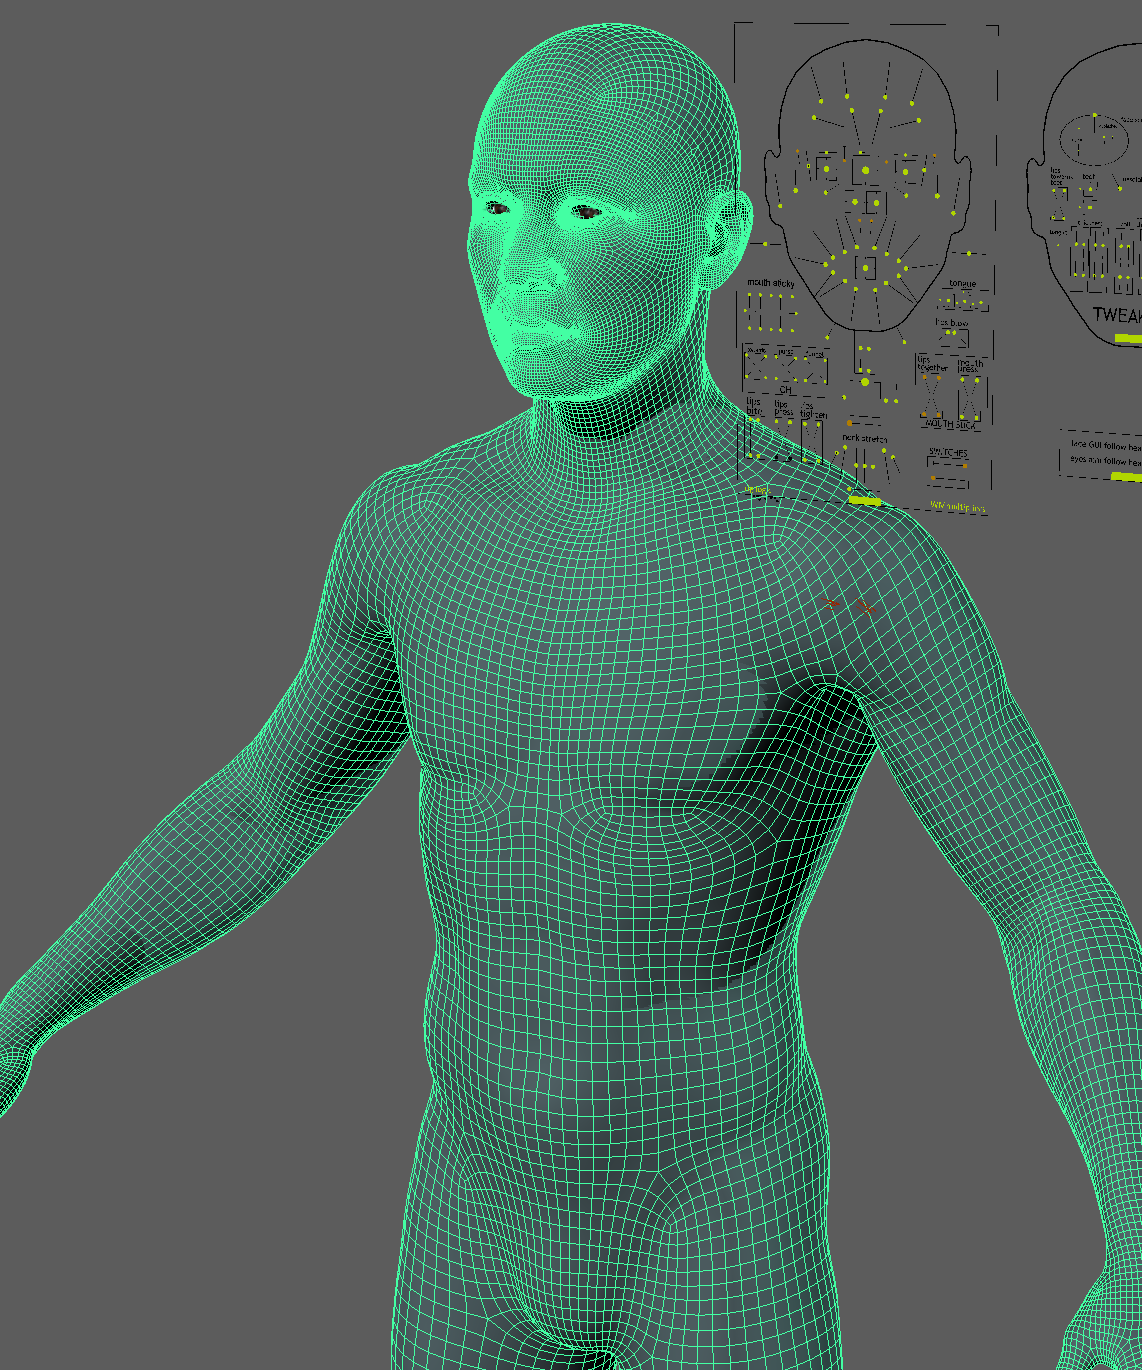
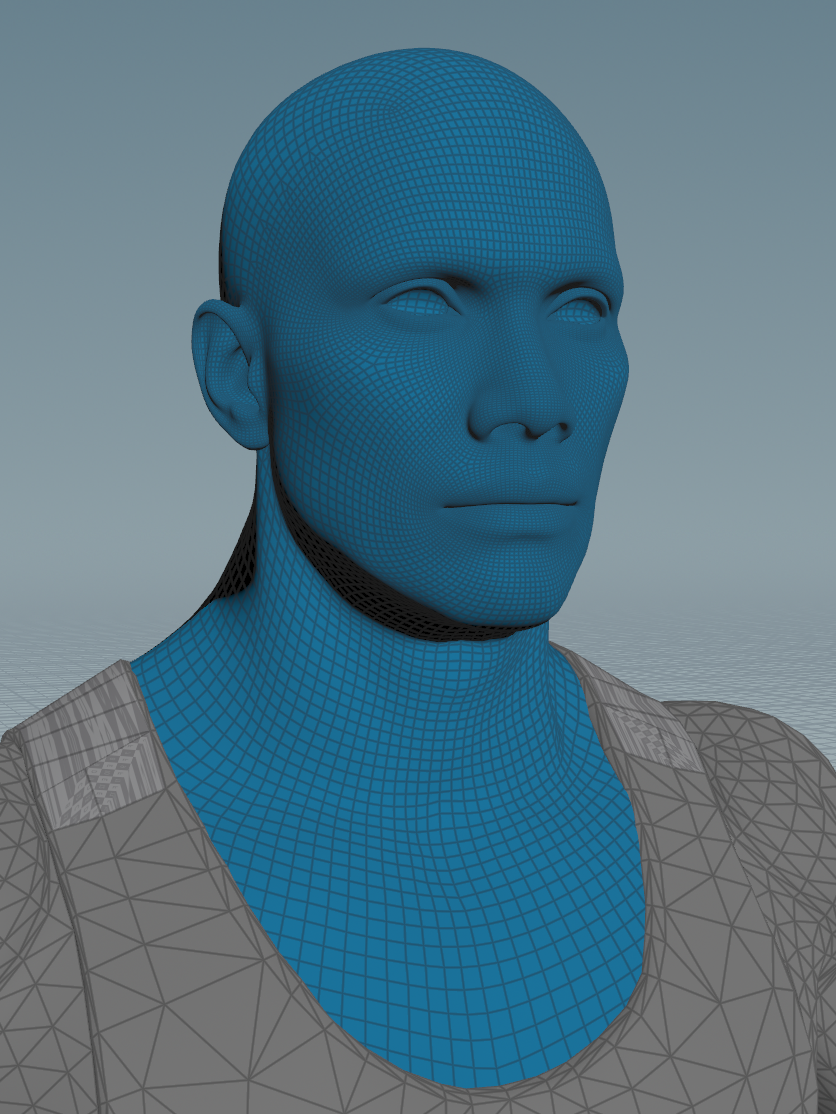
The next step is to start to get the face ready. The face will require some modification, I want to lower the Metahuman chest to the level of Twinblast’s shirt like the original model does. I also want to thicken the Metahuman’s neck to super-hero size. I used Houdini’s TopoTransfer node to distort my original Metahuman mesh to match Twinblast’s face, neck and upper chest.
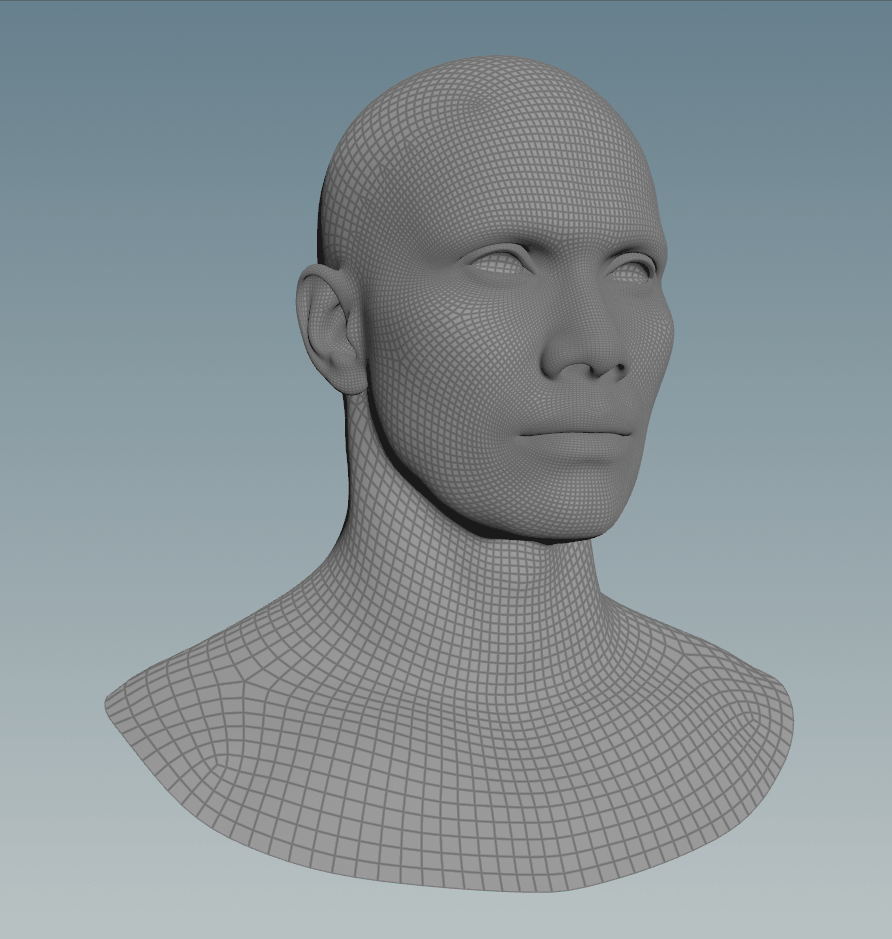
One of the reasons why I use Houdini (instead of software like Wrap) for this step is that Houdini has a lot of tools to modify after the wrap. Here, you can see the face mesh doesn’t fit perfectly, so it’s easy after the wrap to tuck the geometry into the body mesh with a few Soft Transforms.
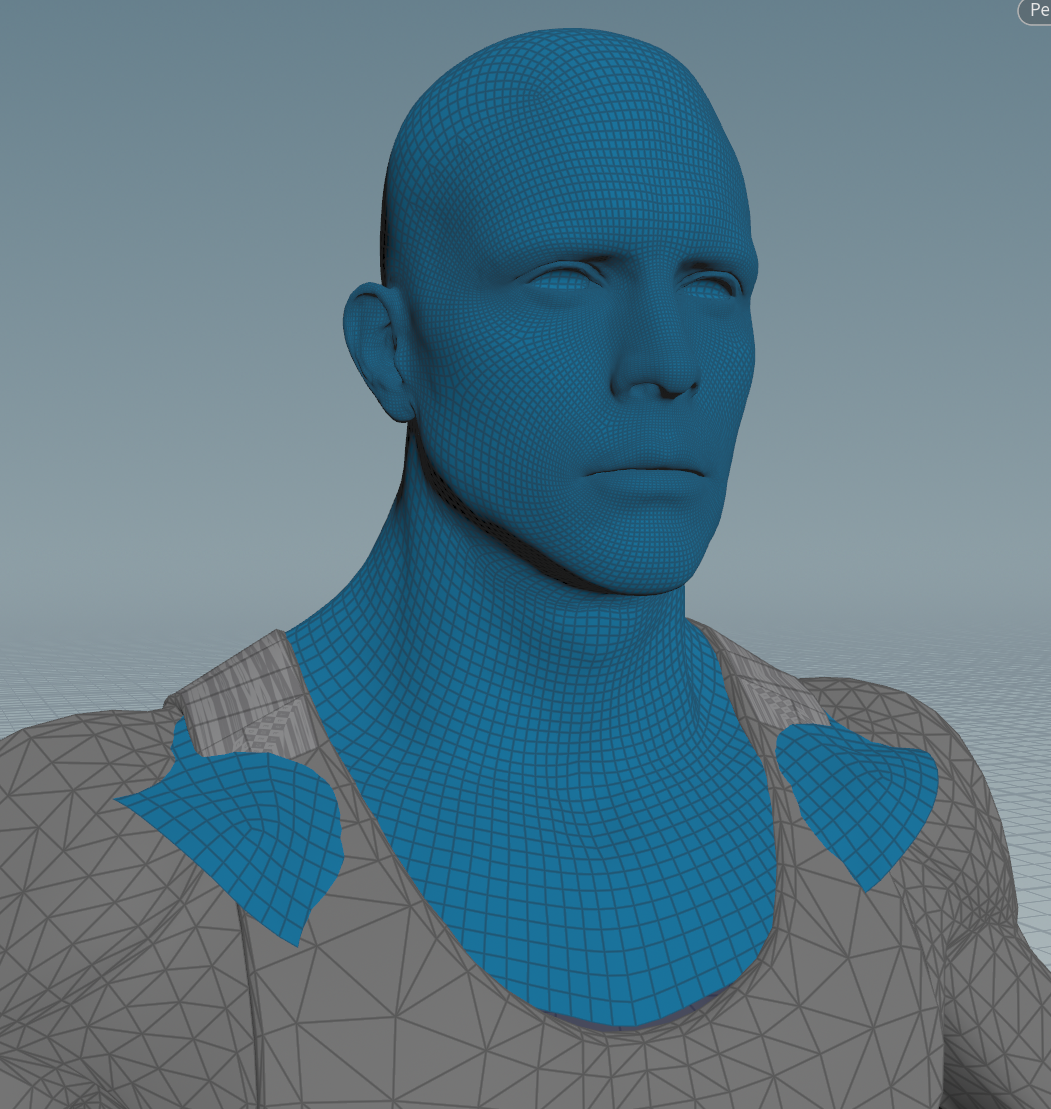
Here’s the final look, with the neck tucked in and the Metahuman face blended back. In this case, I wasn’t too picky with the final look of the face, and it’s much easier to modify Metahuman faces without moving the original eye sockets.
Once I was happy with the head, I used a Point Deform to apply this same distortion to all the other face meshes (eyes, teeth, etc.). The face and all its other related meshes were saved out as .obj files, ready to be imported into Maya for Metapipe.
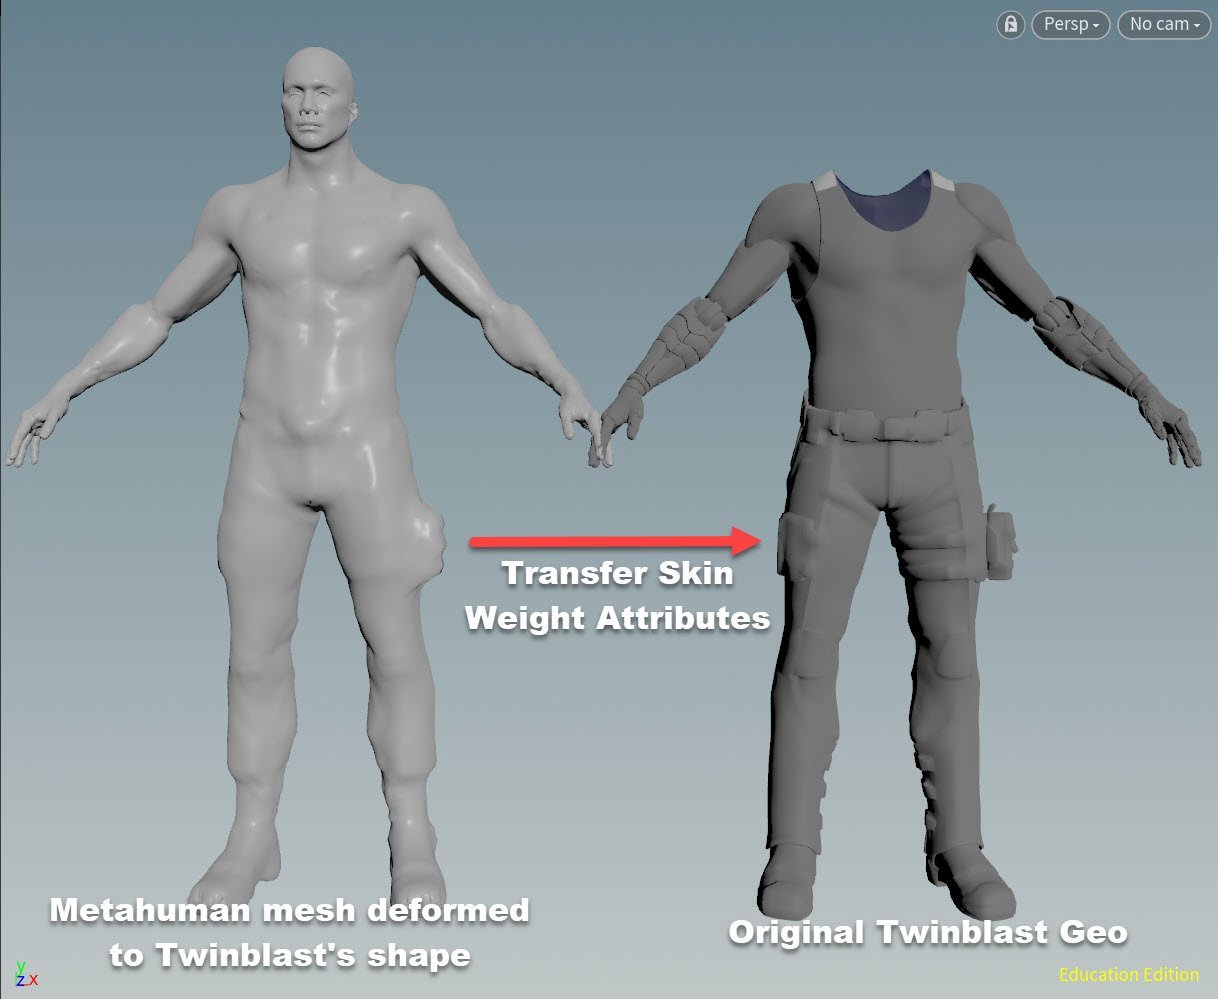
I also used TopoTransfer to wrap the complete Metahuman body over Twinblast.
This was eventually used to transfer Metahuman skin weights over to Twinblast’s original body.
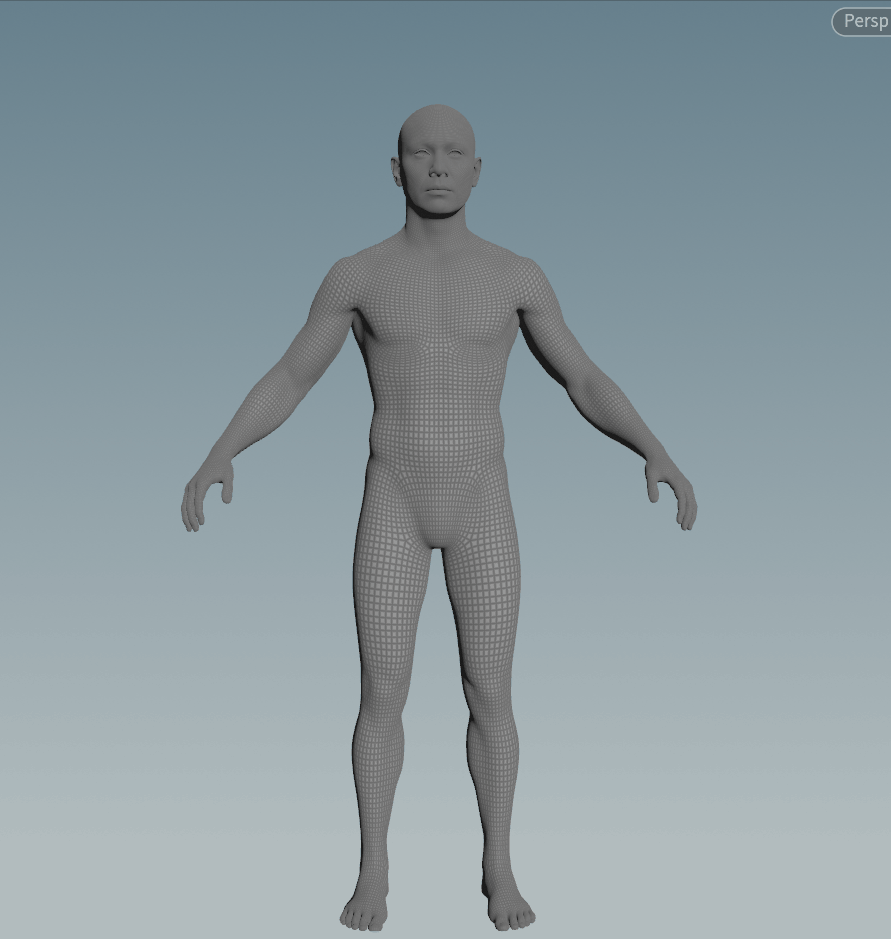
I applied the same deformation with a Point Deform to the Metahuman body (with no head). That was the body I brought into Maya for Metapipe to build the Metahuman skeleton for the original Twinblast body mesh.
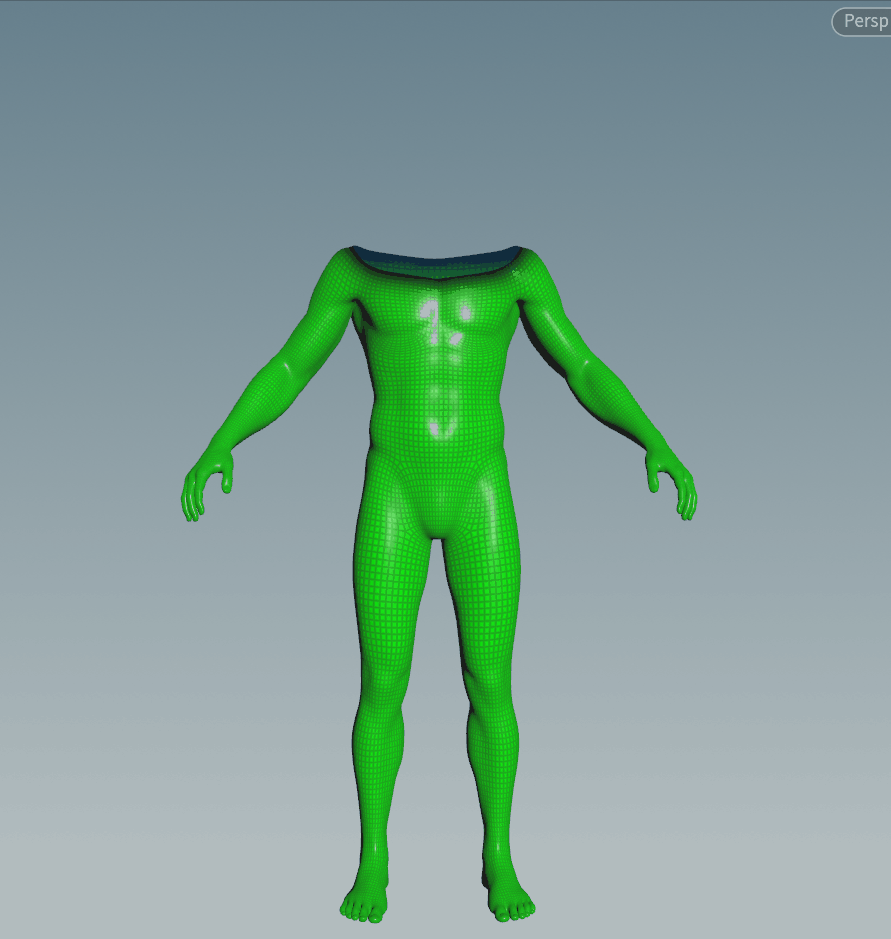

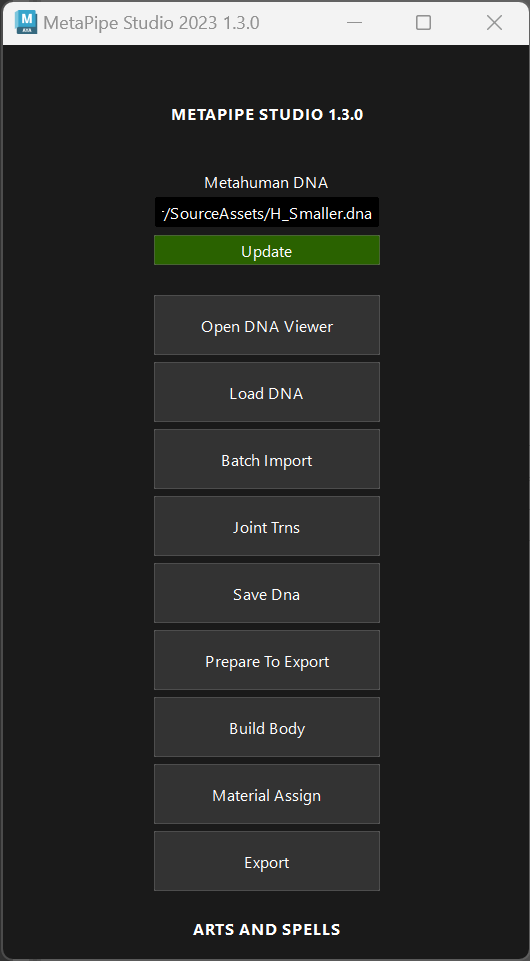
Once everything has been exported, we can import them into Maya using Metapipe. I’m not going to write out an entire Metapipe tutorial, but here is an overview. Once you have all the scripts installed, you basically go down the list in the Metapipe window, button by button.
1 - Open the DNA Viewer.
2 - Load the DNA file. This will load up the Metahuman face and control rig.
3 - Batch import Twinblast’s face, body and eyes.
4 - The ‘Joint Trns’ button will relocate the face joints to the new mesh
5 - Save the DNA file; this finalizes the face and the rig will work on the new face.
6 - The Prepare to Export button cleans up the Outliner.
7a - Import the body
7b - The ‘Build Body’ button will create the Metahuman body skeleton to match our new body proportions.
8 - Assign unique materials to all the face meshes
9 - Export everything (the face, body and the .dna file for Unreal).
I made a video showing the entire process; if you watch it at double speed, it takes two minutes. This leaves out some of what you can do in Metapipe, like making new corrective blend shapes.

Once the face has been exported from Maya, we can get the face ready in Unreal. This process is explained in detail in the Metapipe tutorials, but here is a brief overview.
The first step is to copy the materials from the base Metahuman over to the new face.
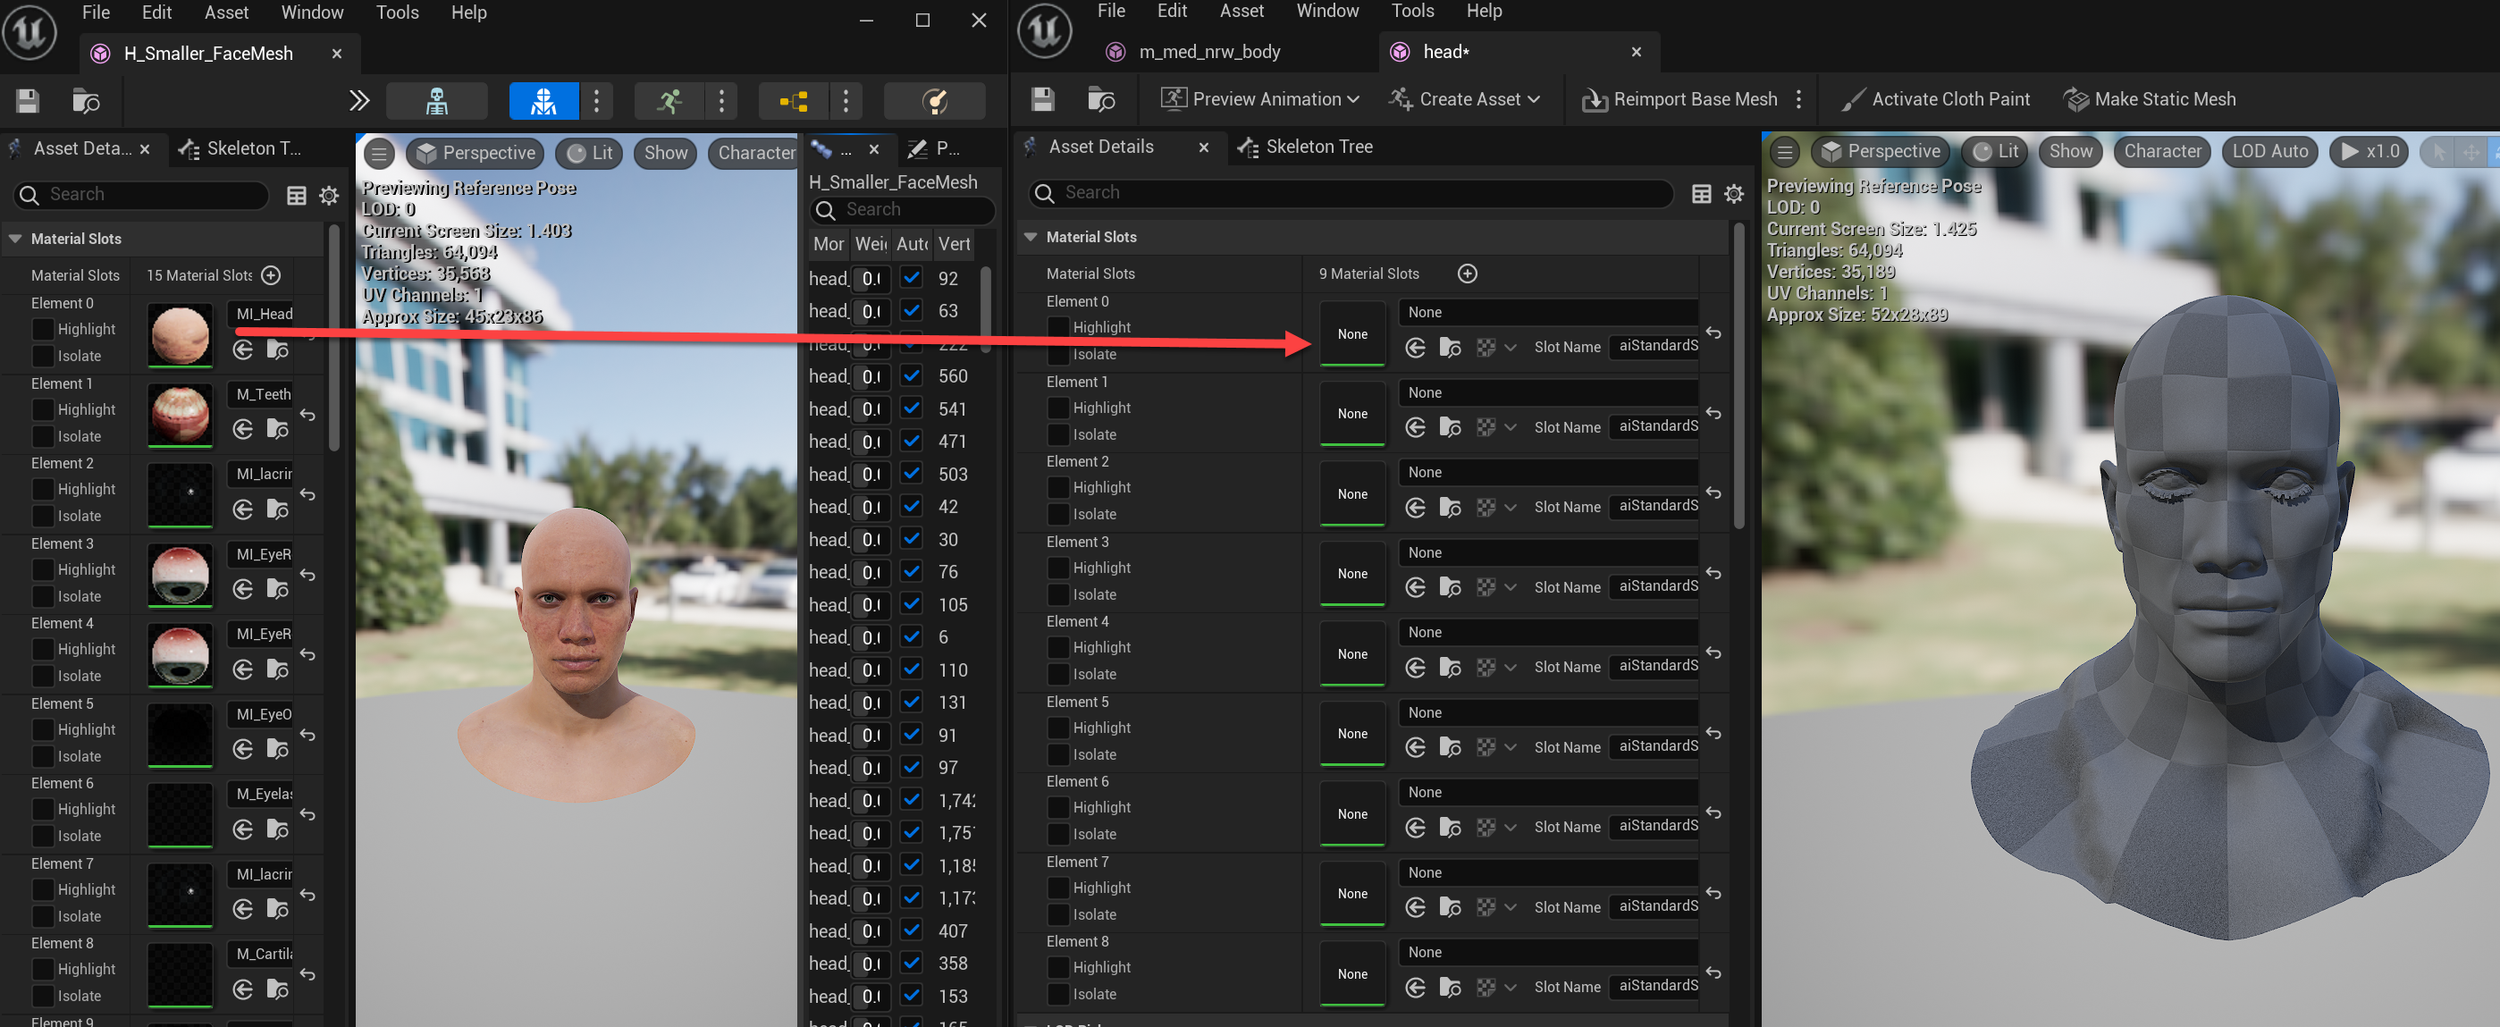
Other settings that needed to be set are turning on ‘Skin Cache Usage’ and ‘Use Full Precision UVs’.
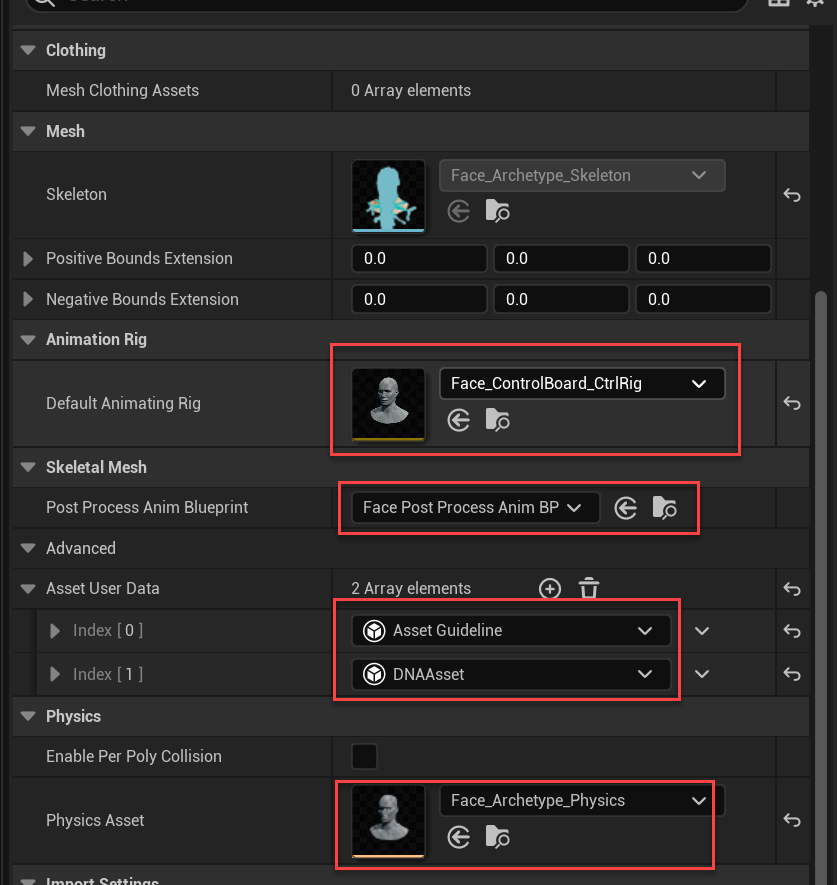
I needed to ensure that the face control rig was attached, the face Post Process Blueprint was on, and the ‘Asset Guideline’ and ‘DNA Asset’ were connected (as well as the Face Physics).
Then, I had to import the .dna file into Unreal, ensuring that it was connected to the face. At this point, the rig should work properly in Unreal.
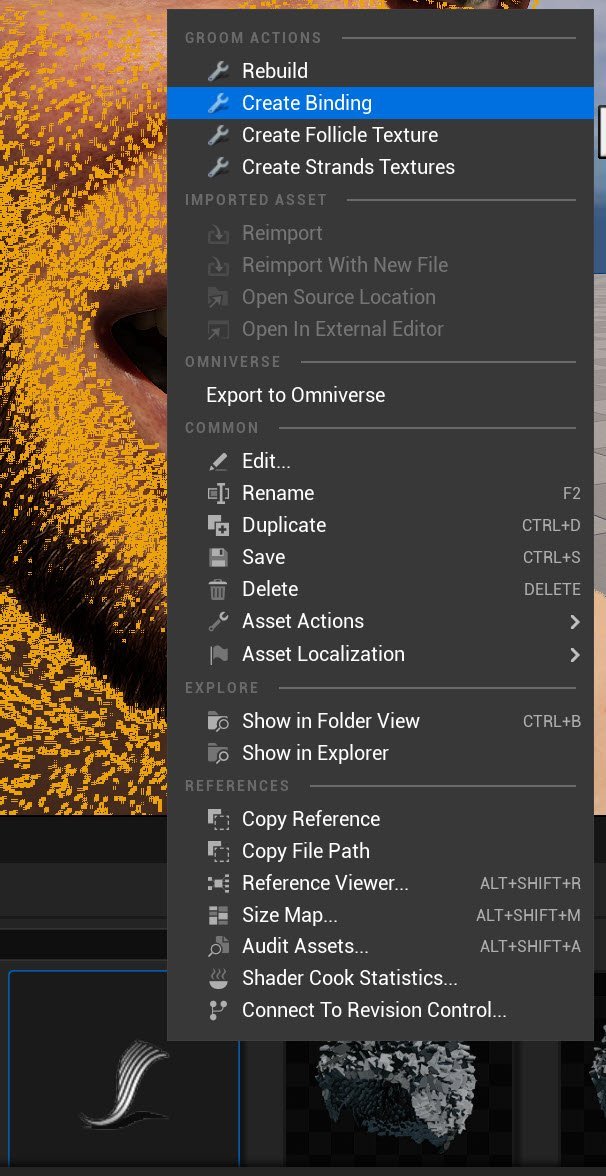
It sensible to transfer the grooms at this stage as well. This process involves re-binding the grooms to this face. Right-click one of the original grooms in the Content Browser
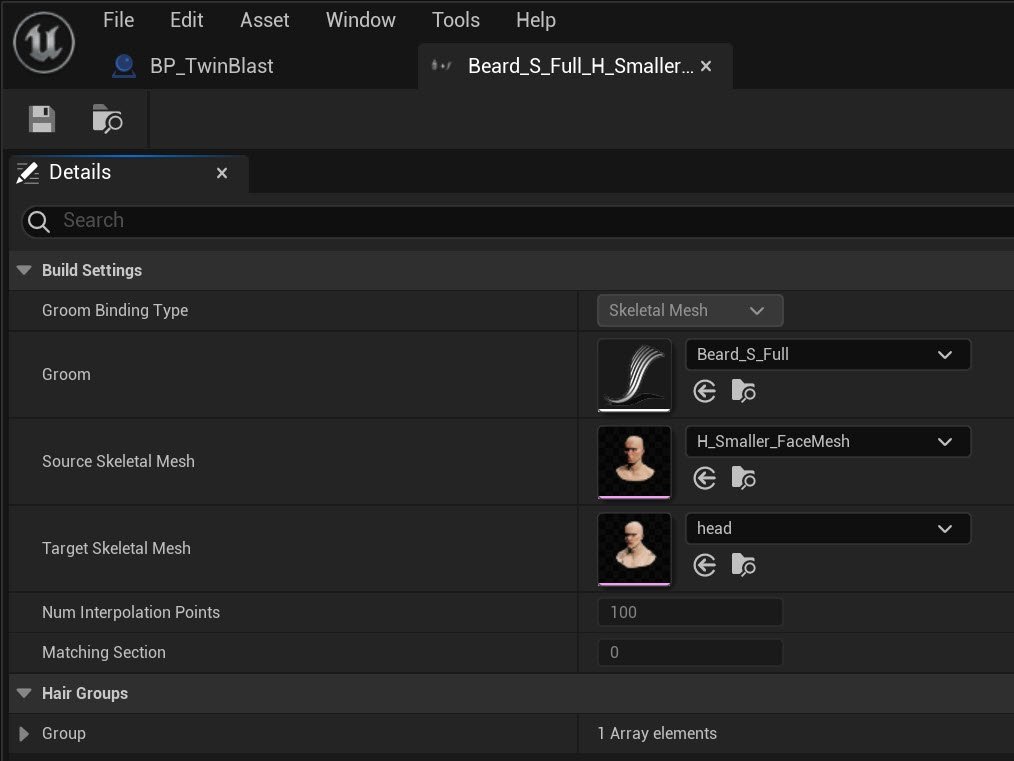
In the bind asset, I selected the new head as the ‘Target Skeletal Mesh’, and the original FaceMesh was the ‘Source Skeletal Mesh’. Once this binding is assigned to the Groom Asset, the groom should snap into place.
Once this is done, the face is complete. We can move on to the body, which will require us to go back into Houdini.

I imported the body from Metapipe back into Houdini, but I’m only going to use the skeleton from it. Here, you can see it lined up over the original Twinblast body geometry.
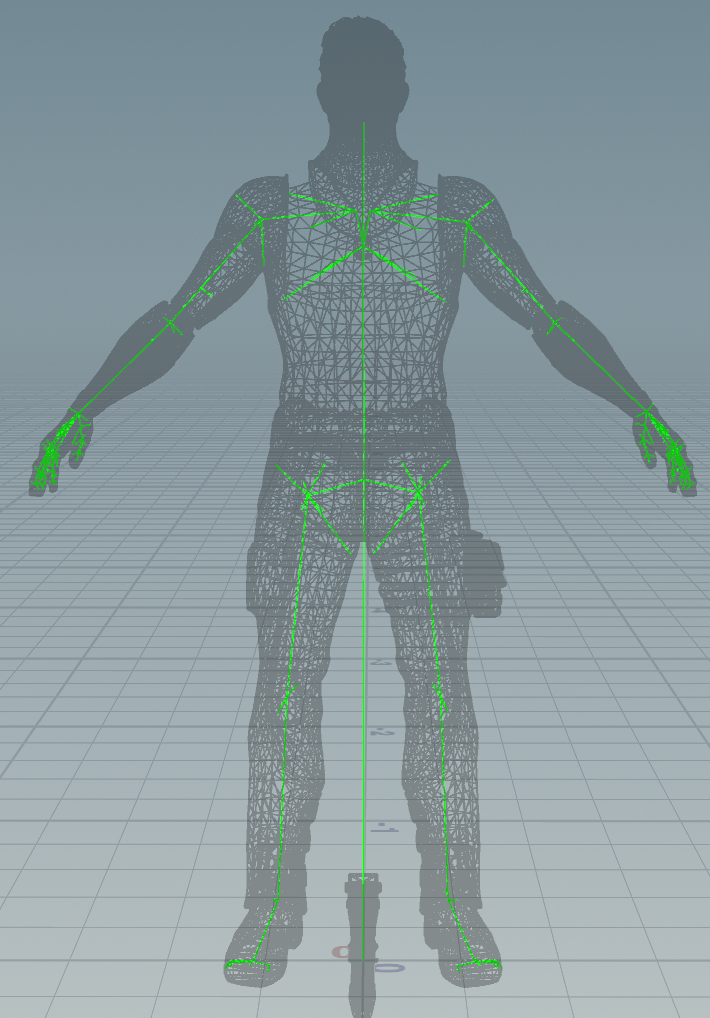
I transferred the skin weights from the complete Metahuman mesh, which I distorted to resemble Twinblast, over to Twinblast’s original geometry.
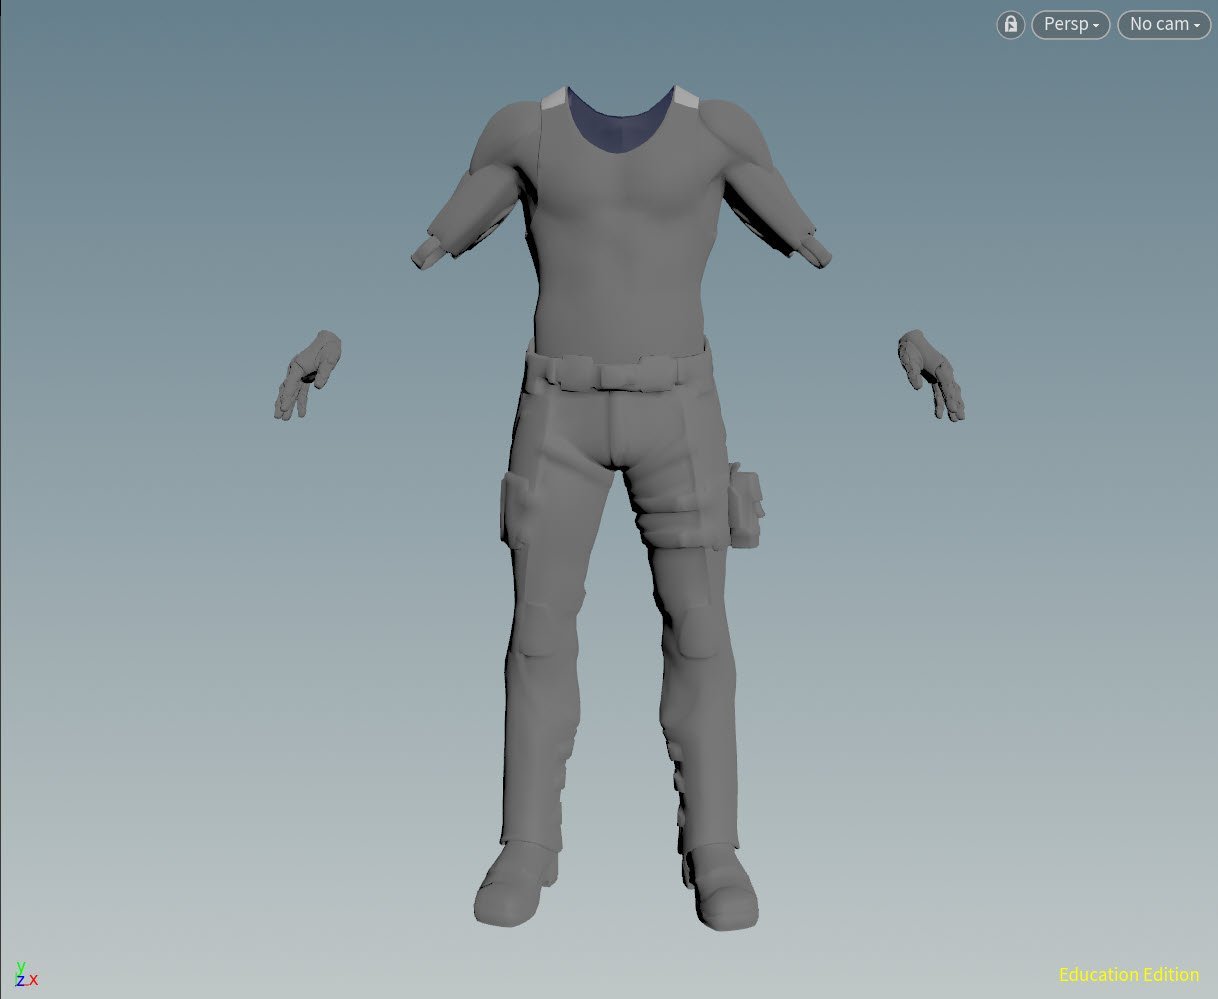
I deleted the forearms as I did not want to use the Metahuman skin weights on them. This would interfere with the robot arm animation I wanted to include. I needed to use the original Twinblast forearms and skin weights.
This was the final body.fbx that I exported from Houdini and imported into Unreal which contained the Metahuman body skeleton.
For the forearms, I wanted to keep the skeleton with the original bones. After much experimentation, I realized that keeping these as separate meshes has a lot of advantages. The main one being that I could keep the Metahuman post-process Blueprint on the main body without it interfering with the forearms.
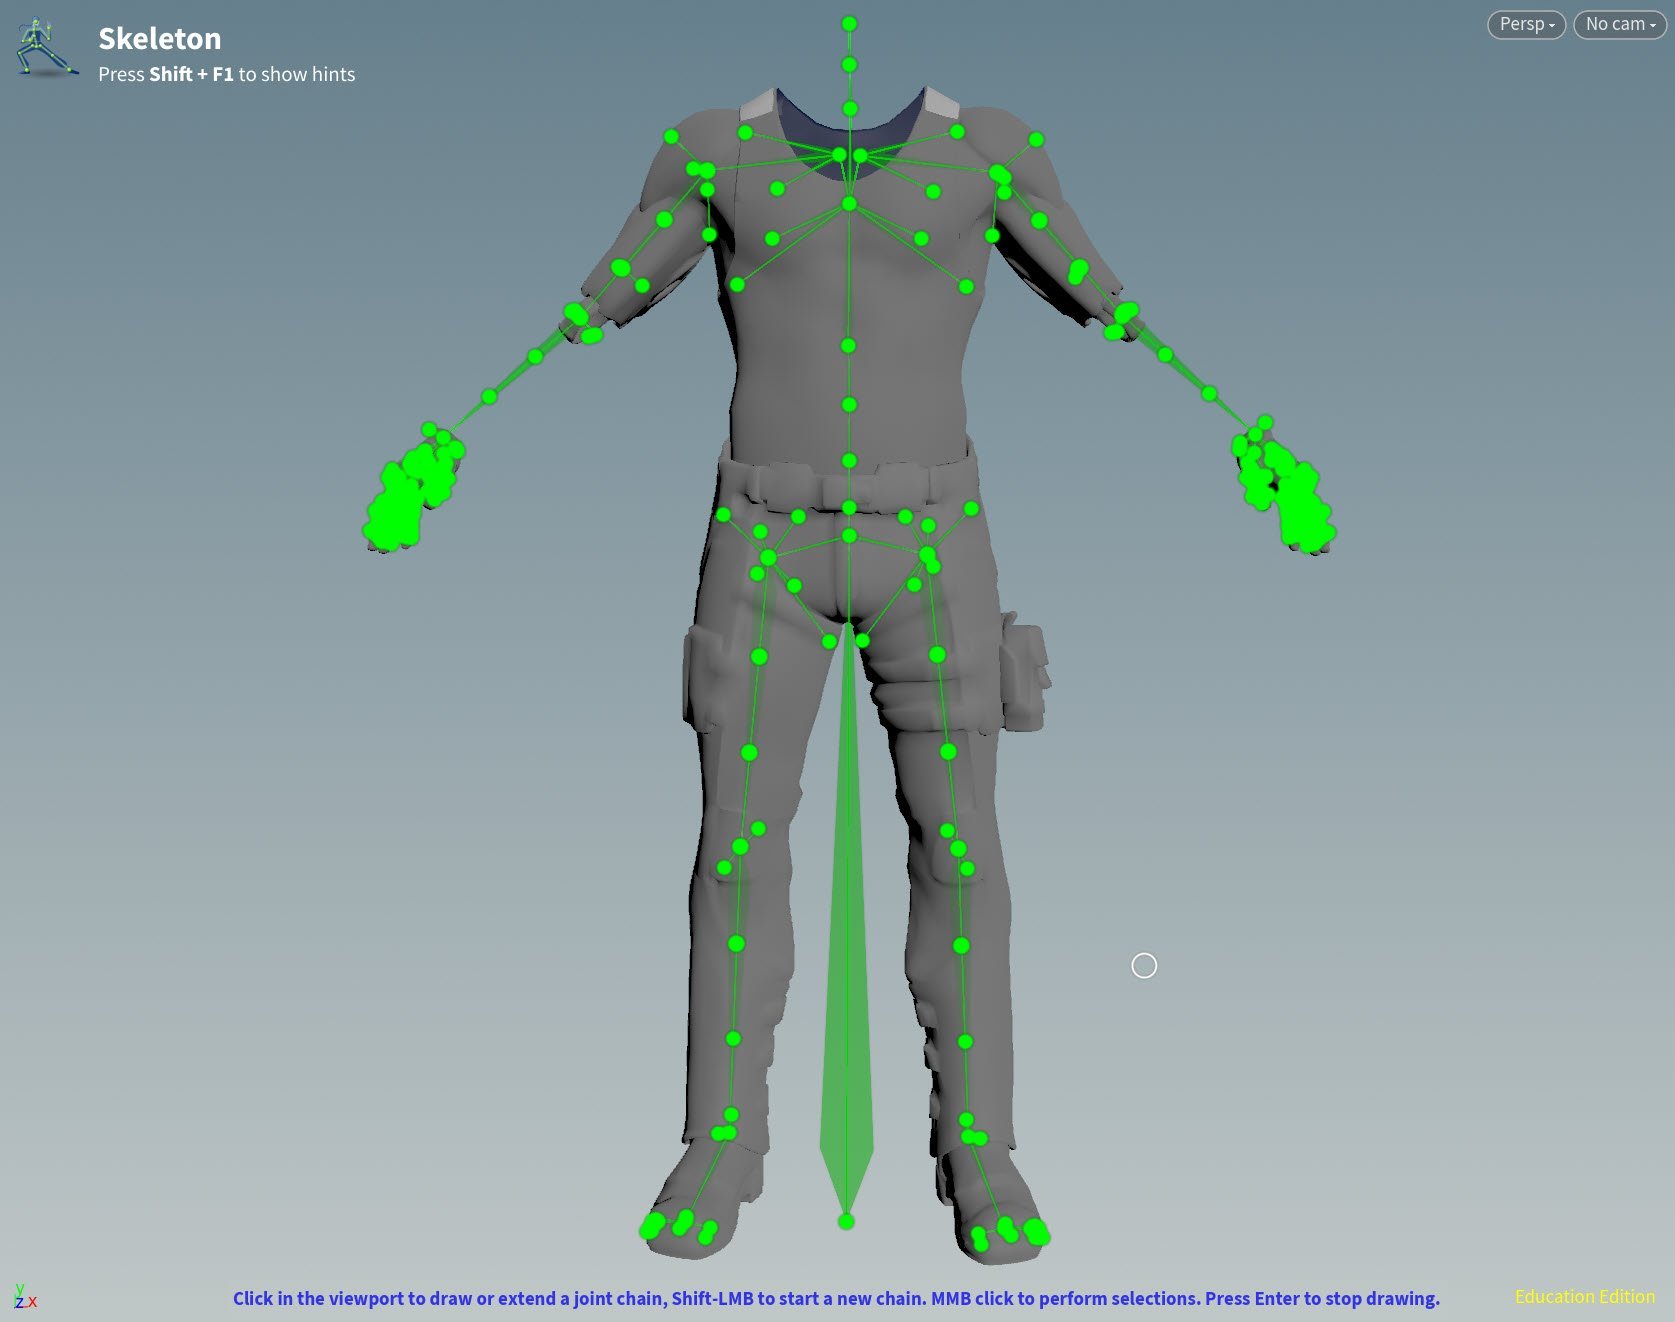
As I mentioned earlier, Metahumans have an Animation Post-Process Blueprint on them that controls the ‘helper bones’ which help to preserve volume.

If the Post-Process BP is turned off, we get very different behavior. Notice that we lose a lot of volume here. While this isn’t as good as a full-on muscle sim, it’s a very nice feature, it’s realtime, and it enhances the overall look of the character.
I wanted to retain this feature for my character, but I found that adding the bones for the forearm caused issues when the Post-Process BP was activated. This is why keeping the forearms as a separate mesh can be beneficial.

This is what the export for the forearms looked like.
In Unreal we can have ‘child skeletons’ that will follow the movement of a ‘parent skeleton’. This is the same idea with how the face skeleton of a Metahuman can follow the movement of the body skeleton. As long as the bones up to the forearms have a corresponding bone in the parent skeleton, it can copy those movements.
This way, we can have a skeleton just for the forearms. This will include all the joints needed for the forearm-plate animations I wanted to do. It will allow the settings for the majority of his body to copy the Metahuman setup, while the forearms will have their own setup they can use.
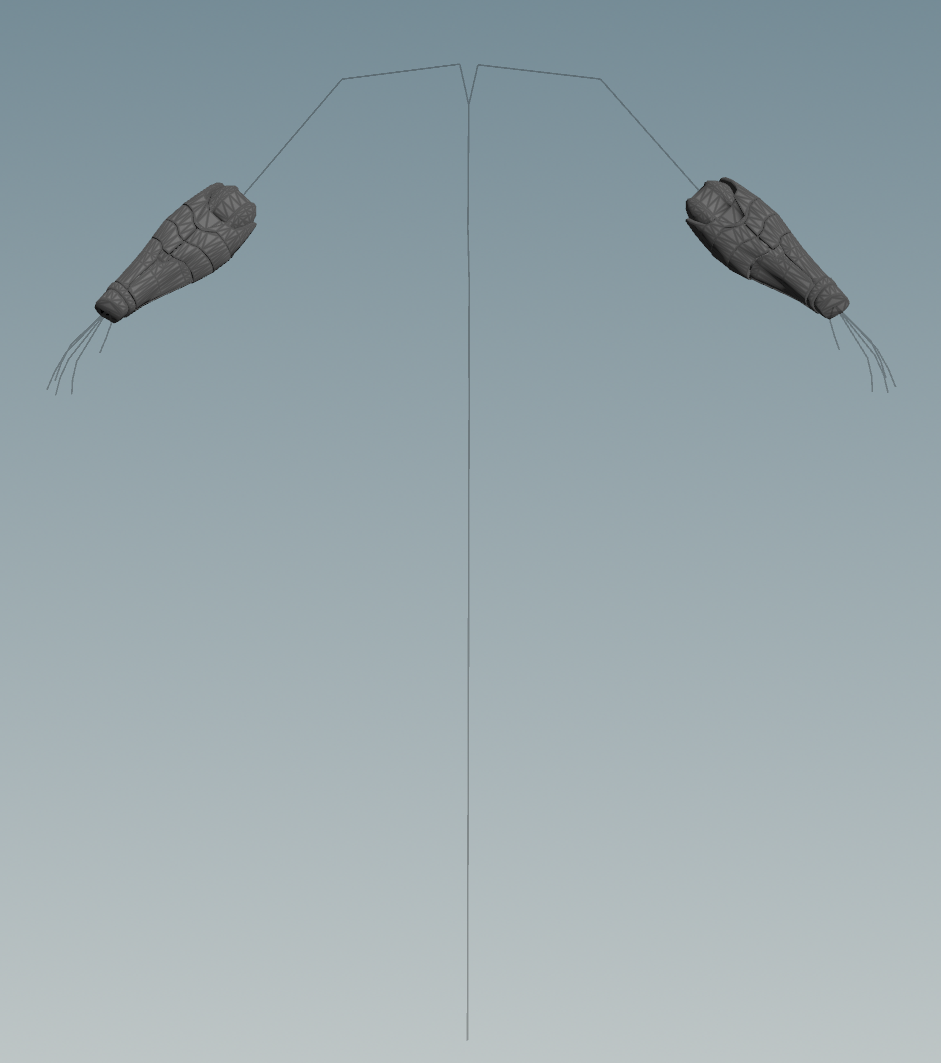
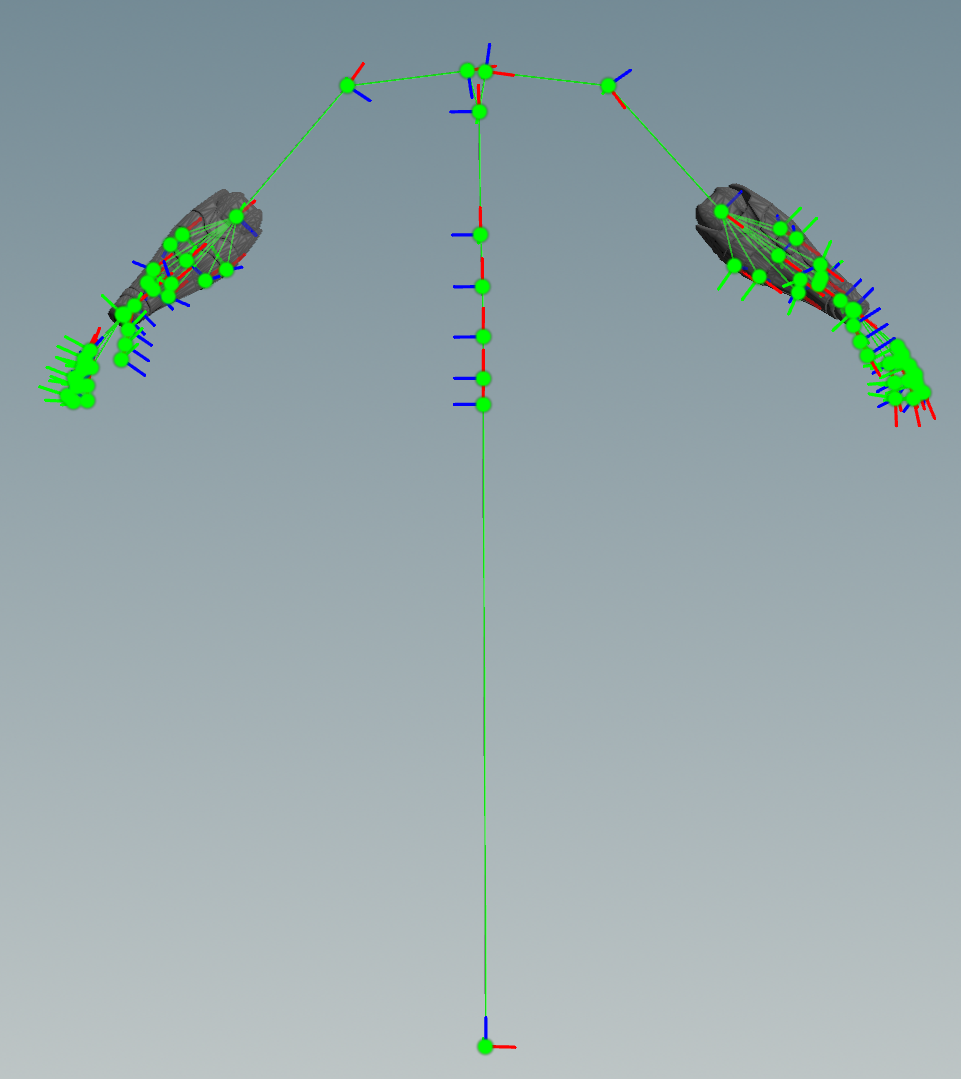
So now I have the three components that I needed. The face, the body and the forearms.
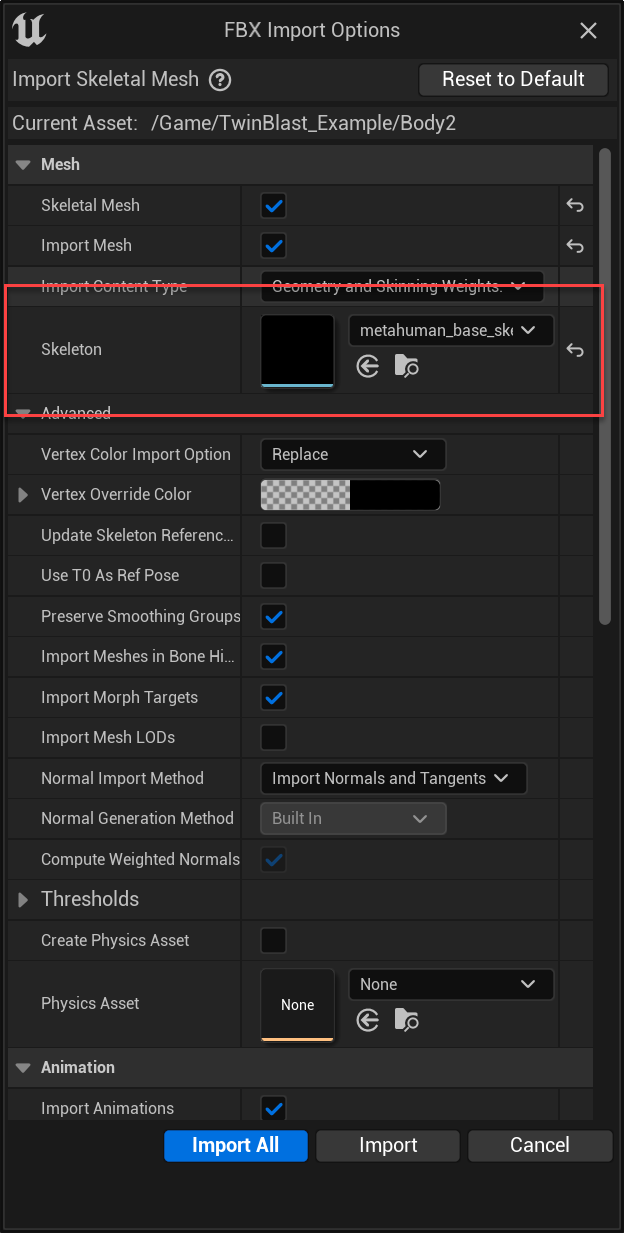
The body.fbx was imported as a Skeletal Mesh that was connected to the existing Metahuman base skeleton. Check the Metapipe tutorials to make sure you have all the Import options set correctly.

Once we have imported the head, body, and arms, I’m going to duplicate and modify an existing Metahuman Blueprint.
Notice that this Metahuman consists of five Skeletal Meshes. The Body acts as the main driver, and its motion is copied to the four children (Feet, Legs, Torso, Face).
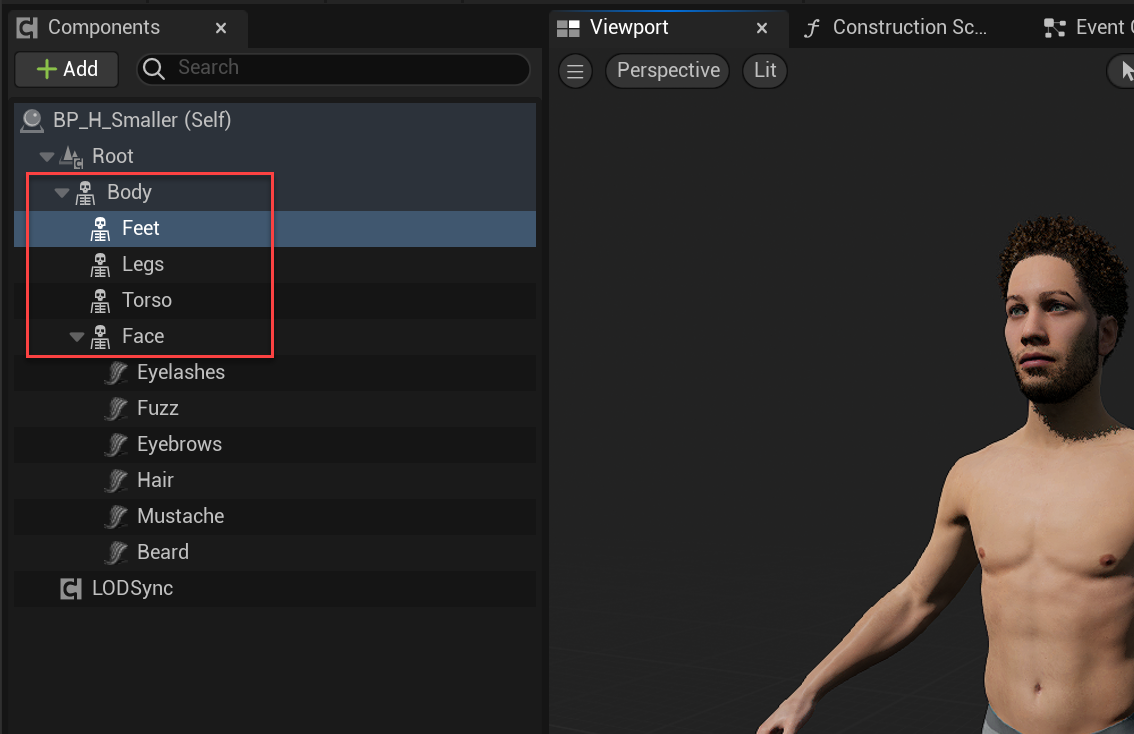
Each skeleton can be specialized for its purpose. For example, the ‘Legs’ skeleton has a stripped-down skeleton that lacks many ‘helper bones’.
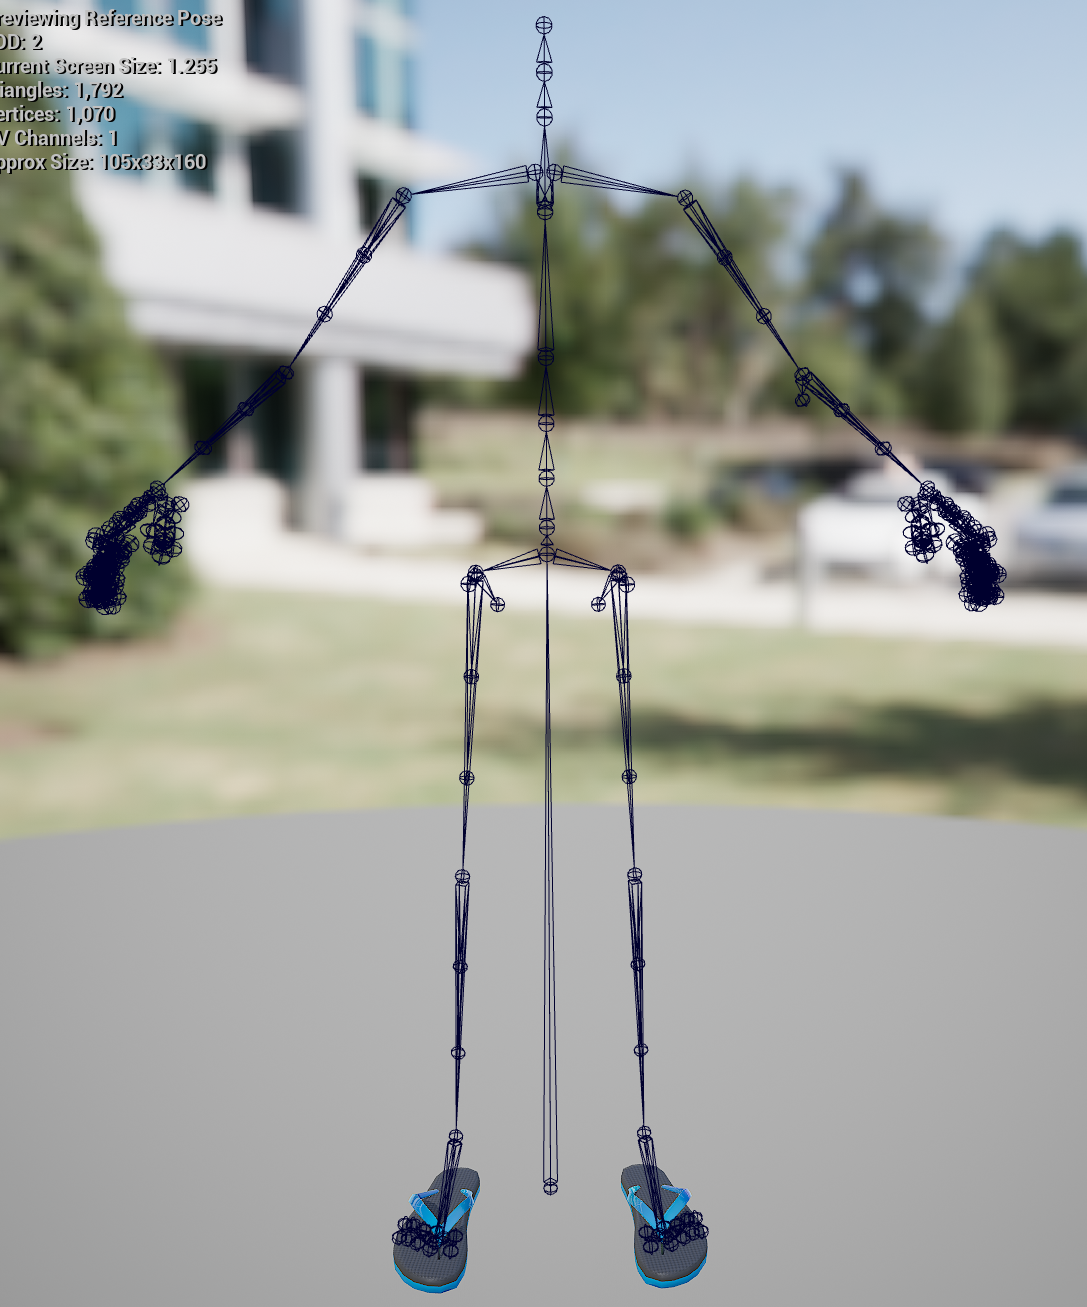
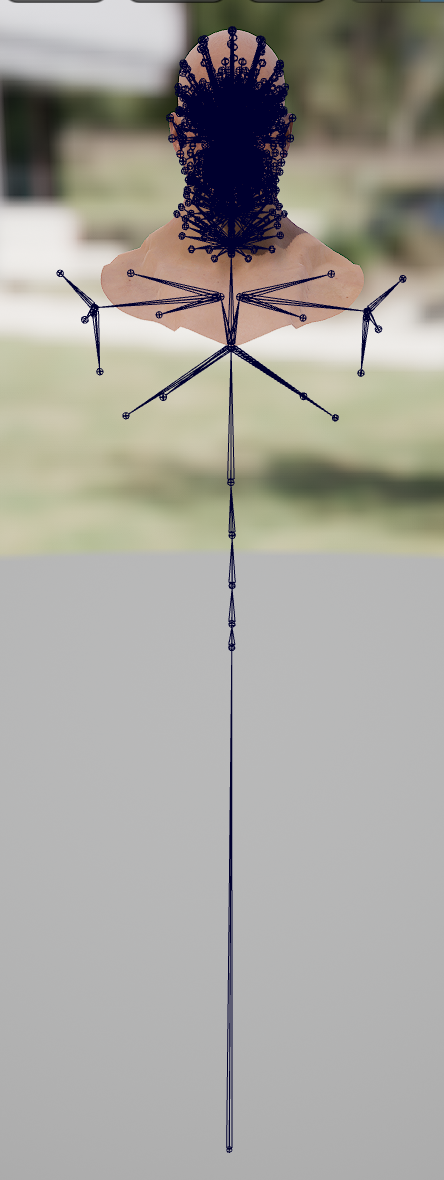
The face skeleton has the spine bones (which will follow the body’s motion) but there is a massive amount of bones for just the face. This separation of meshes allows us to have specific skeletons for certain body parts and separate settings for different meshes.
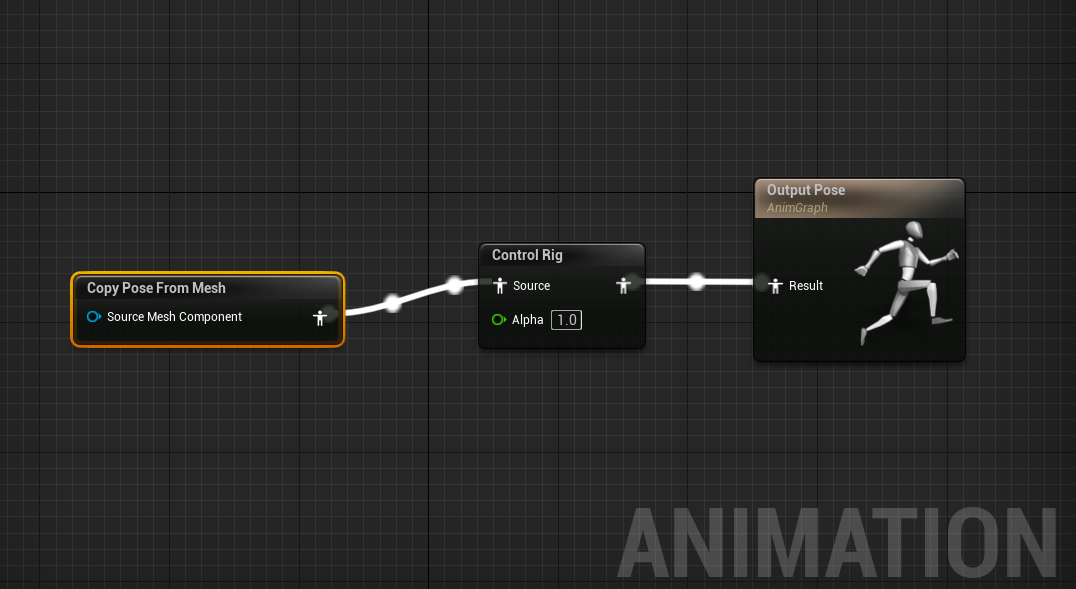
If you examine the AnimGraph for the child elements in a Metahuman, you’ll find a ‘Copy Pose from Mesh’ in there somewhere. If ‘Use Attached Parent’ is checked in the Details panel, it will copy the movement from its parent skeleton in the Blueprint. This is how the skeletons know how to follow the body.
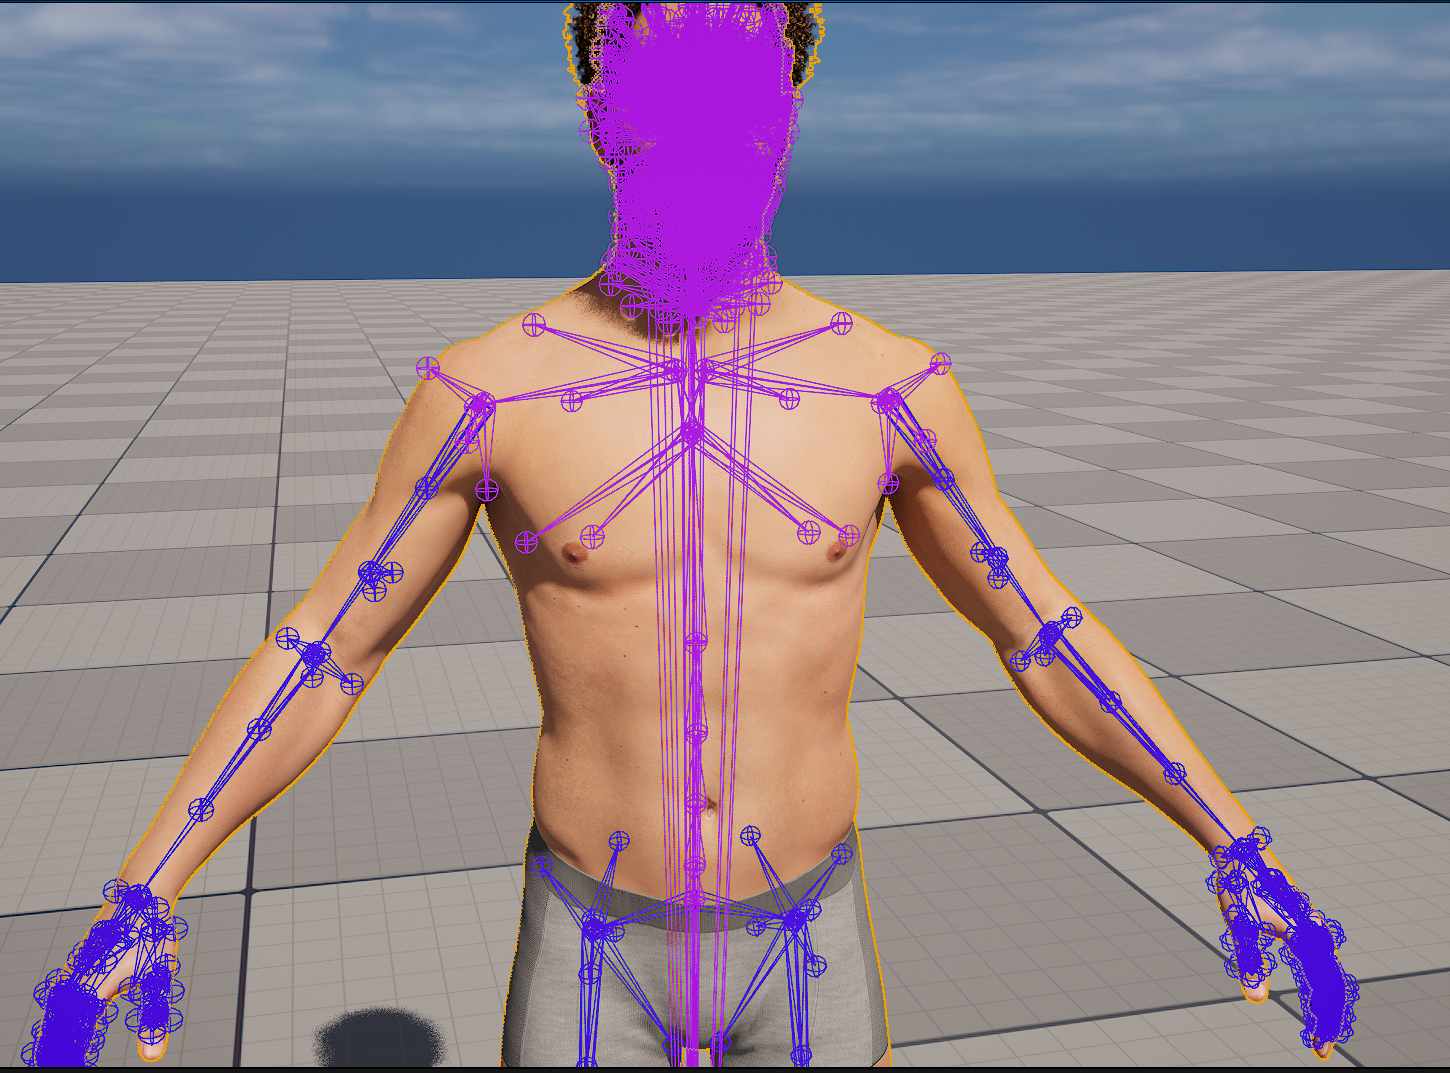
If you use the command ‘ShowFlag.Bones 1’ in the console, then you can see the bones of the Metahumans in the scene. Note the different colors for the different skeletons.
Here are the steps I used to combine the different meshes into one Metahuman.
Duplicate and rename the existing Metahuman Blueprint.
Switch the body with Twinblast’s body from Houdini.
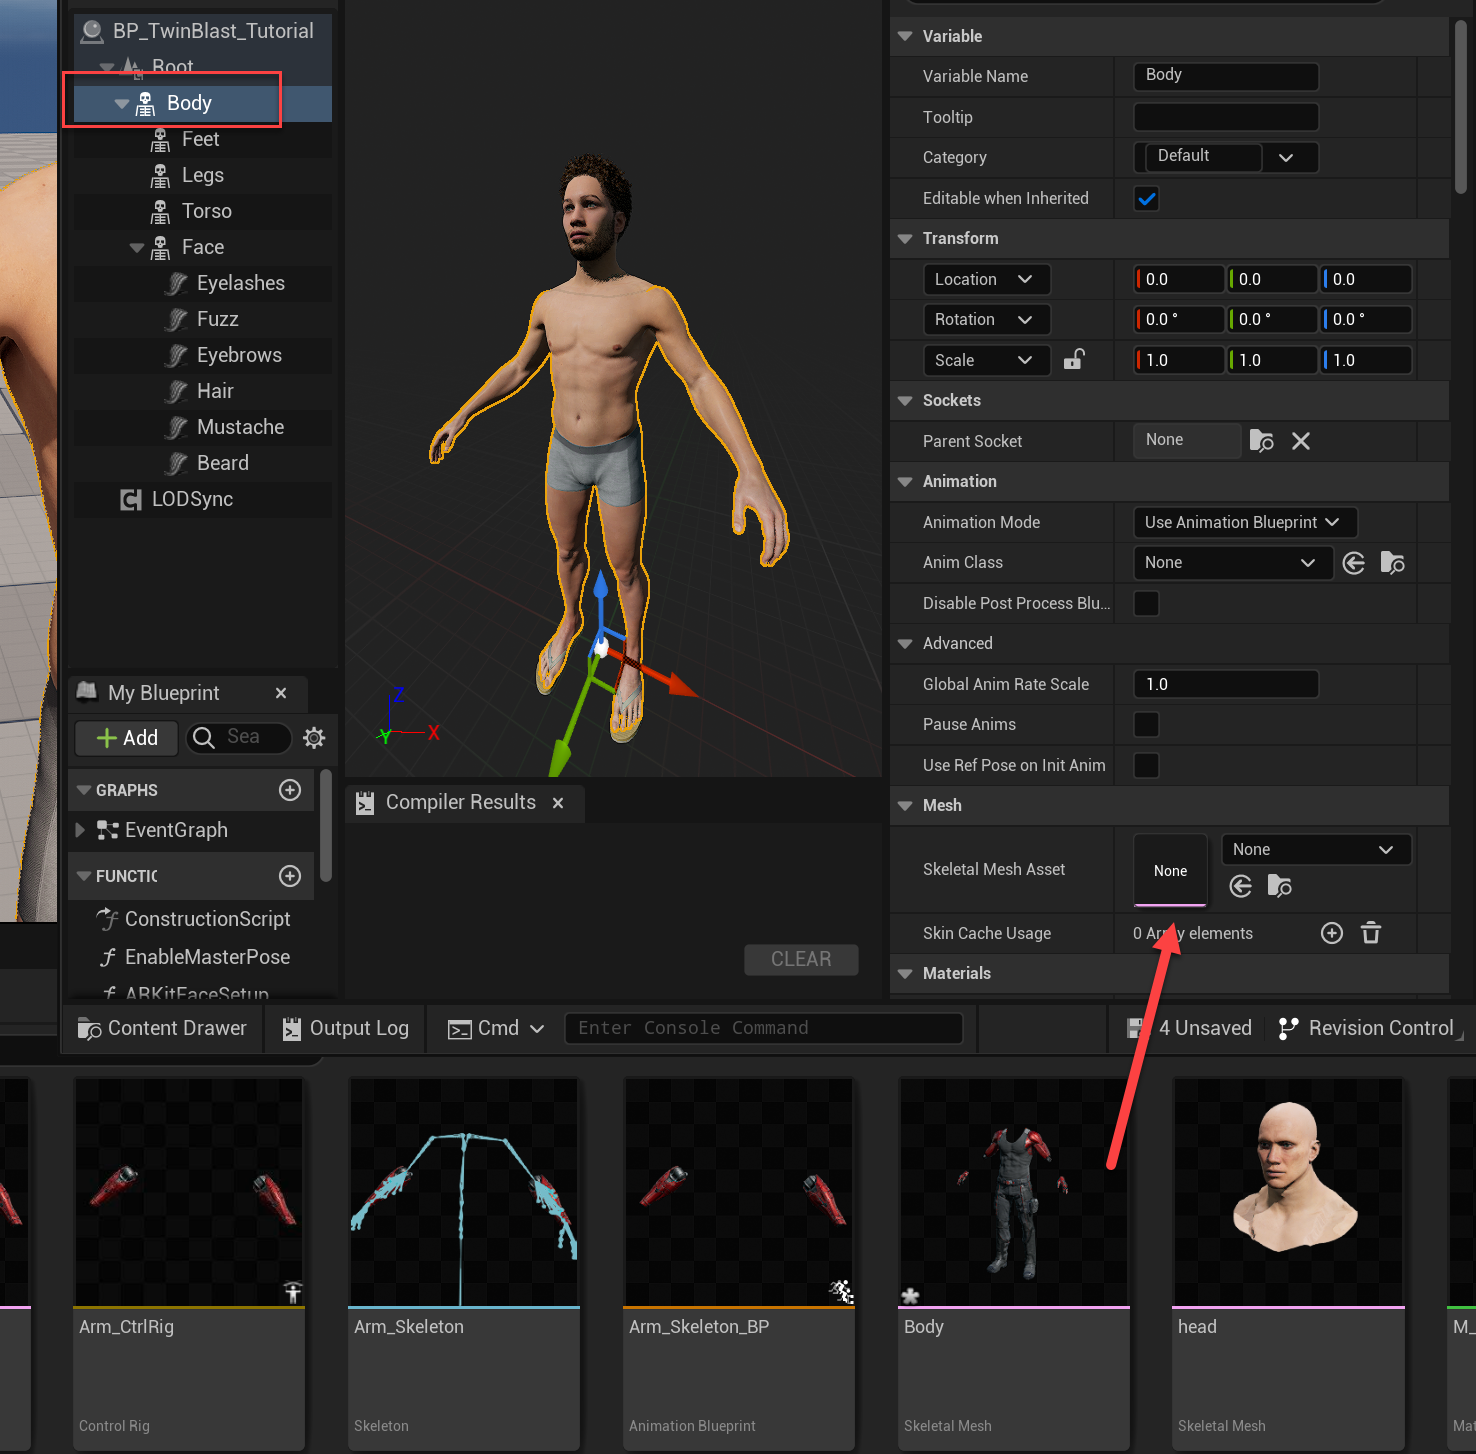
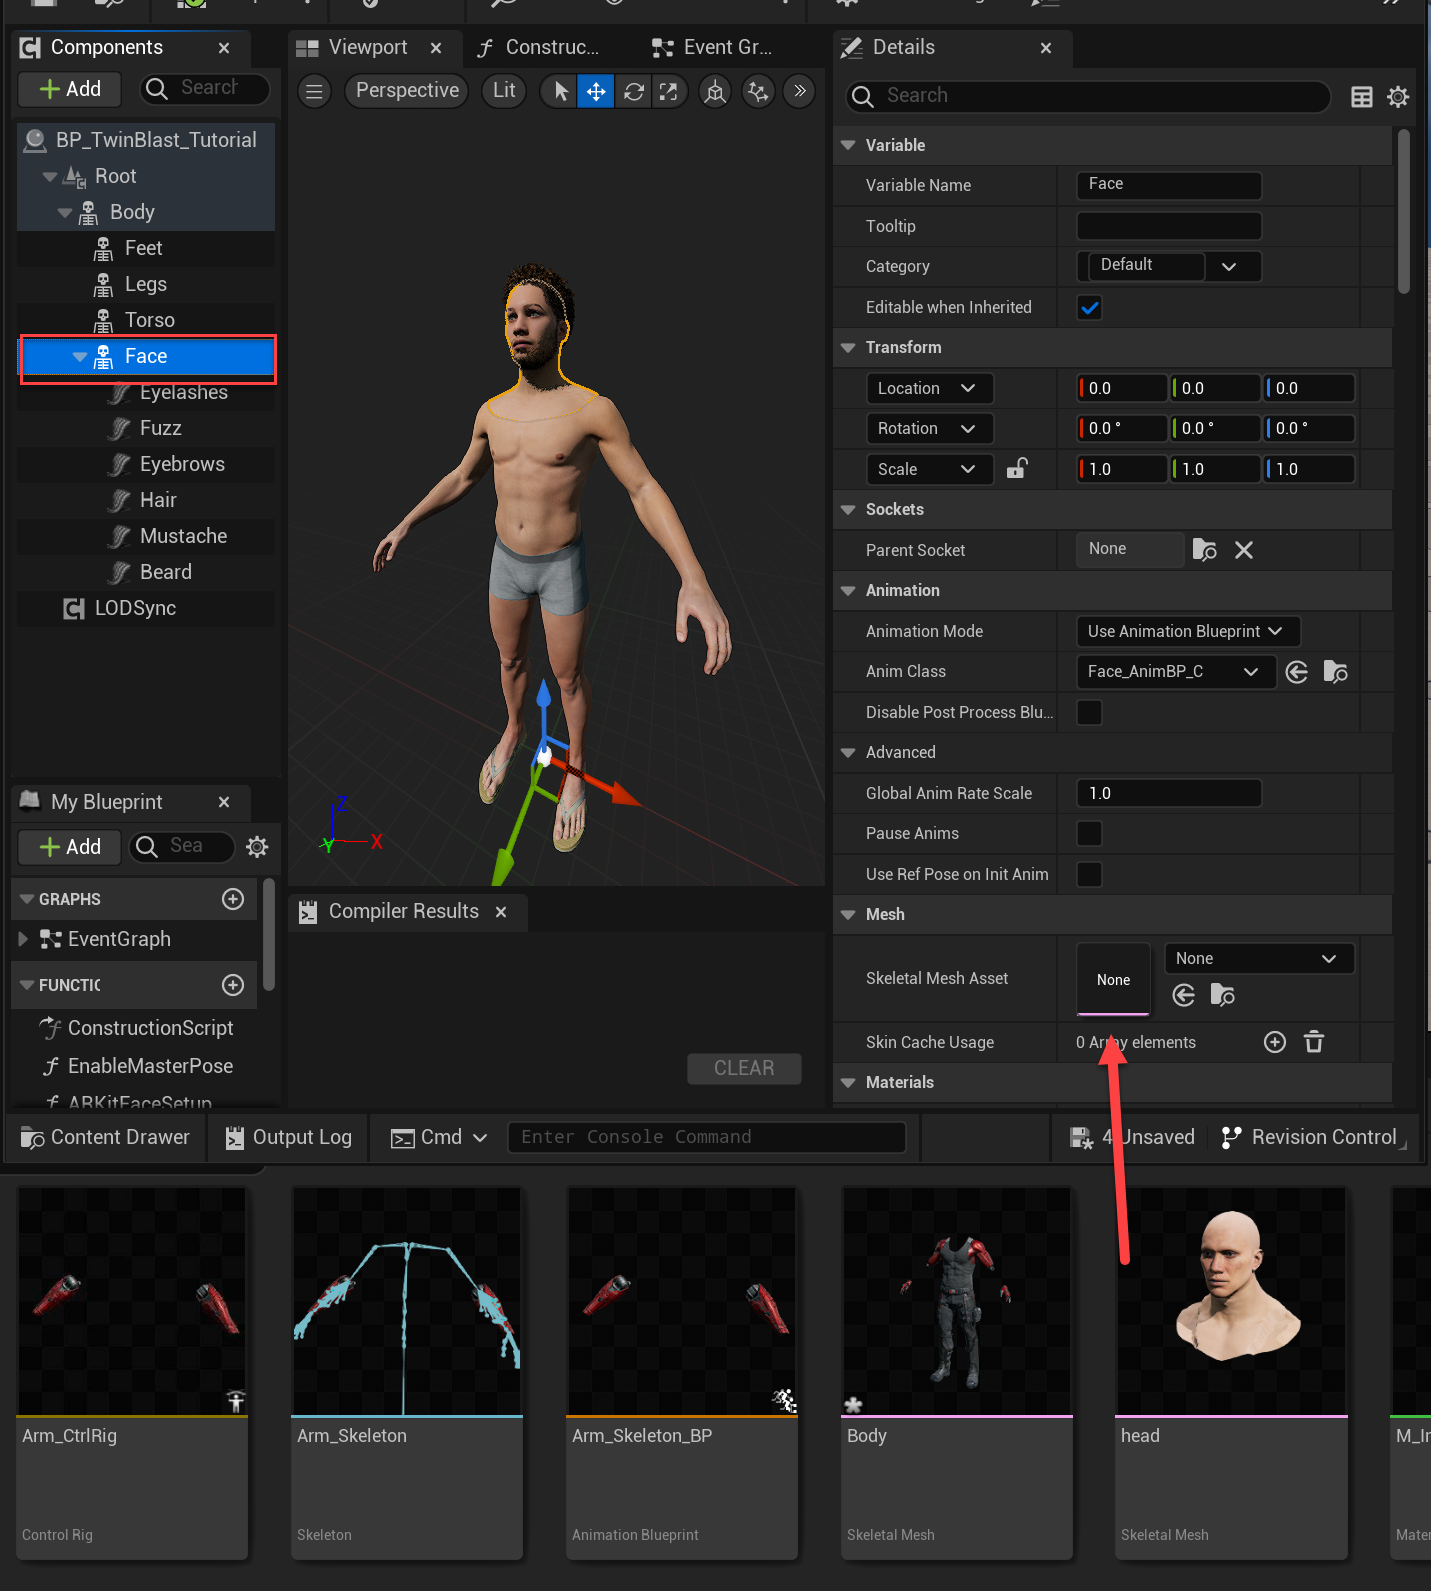
Compile and Save, then close and reopen the Metahuman Blueprint (tor some reason, the Blueprint viewport doesn’t refresh; it only seems to refresh when you close and reopen the Blueprint. Maybe a 5.2 bug?)
I replaced the groom bindings with the ones I made earlier.
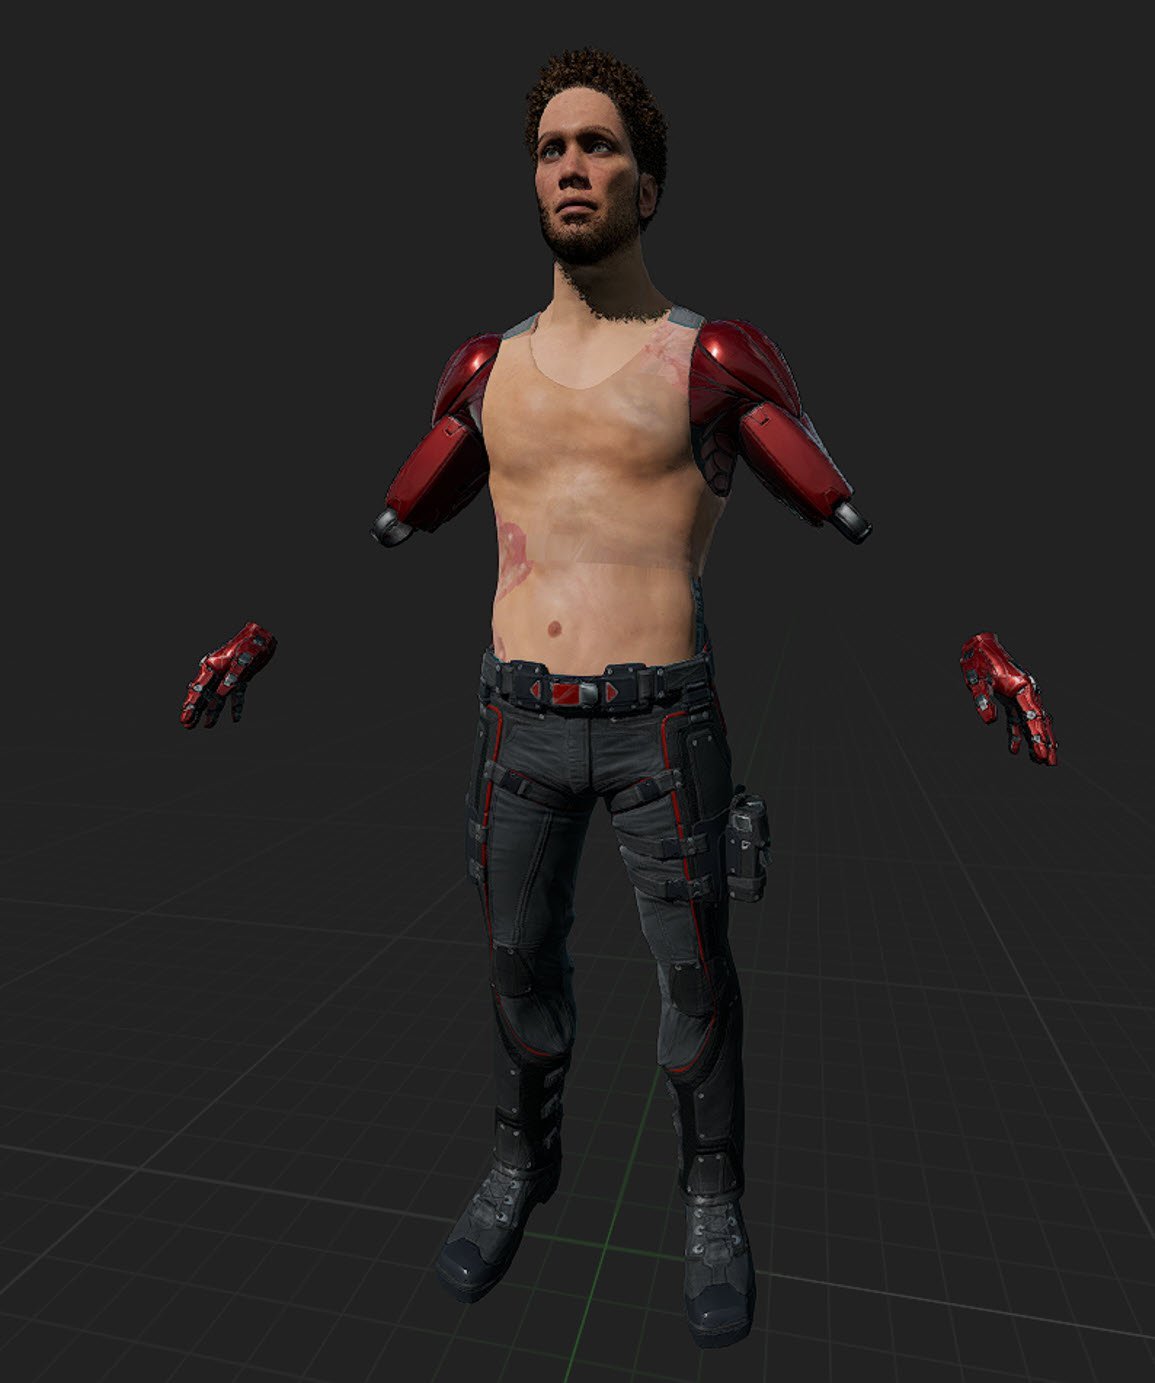
I deleted the skeletal meshes that I didn’t use such as Torso and Legs. I switched the mesh for the feet with the Forearms. Compile, save, then close and reopen the Blueprint to see the result.
We should have something that looks like this (I turned off the grooms temporarily). I need to replace the forearm’s material.
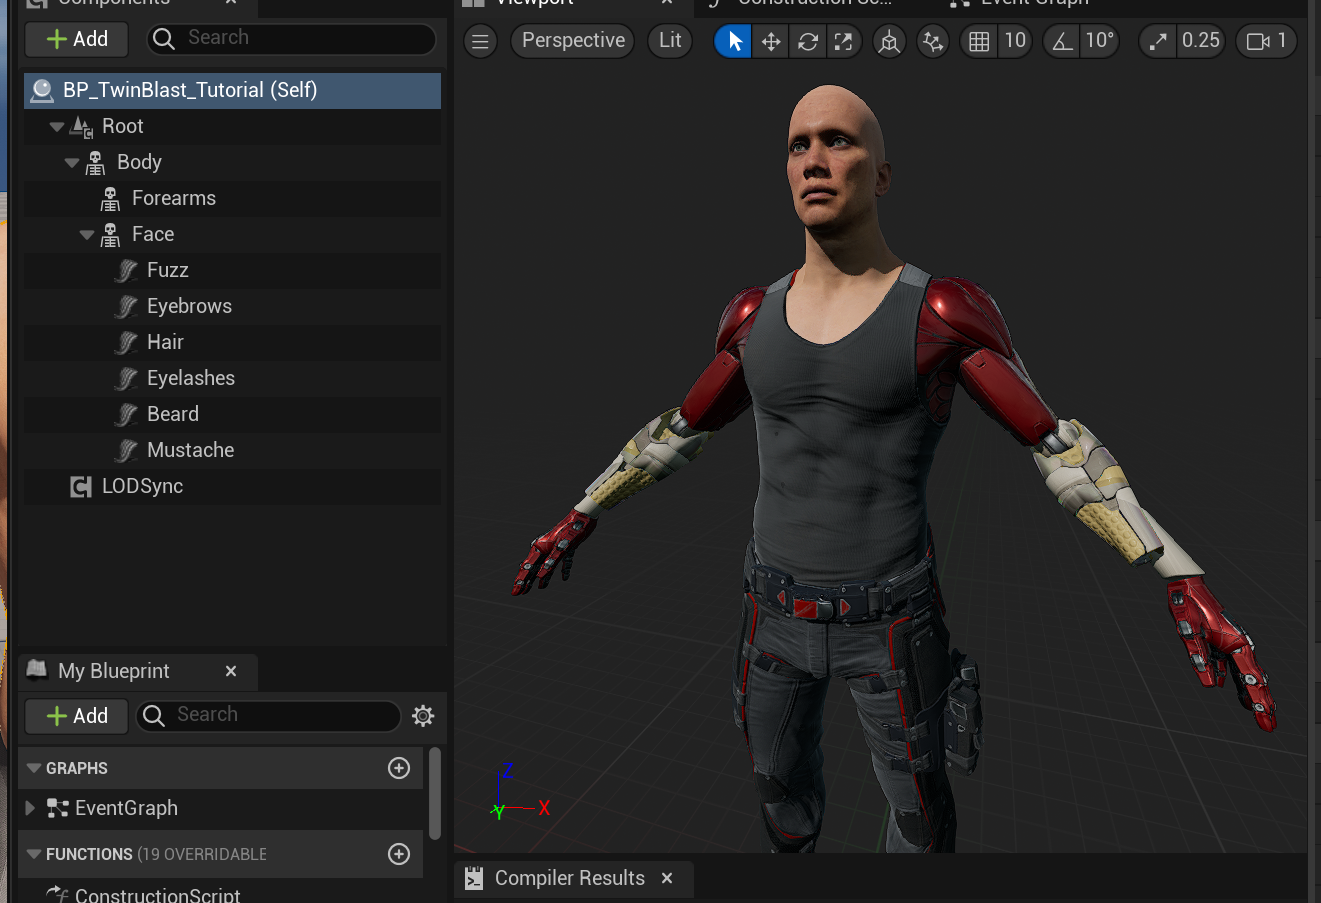
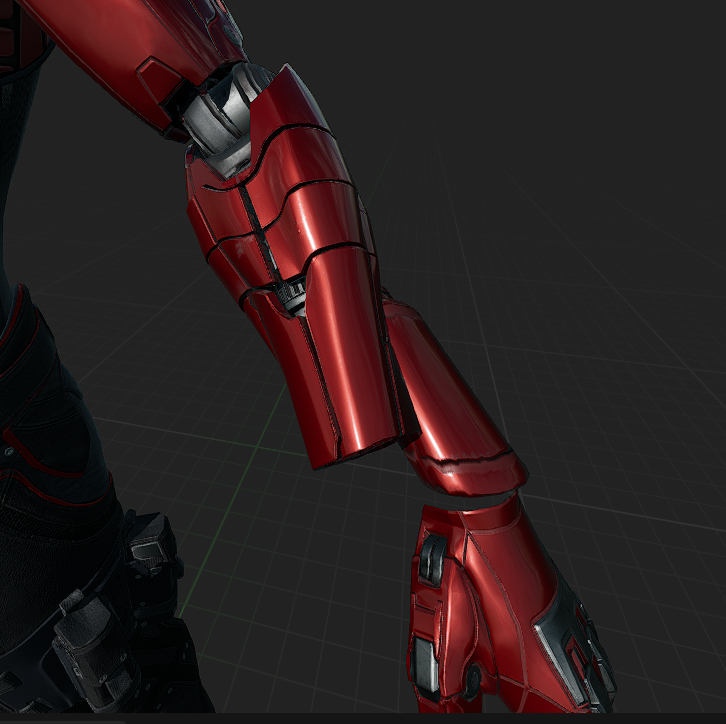
For some reason, the forearms are not in the correct position.
It’s not a huge deal; when we make the rig to control the animation it snaps back into place. However, I would love to know why the position has shifted (on export from Houdini, it’s fine).
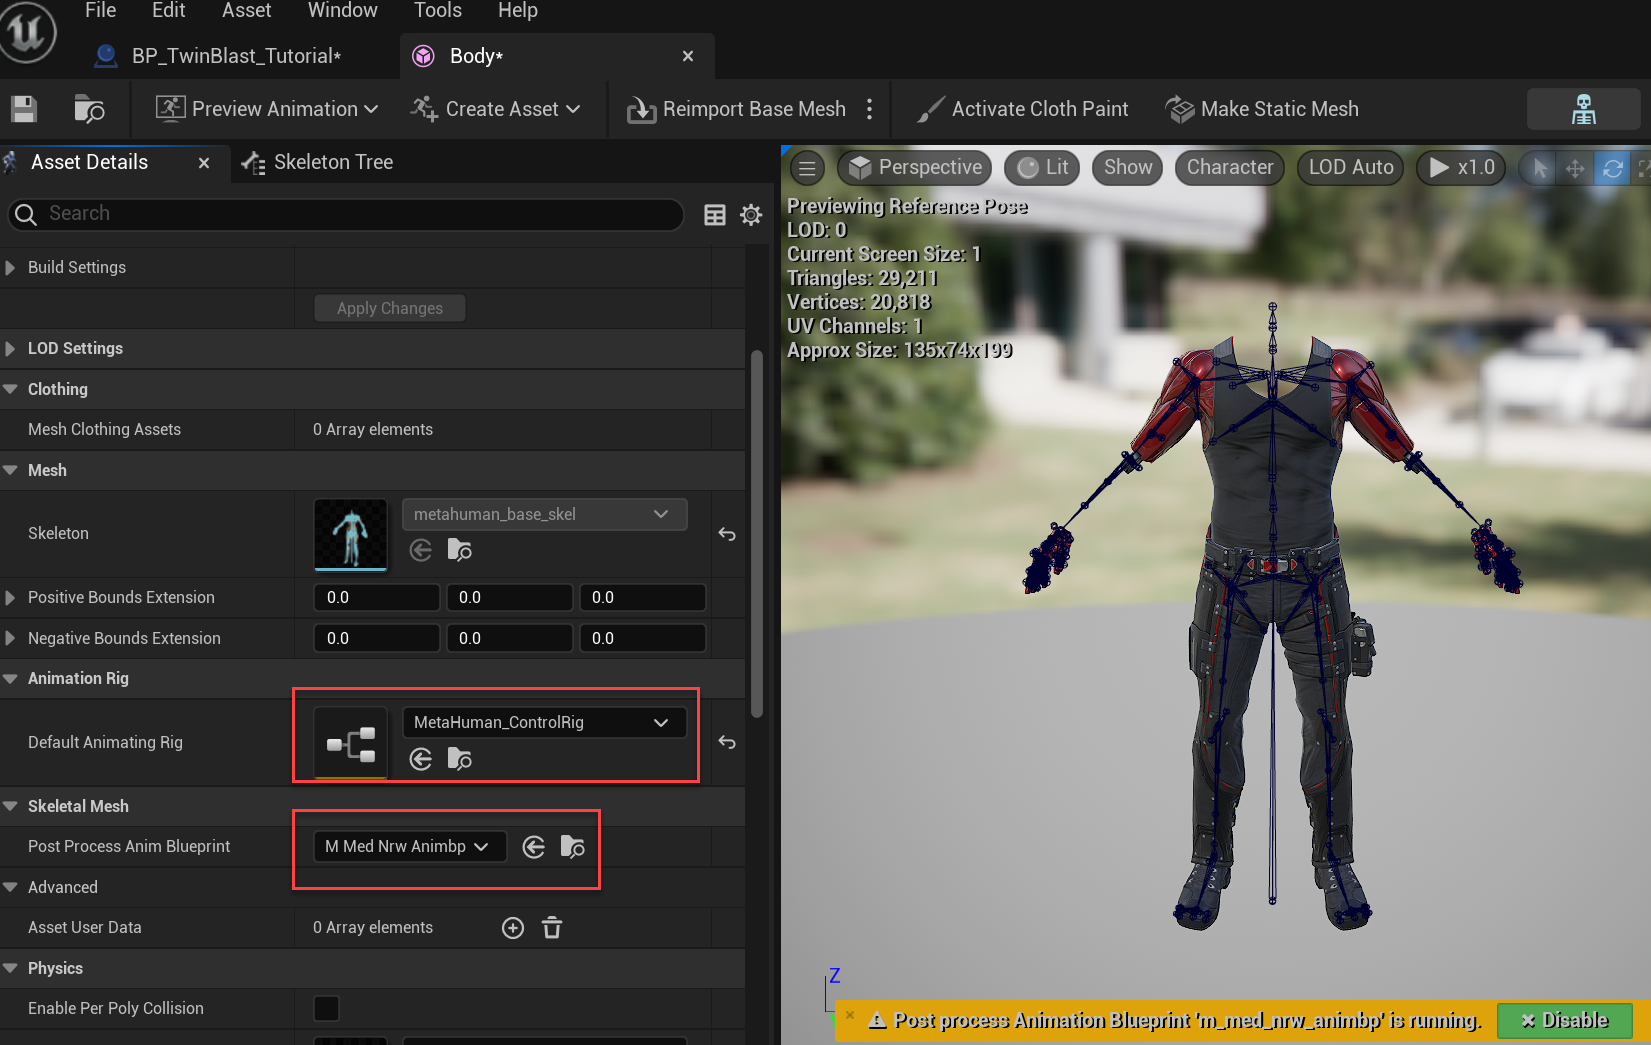
I changed the default rig to use the Metahuman Rig. I attached the Post Process Blueprint to animate the helper bones.
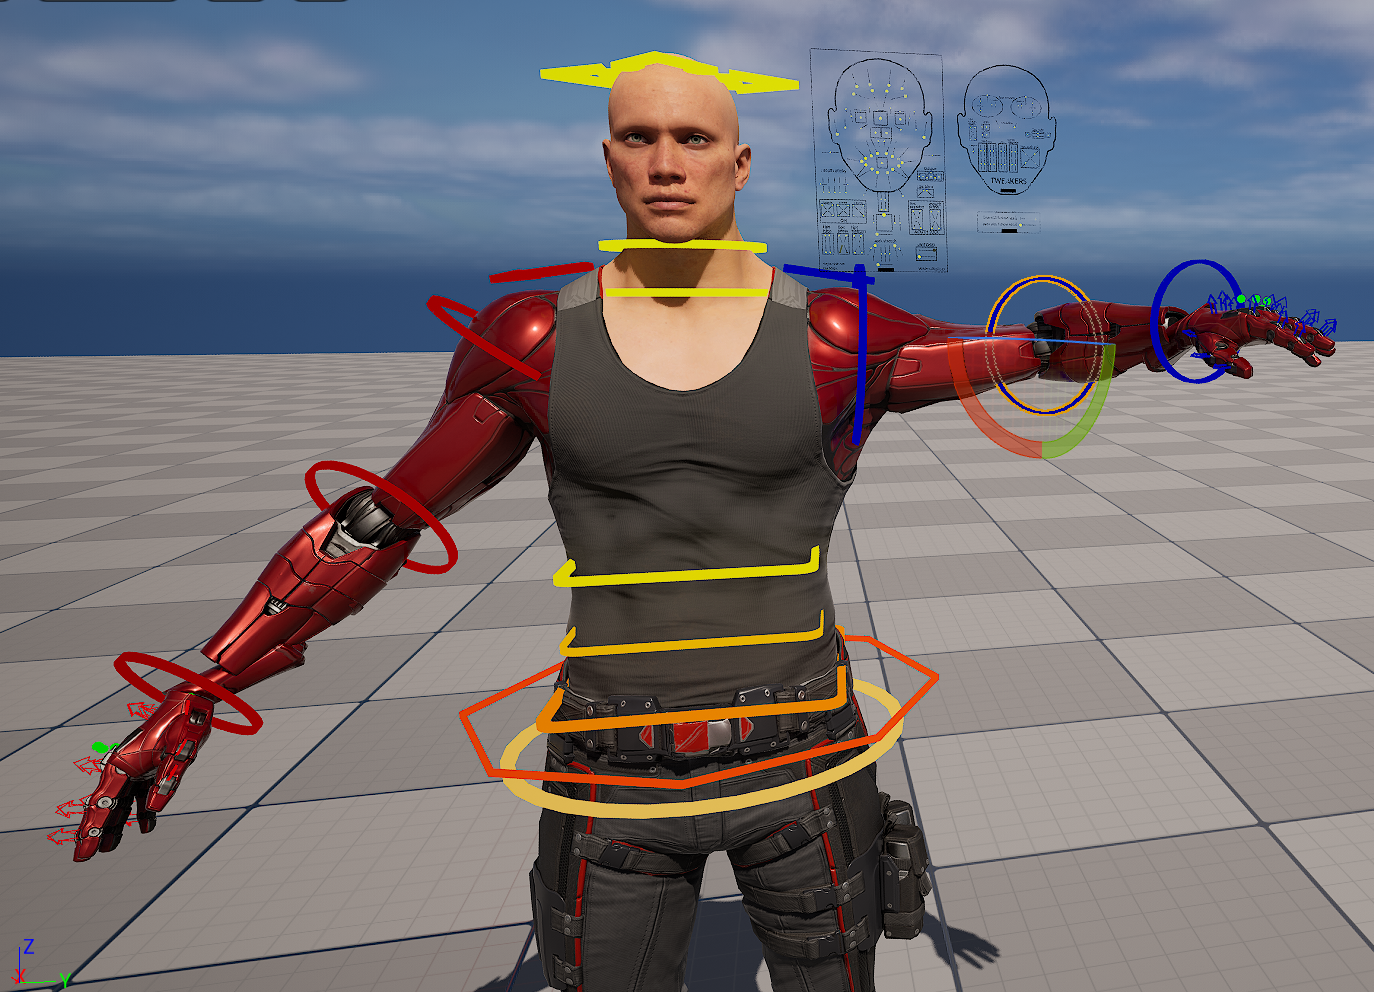

RIGGING THE FOREARMS
Now that everything has been imported into Unreal and placed into the Metahuman Blueprint, the last step is to build a control rig for the forearms to enable the cool forearm plate animation.
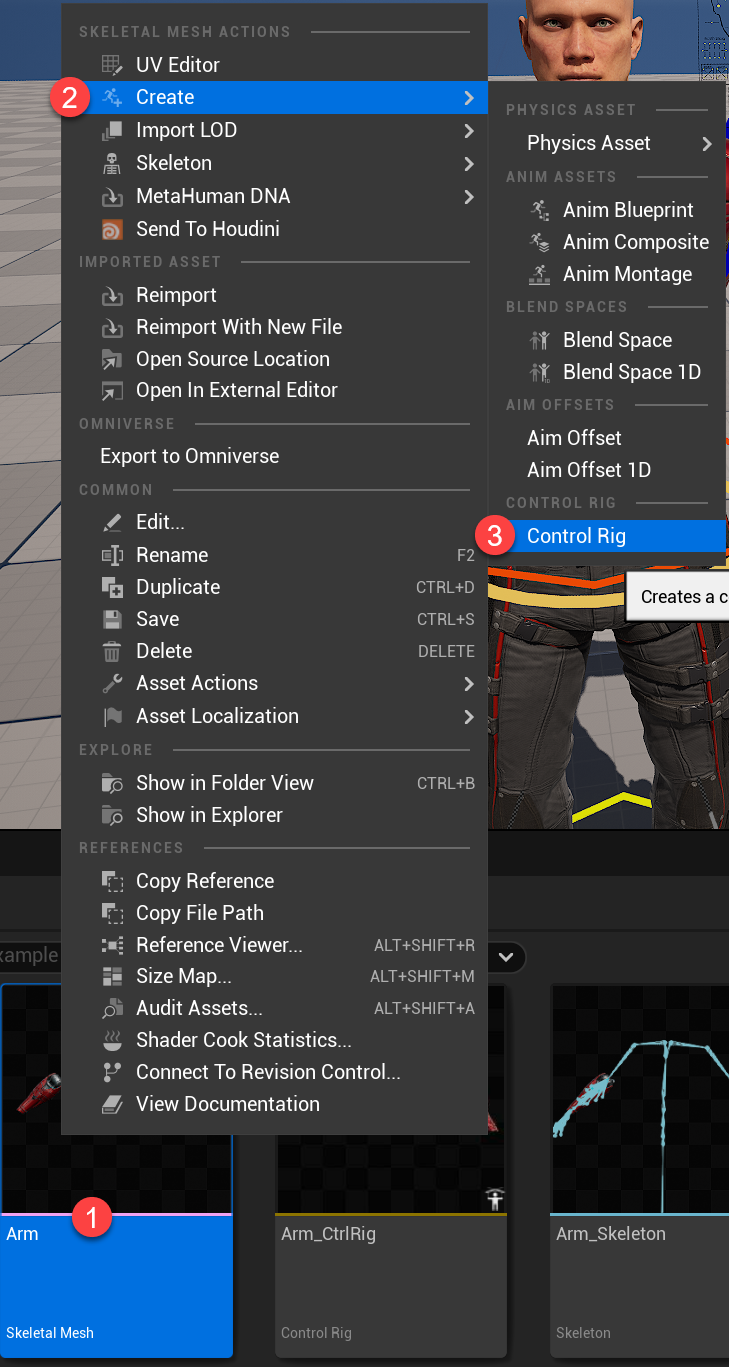
Just to warn you, I’m not a rigger, so this might not be the best approach. In fact, I’m sure there are more efficient ways of doing this; this is just what I know.
Here’s a list of tasks I wanted completed.
- There are two sets of plates: upper and lower. I want to be able to pull them out and rotate them around the arm.
- When we imported the forearms, they were not in the correct position. It would be beneficial if we could adjust the forearm position/rotation in case we need to correct it.
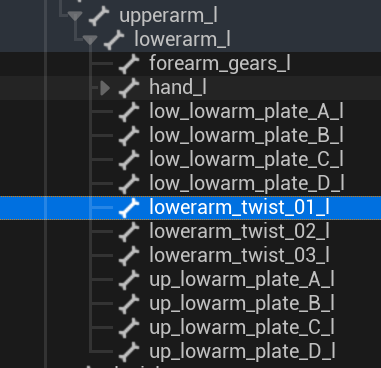
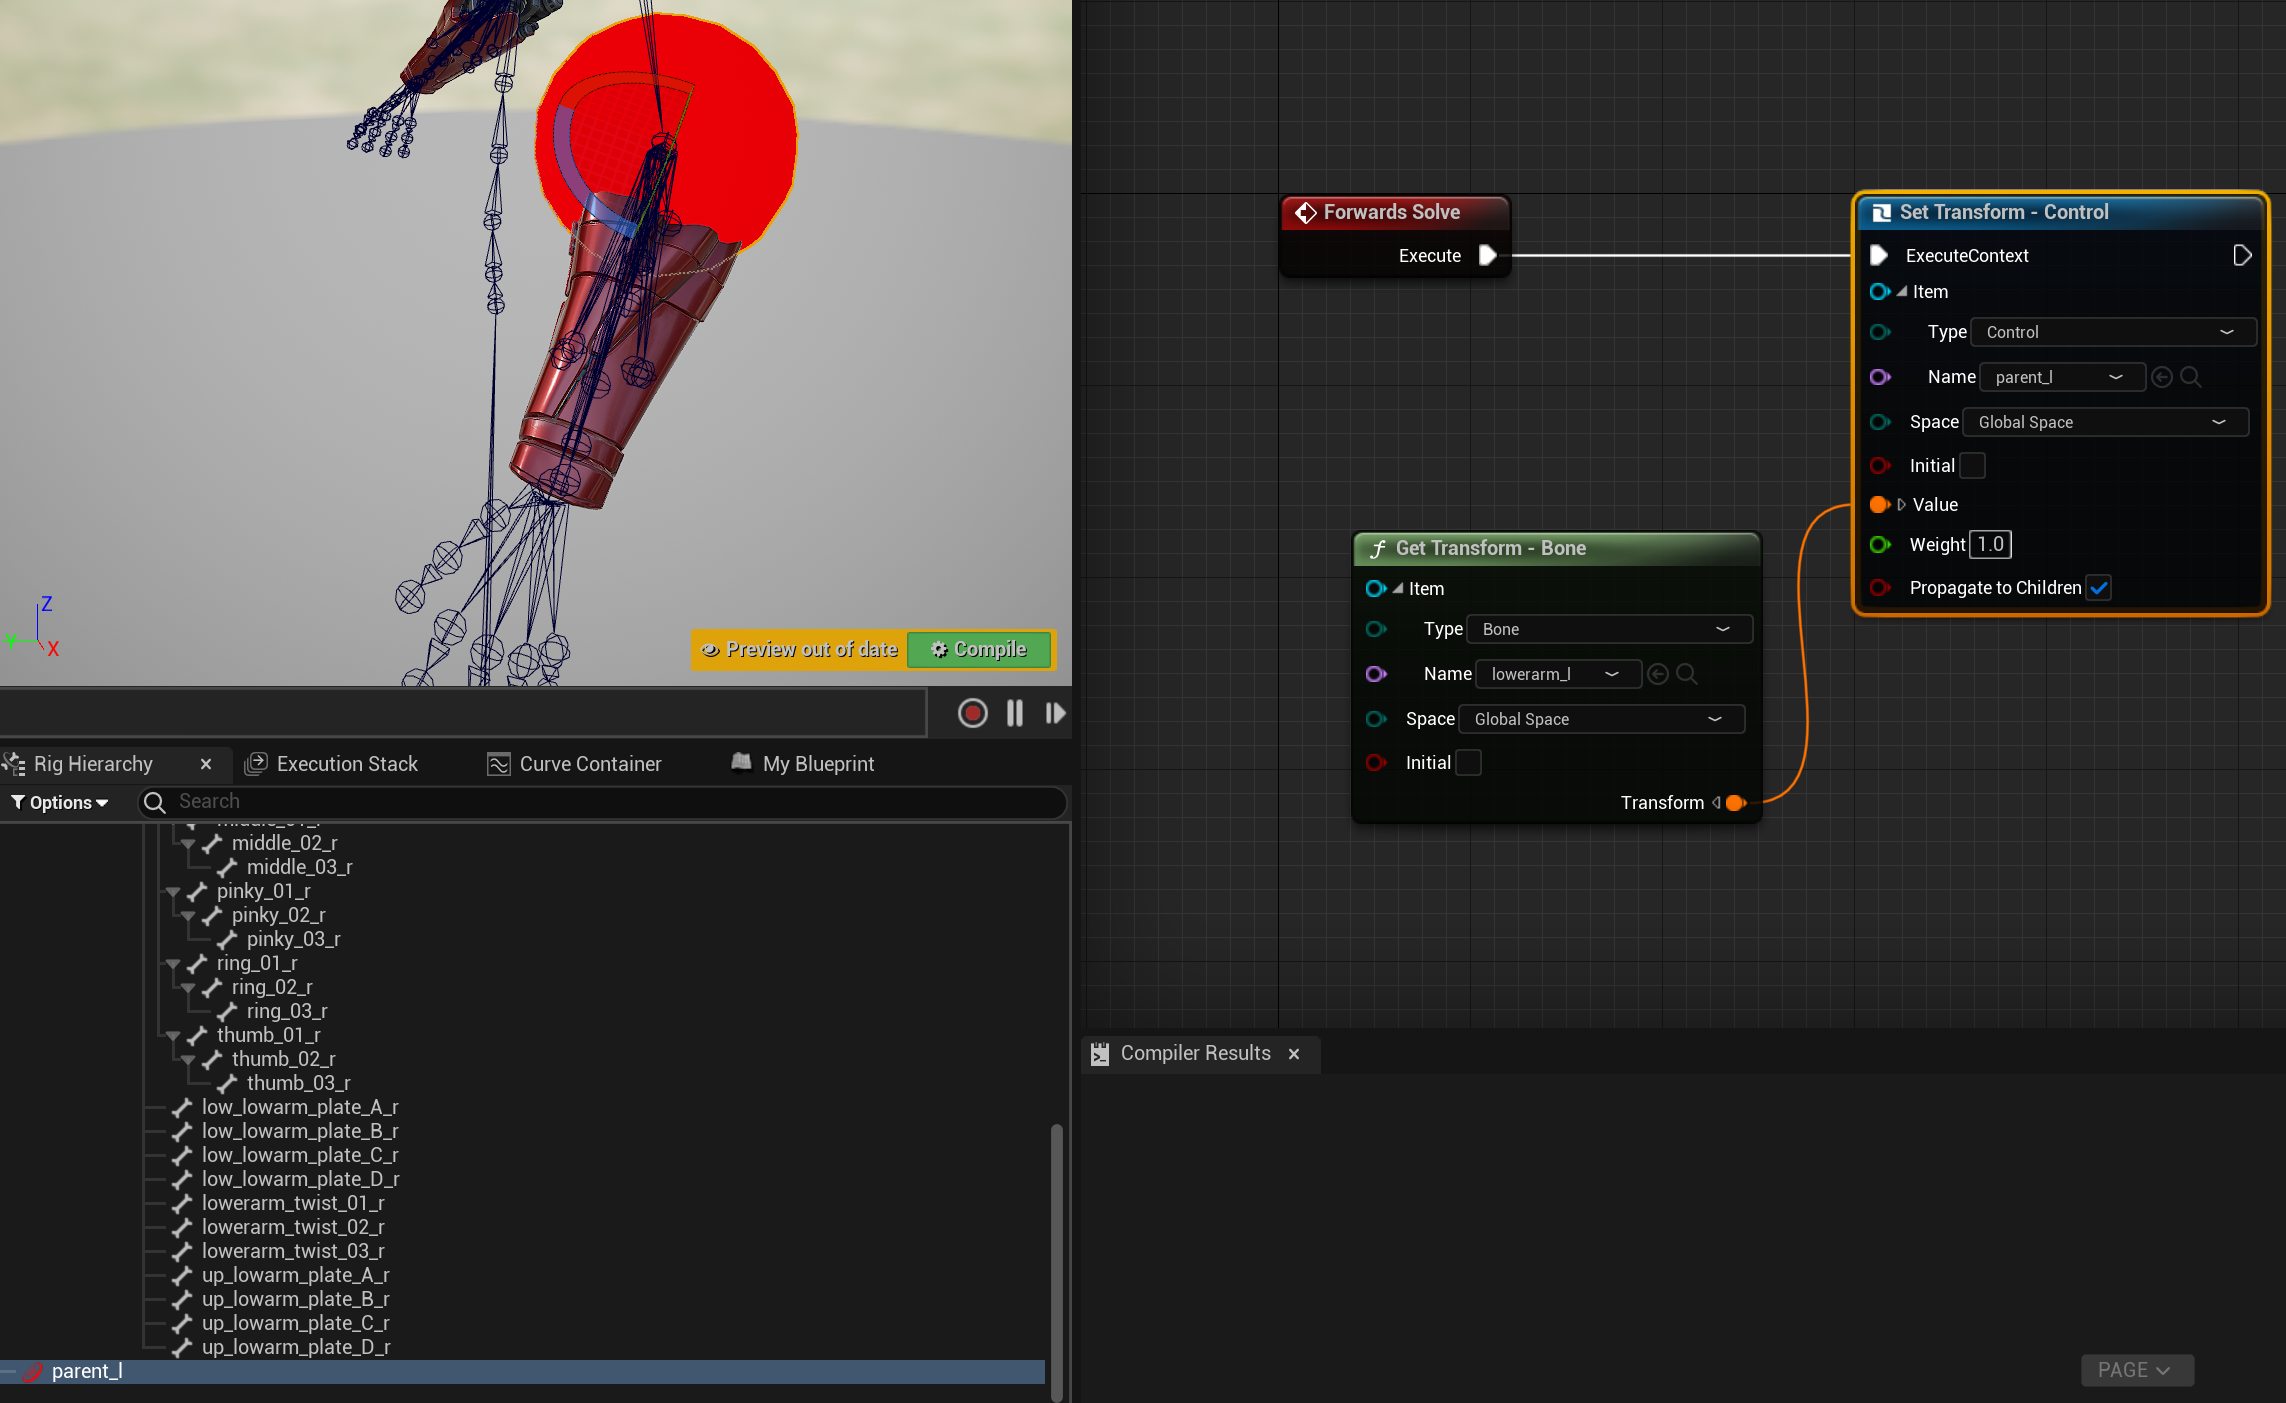
I like having all the controls under a main parent. I’m going to GET the lowerarm_l bone (I assume that this will move along with the Body skeleton) and use that to SET the transform of a control. All my other controls will be under this one, so if the arm moves around, the child controls should move along too.
I’m making the control large just for visualization purposes in this tutorial. I’ll turn off the visibility for this.
You can click the images to enlarge them.
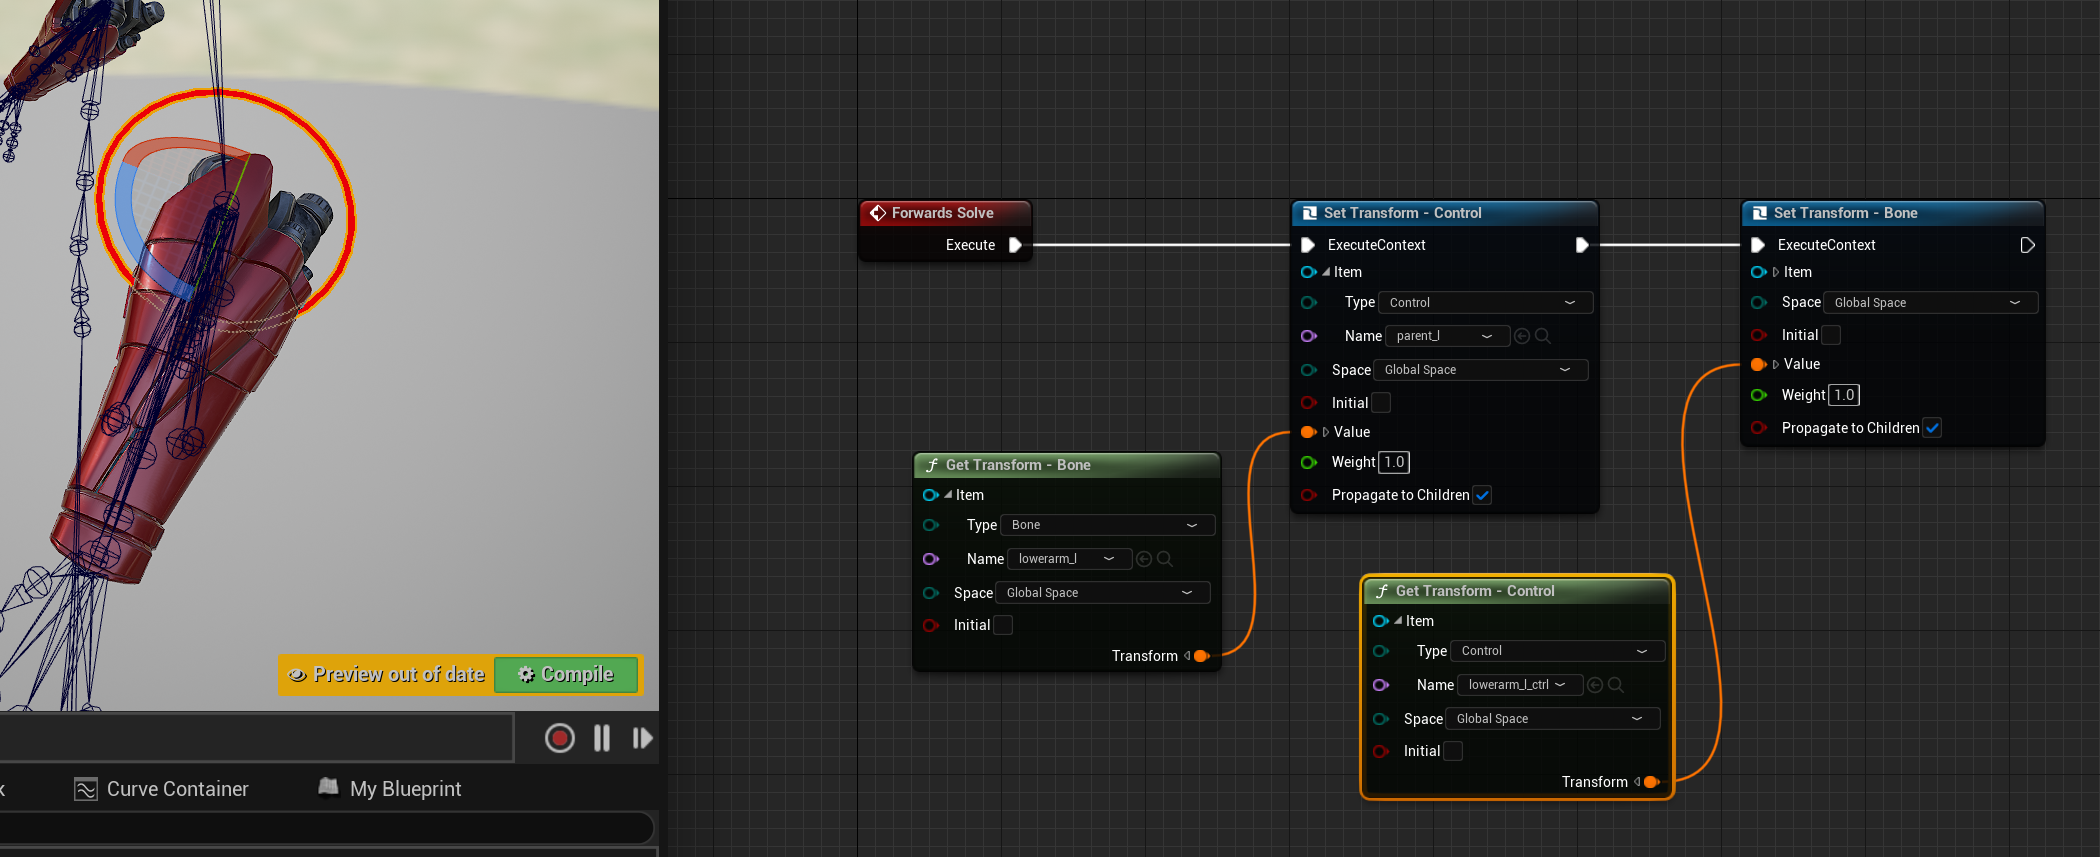
Now, I want to create a control to maneuver the forearm around. This is just in case I need to make adjustments to the entire forearm. I’m going to make a control at the lowerarm_l, then GET that control and use it to Set the lowerarm_l bone. (I may end up hiding this control too.)
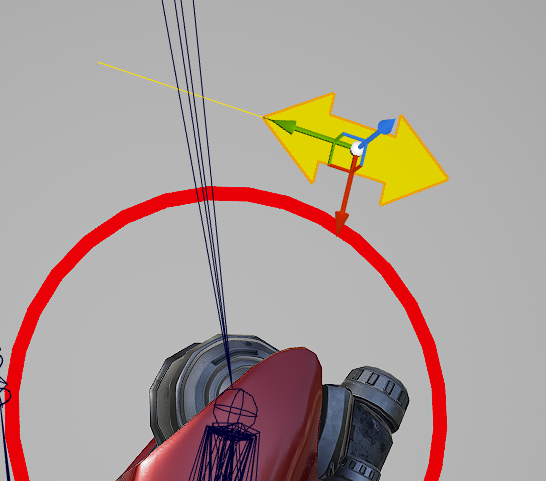
The next step is starting on the upper forearm plates. I made a slider float control.
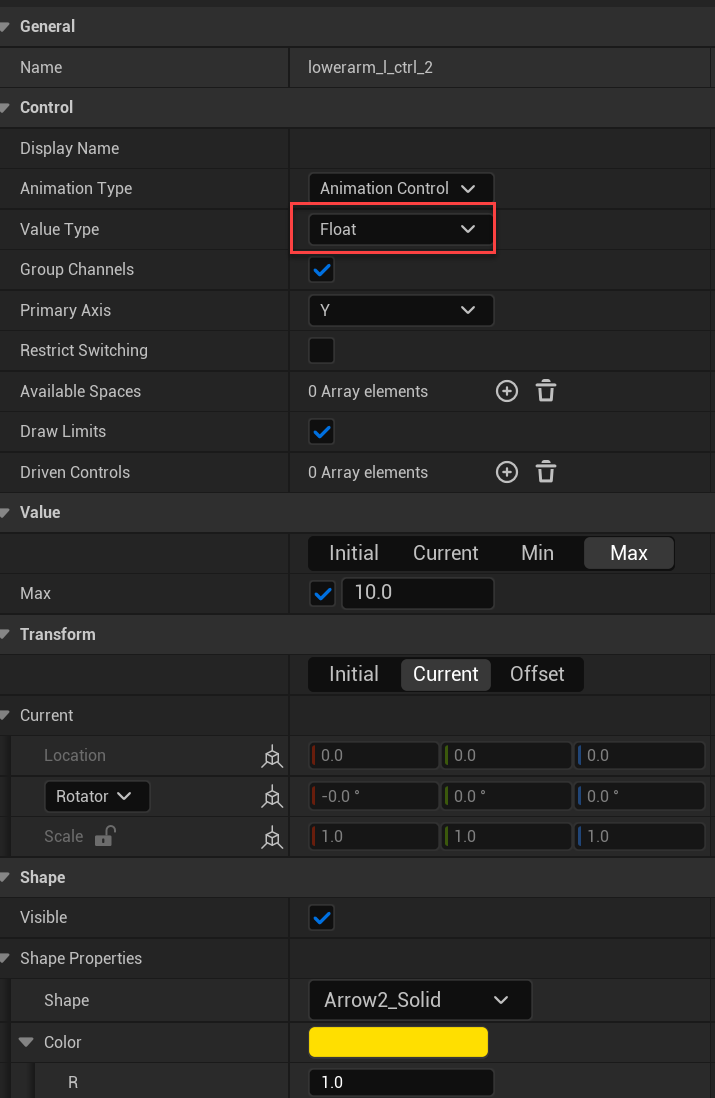
Here, I’m getting the float control, multiplying it by -1 (which will move the plates away from the body instead of towards it), and applying that to the Y position in an Offset Transform node.
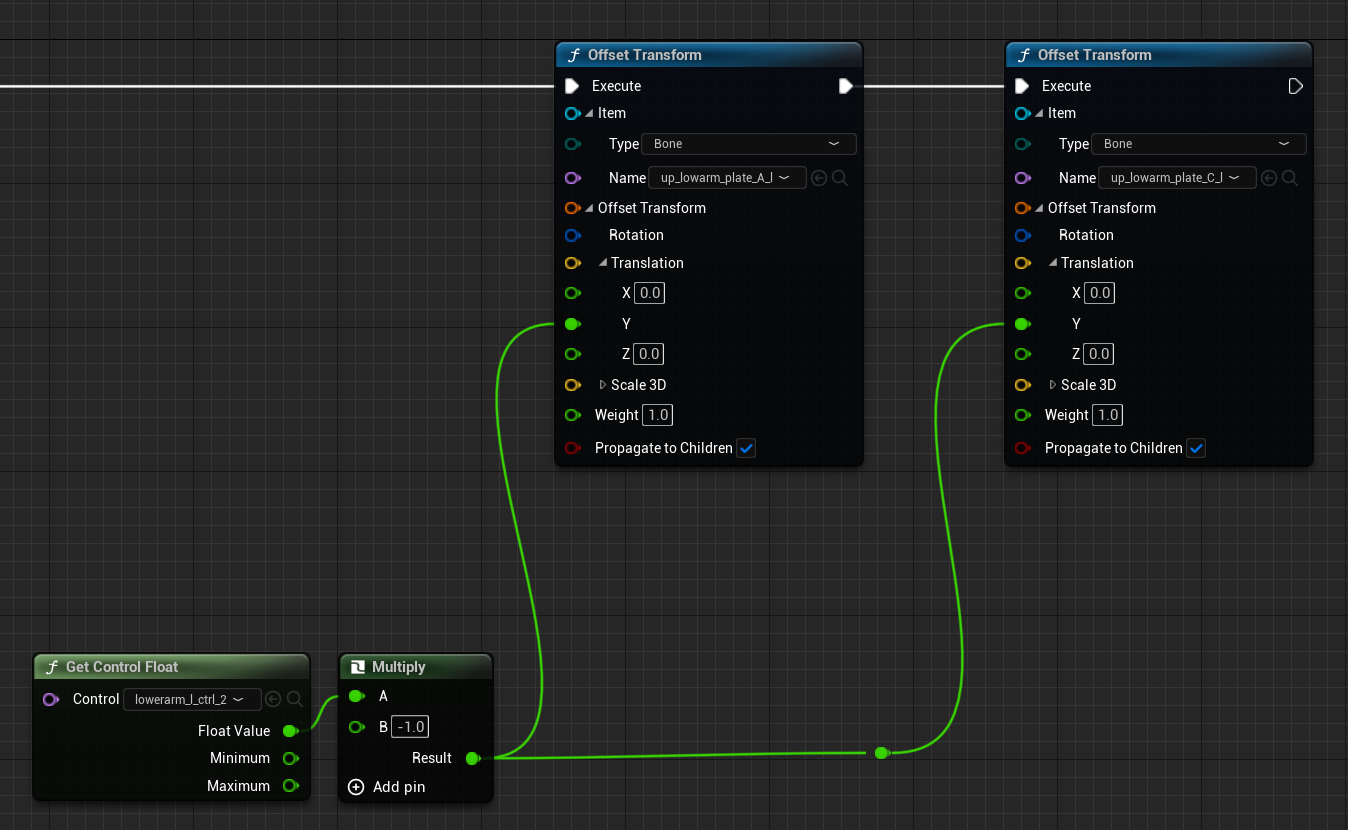
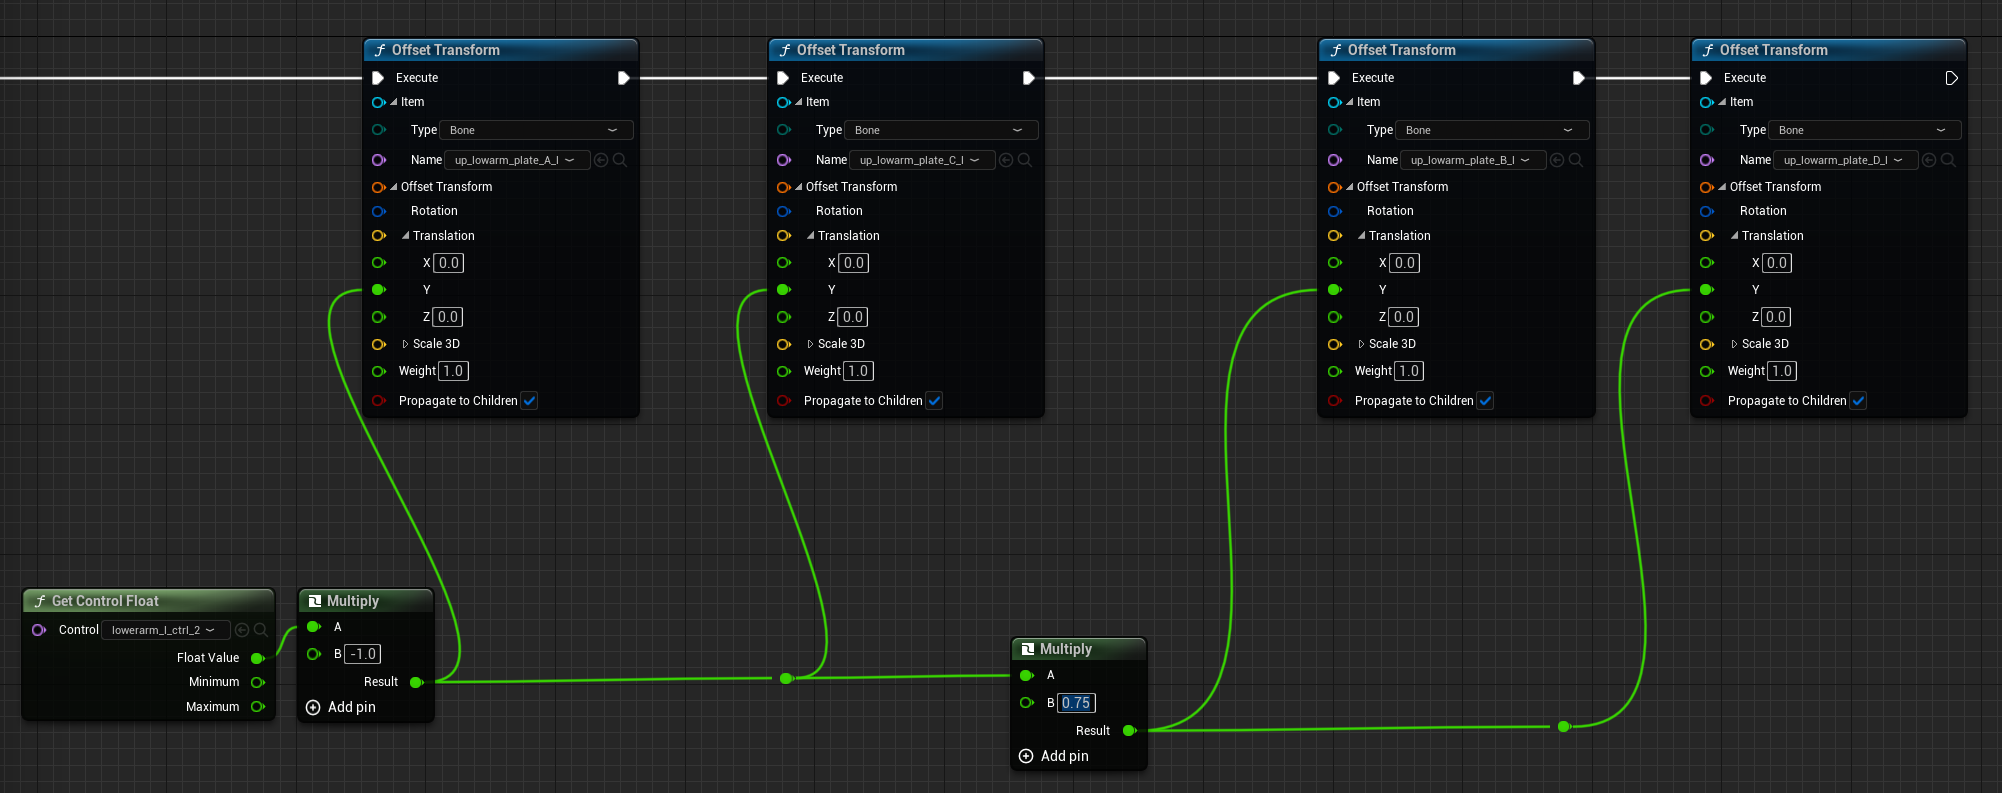
I want the lower plates to move out, but not as much. I’ll multiply the control’s value by 0.75 and apply that to the two plates below.
Then, I added rotation controls for the plate and created another float control.
The value of the control will go into a ‘Evaluate Curve’ node that allows us to remap the 0 to 10 range of the control to any desired range. I’m changing it to go from -50 to 50. Then, that value is fed into a ‘From Euler’ node which converts it into a Quaternion that can be used by the Offset Transform to add rotations to the bones.
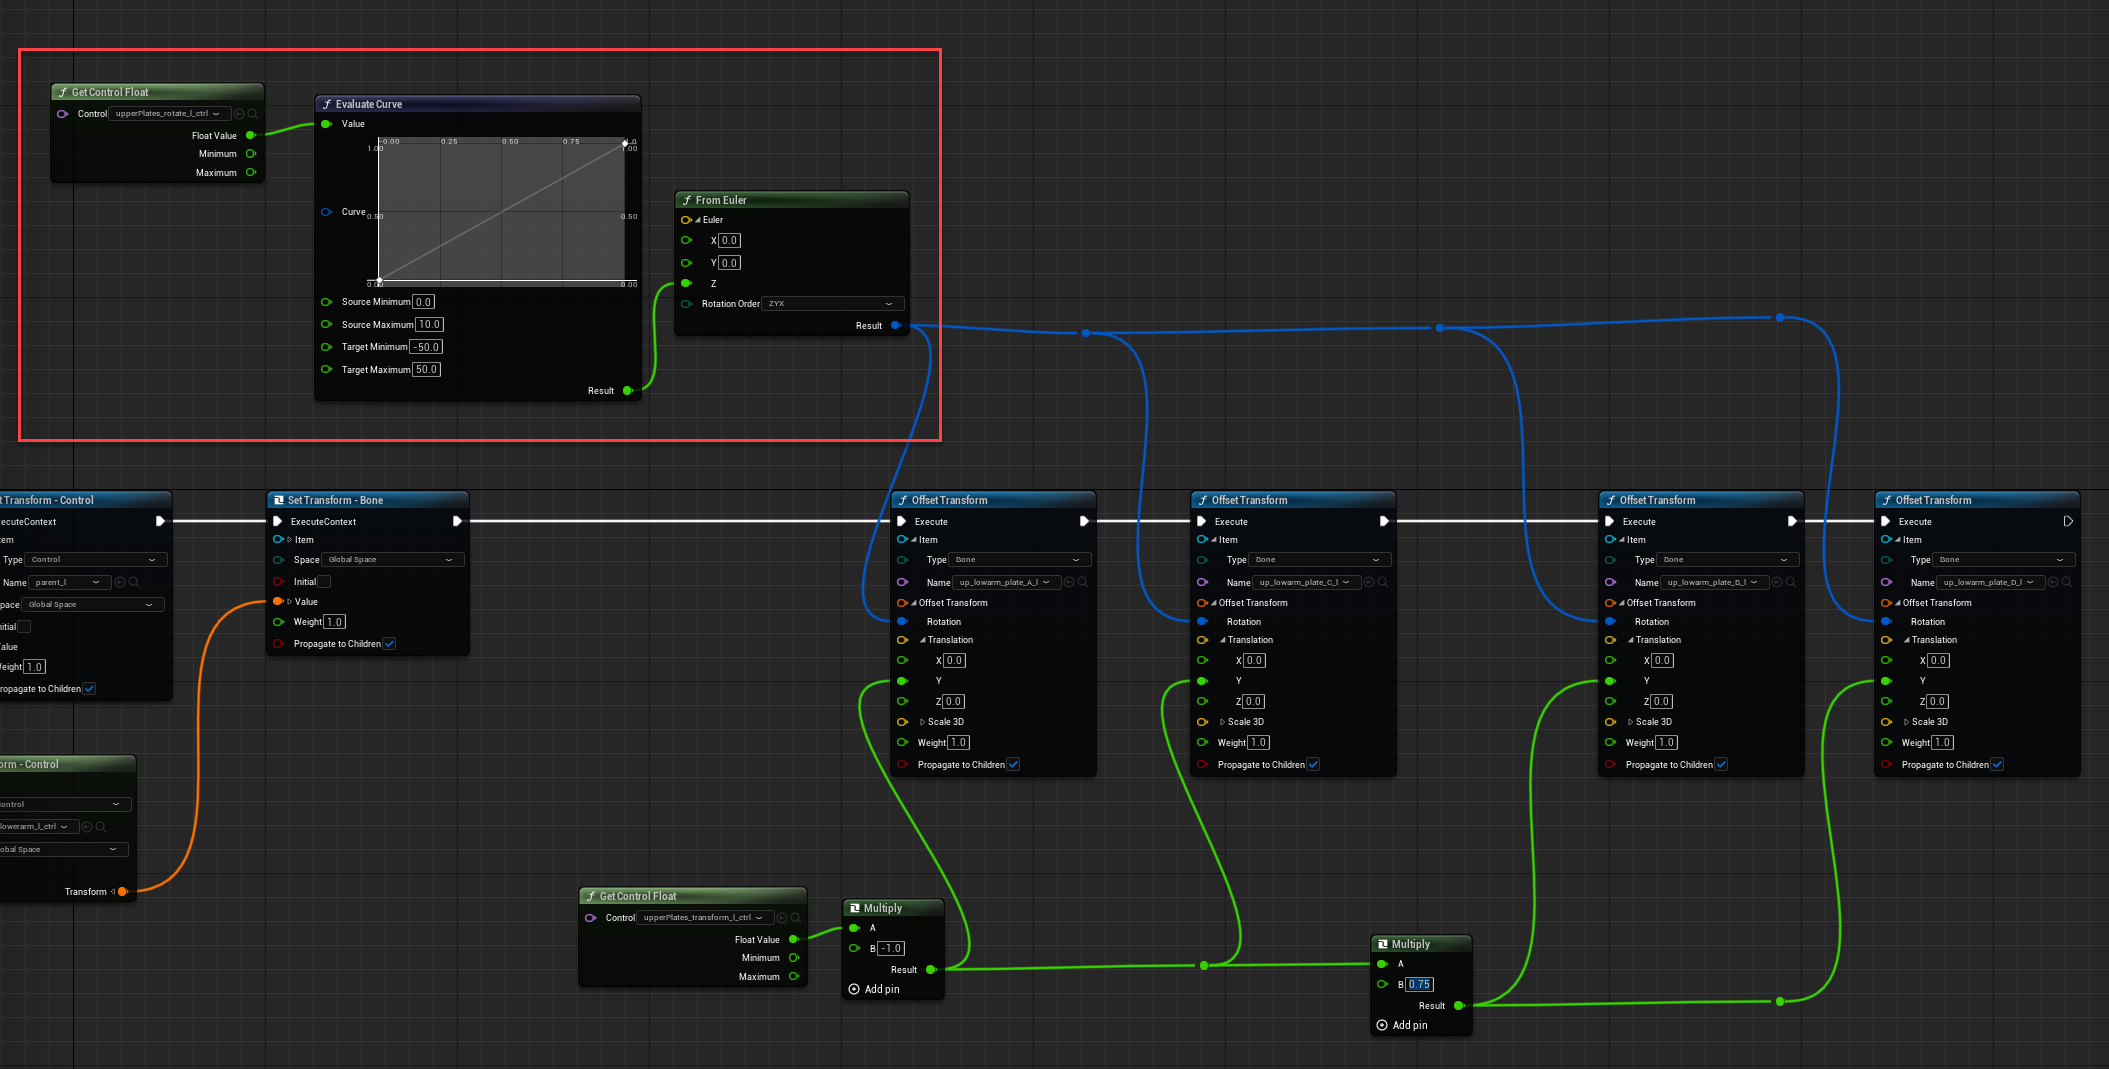
The next step is to add an overall rotation to the plates. While there's likely a better way to do this, the first method that comes to mind is to create controls for the bones before performing all the Offset Transforms. These controls would then be parented under a pivot positioned in the middle of the bone (the twist bones are well-positioned for this task).
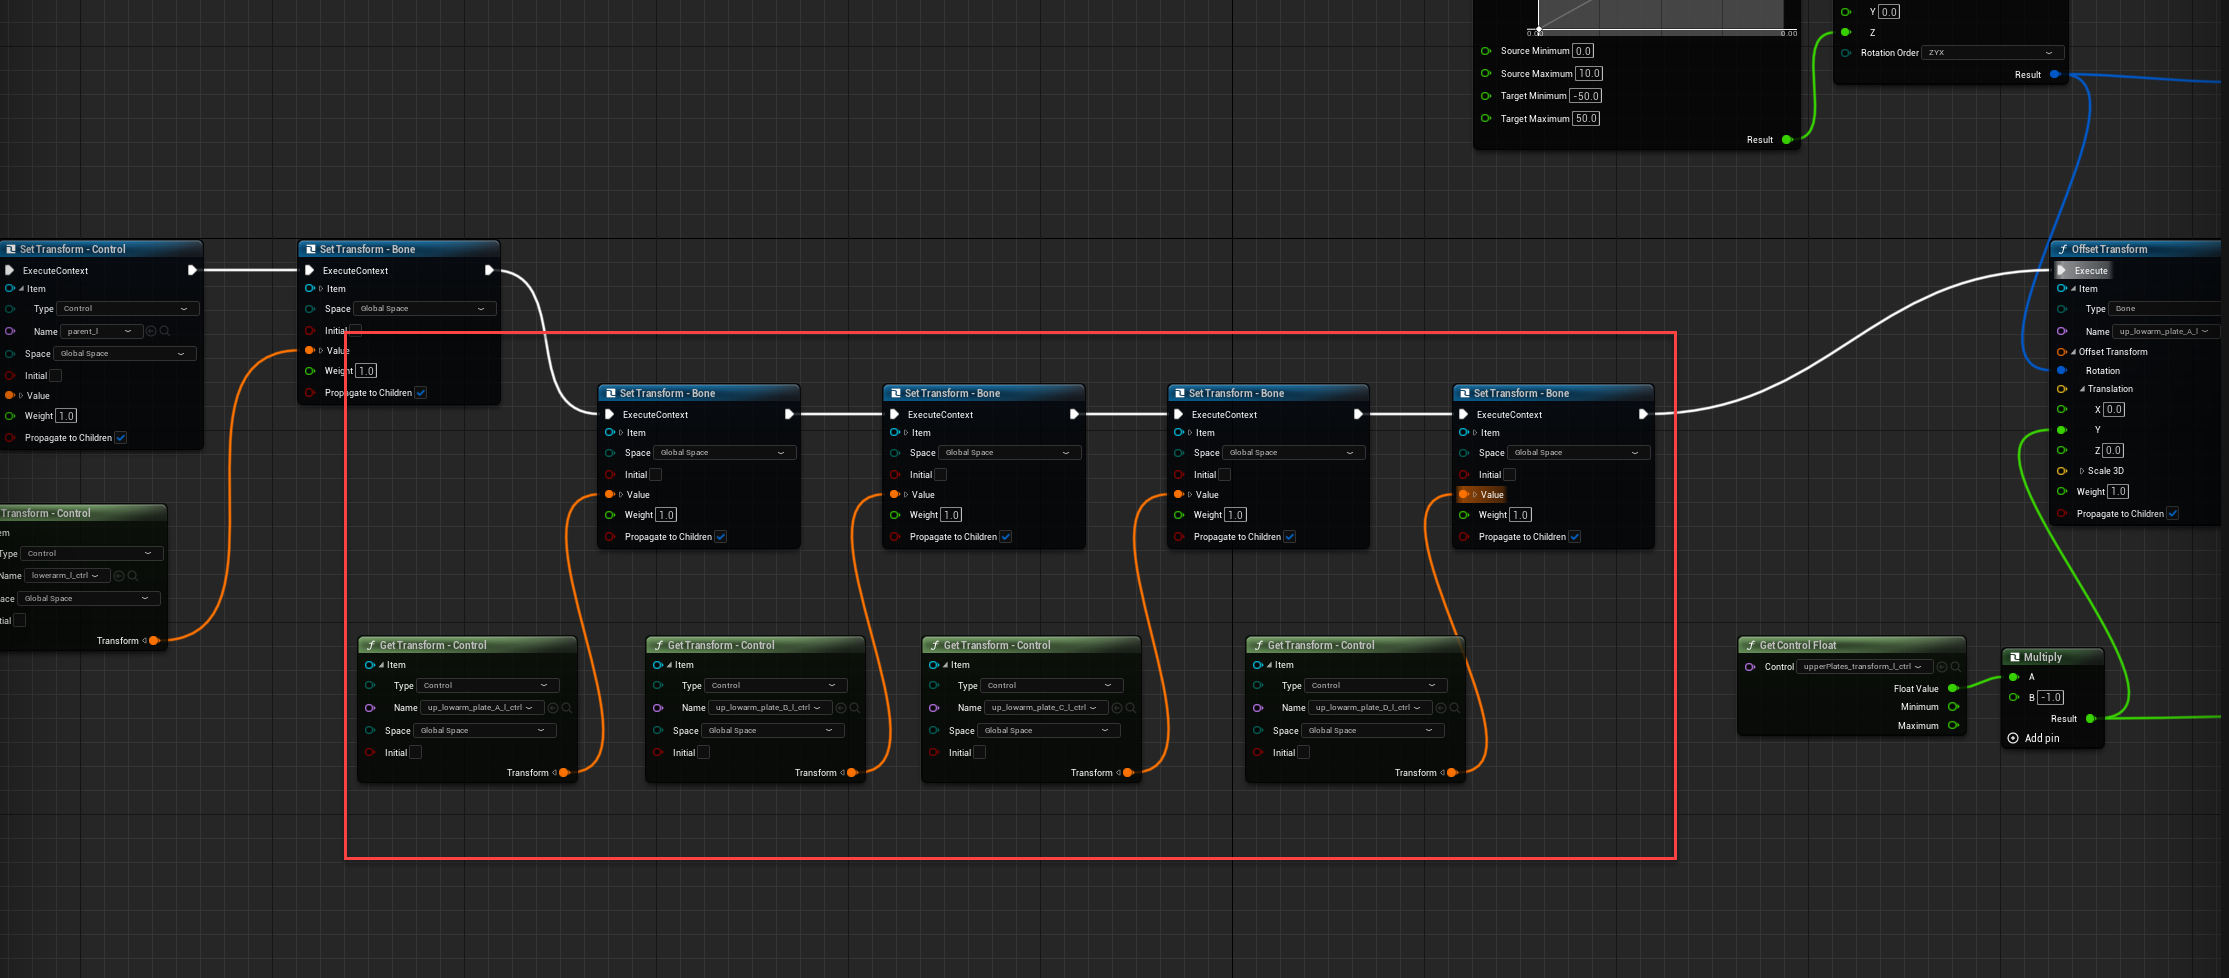
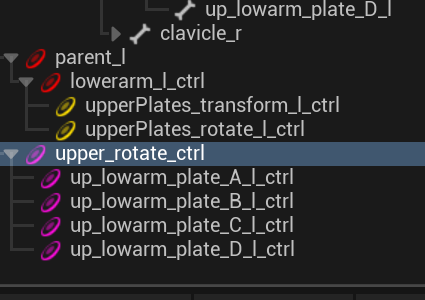
A similar setup was implemented for the lower arm plates.
That was the majority of the setup. But there was one last thing. Without this the forearms don’t follow the body skeleton anymore. I’m not sure why. Here’s what I did.
I had to create an Animation Blueprint for the Forearms.
I made a ‘Copy Pose from Mesh’ node and attached it to the Output Pose. ‘Use Attached Parent’ is checked on.
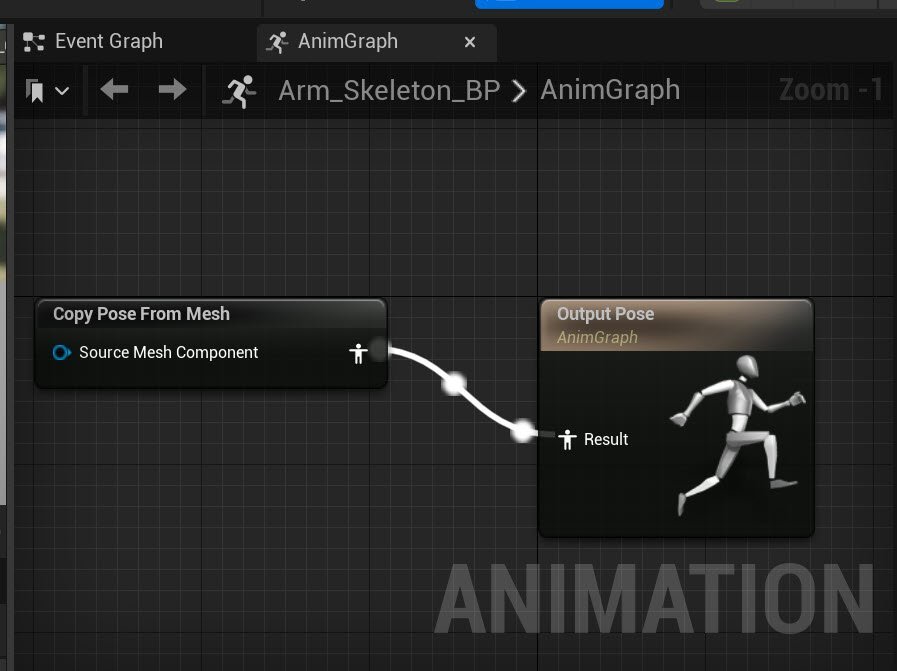
I had to tell the Twinblast Metahuman Blueprint to use this Animation Blueprint. In the Twinblast Blueprint, I connected the Animation Blueprint to the Forearm Skeletal Mesh.
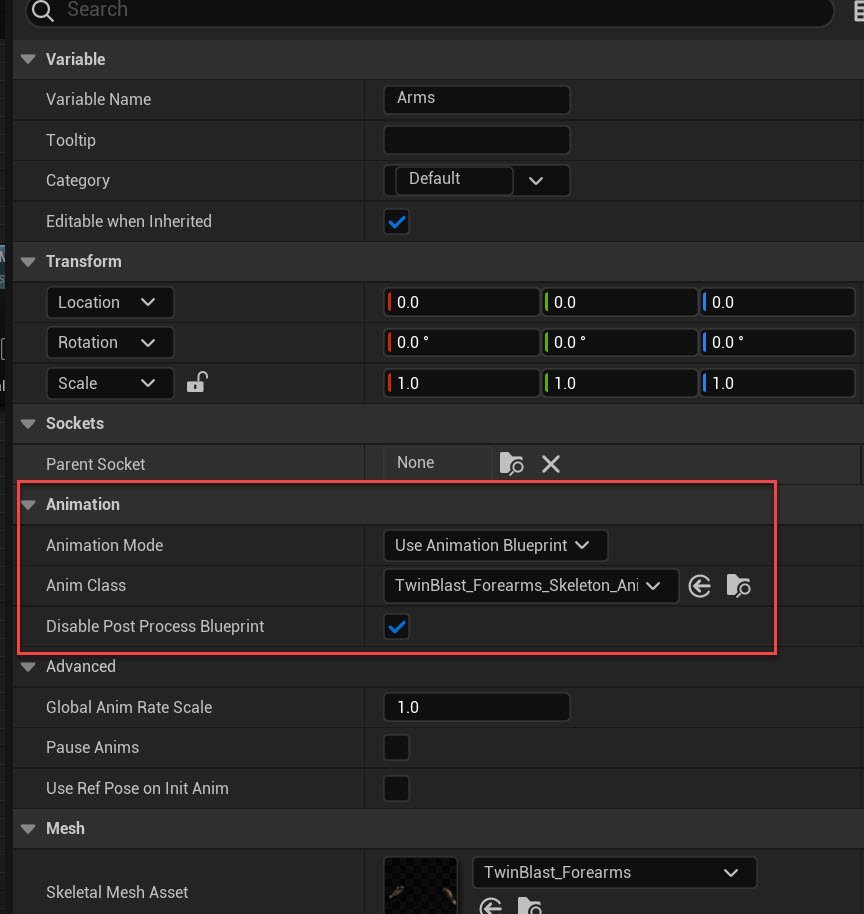
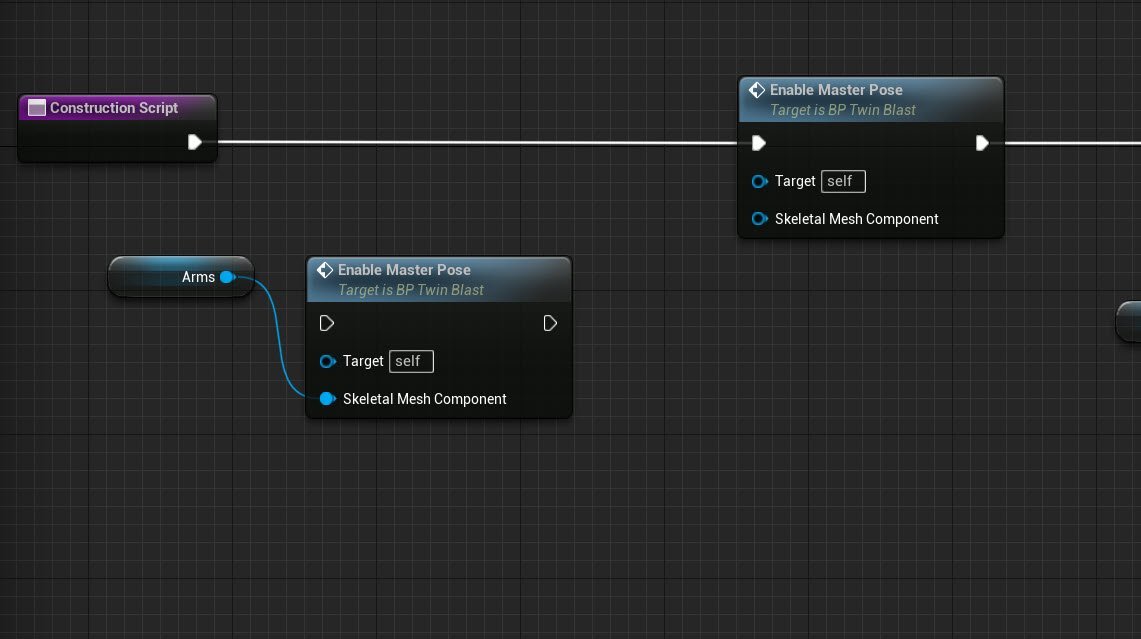
I also disconnected the Forearms from the Metahuman construction script. I’m not 100% sure that this was needed.
That was the last thing I needed to do. Once that was done the forearms followed the body animation and I could animate the forearm plates.
Other minor details included replacing the base face texture with a texture from a VFace scan from Texturing.xyz. I used Nuke to transfer the wrinkle and blood-flow textures by dividing the base texture by the CM1, 2, and 3 textures, then multiplying them over the VFace texture. It wasn't perfect, but it was good enough. I kept the normal maps that came with the Metahuman.